Working with Your First CrafterCMS Website
This article assumes that you have followed the steps in the Cafter CMS Quick Start Guide to get CrafterCMS installed and logged in to Crafter Studio. We will be using an out-of-the-box blueprint, called “Website_Editorial” to create your first website.
Let’s get started building your first website!
Creating your website from out of the box blueprint Website_Editorial
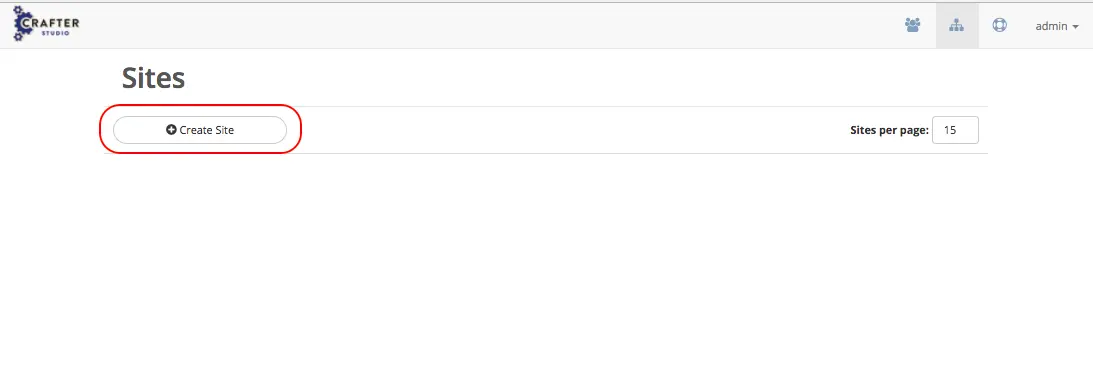
After logging in, you’ll see the MySites screen (Below). Click on Create Site
Give the site a friendly name for the Site Id , a description and then choose a blueprint. We’re going to be using the “Website_Editorial” blueprint. Blueprints offer you a starting point for your website. New blueprints can be created and installed into the system. As you are entering the site id, spaces are removed and upper case letters are converted to lower case letters.

Click on Create and wait for the system to create your site based on the blueprint. It’s creating the following: configuration, site content, and permissions based on the template provided by the blueprint.
When it’s done you will be taken to the Home Page of your site: (need to update image below)
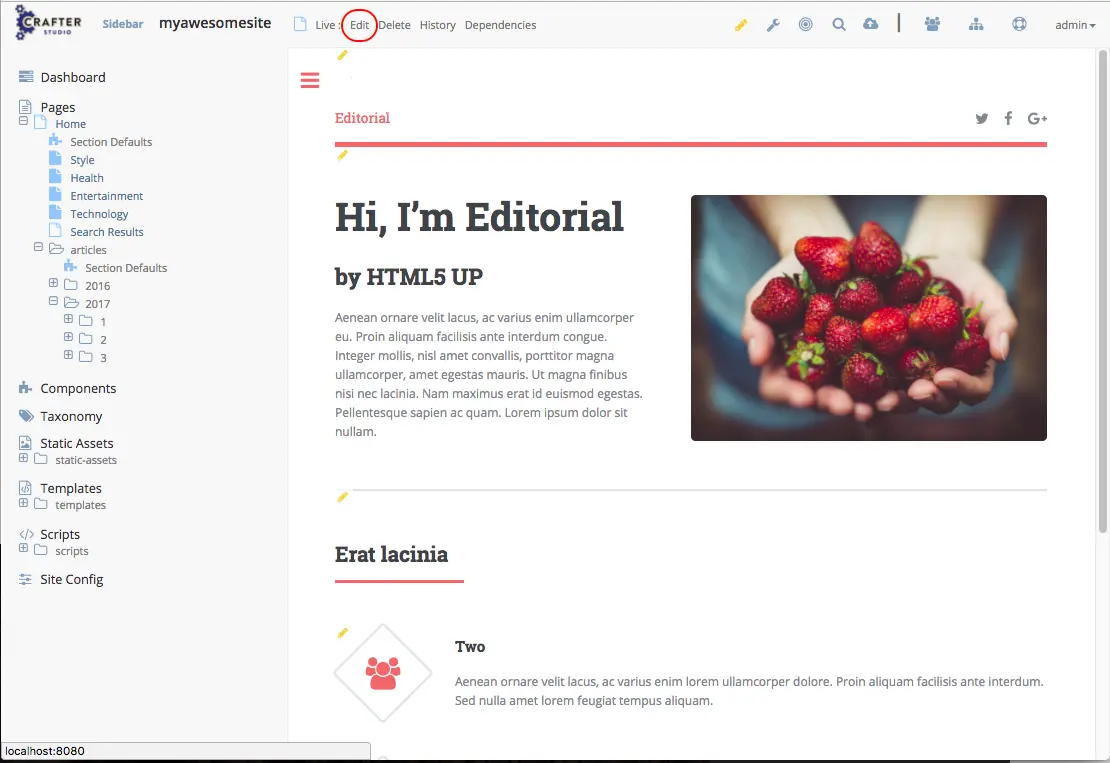
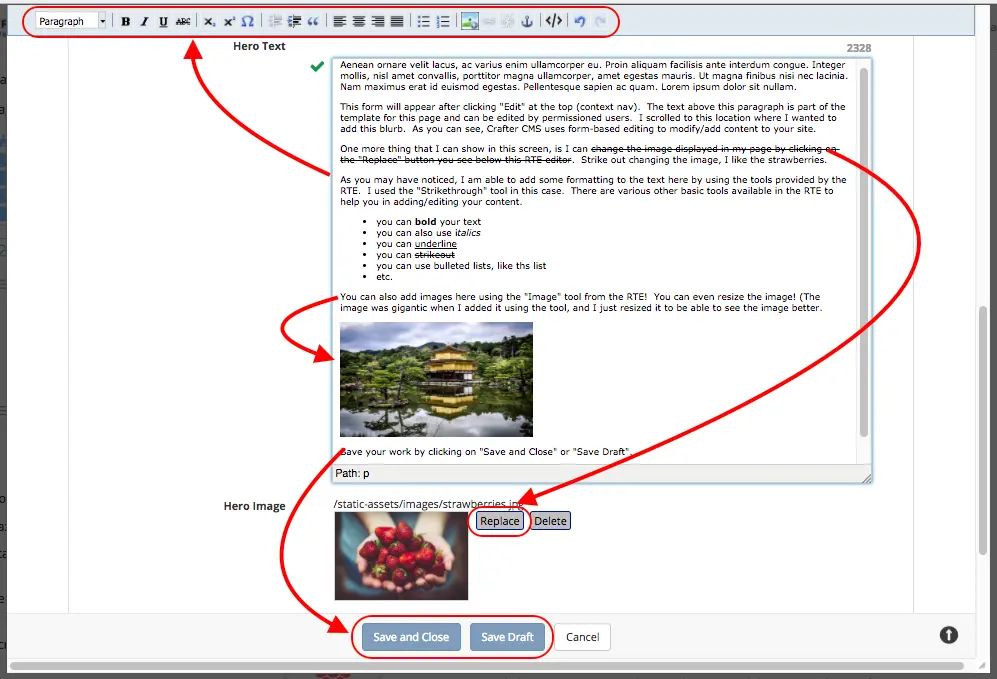
Your site is setup, we can now start adding/editing content! To edit content you see on the page, click on Edit at the top (see above). This will open a form (see below) where you can edit the page content. To see other ways of editing page content, see Editing a Page.
Adding a new article page to the site
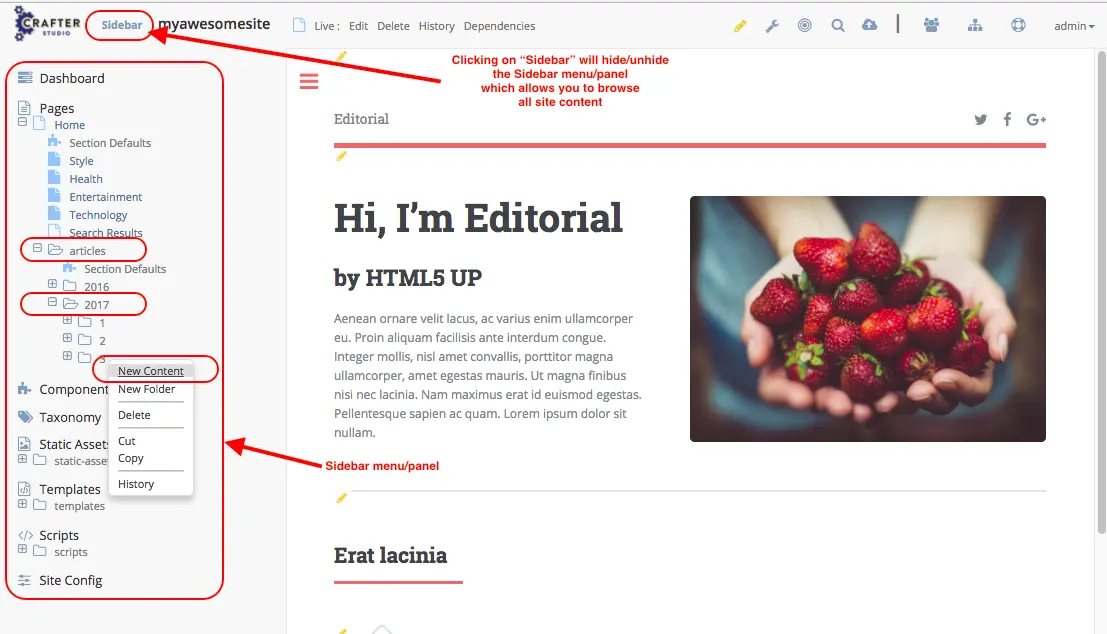
We’ll be adding a new article to the site. To add a new article (or a new page), navigate to the level and location within the site navigation tree in the Sidebar where we want to create the new page. In this case, we are adding an article under articles -> 2017 -> 3. Right click, then select New Content (need to update image below)
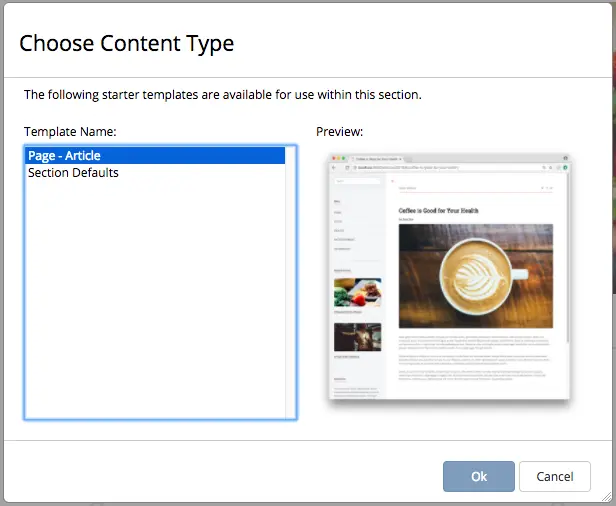
We’ll then select the page template we want. Since we are adding a new article to the site, we will be selecting the template Page – Article
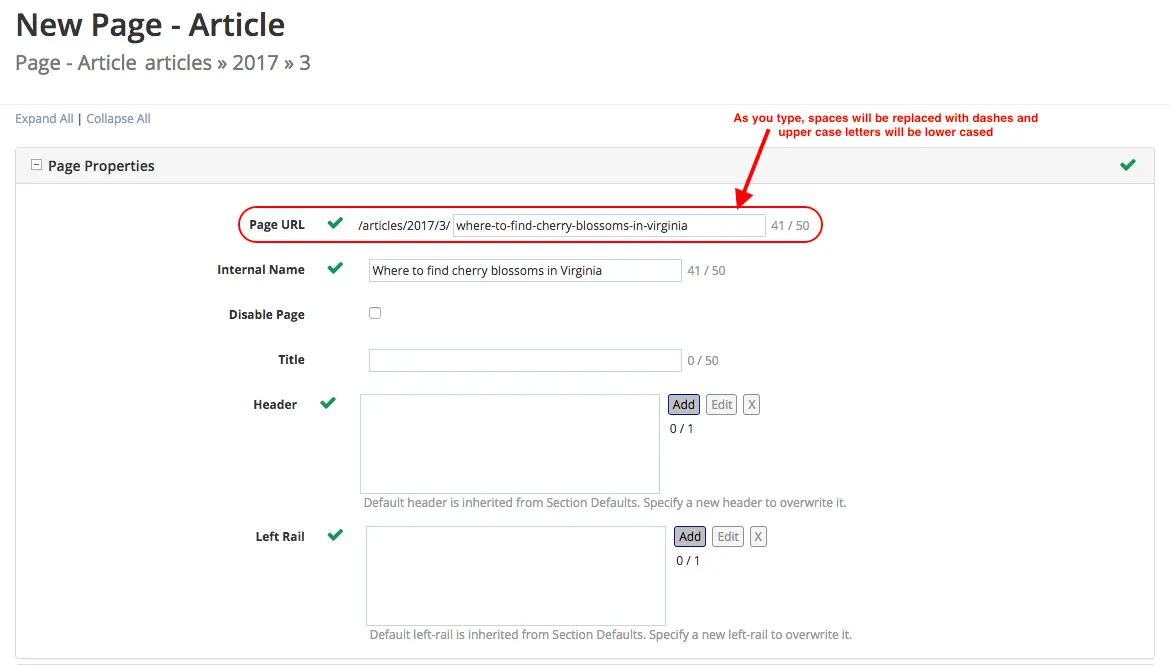
We’ll start filling out the form for our new article, “Where to find cherry blossoms in Virginia”. For the Page URL, replace spaces with dashes. You can write the Internal Name and Title however you like as long as it is 50 characters or less as indicated on the right of the input boxes. For the Headerand Sidebar, we will be using the default provided by the template.
The next section on the form is the Metadata section, where we can select the category for our article, the targeted segments of the article and whether our new article should be added to the Featured section. Our new article, will be under Entertainment for the Categories and the targeted segments is Gal. We will also be placing our new article in the Featured section.

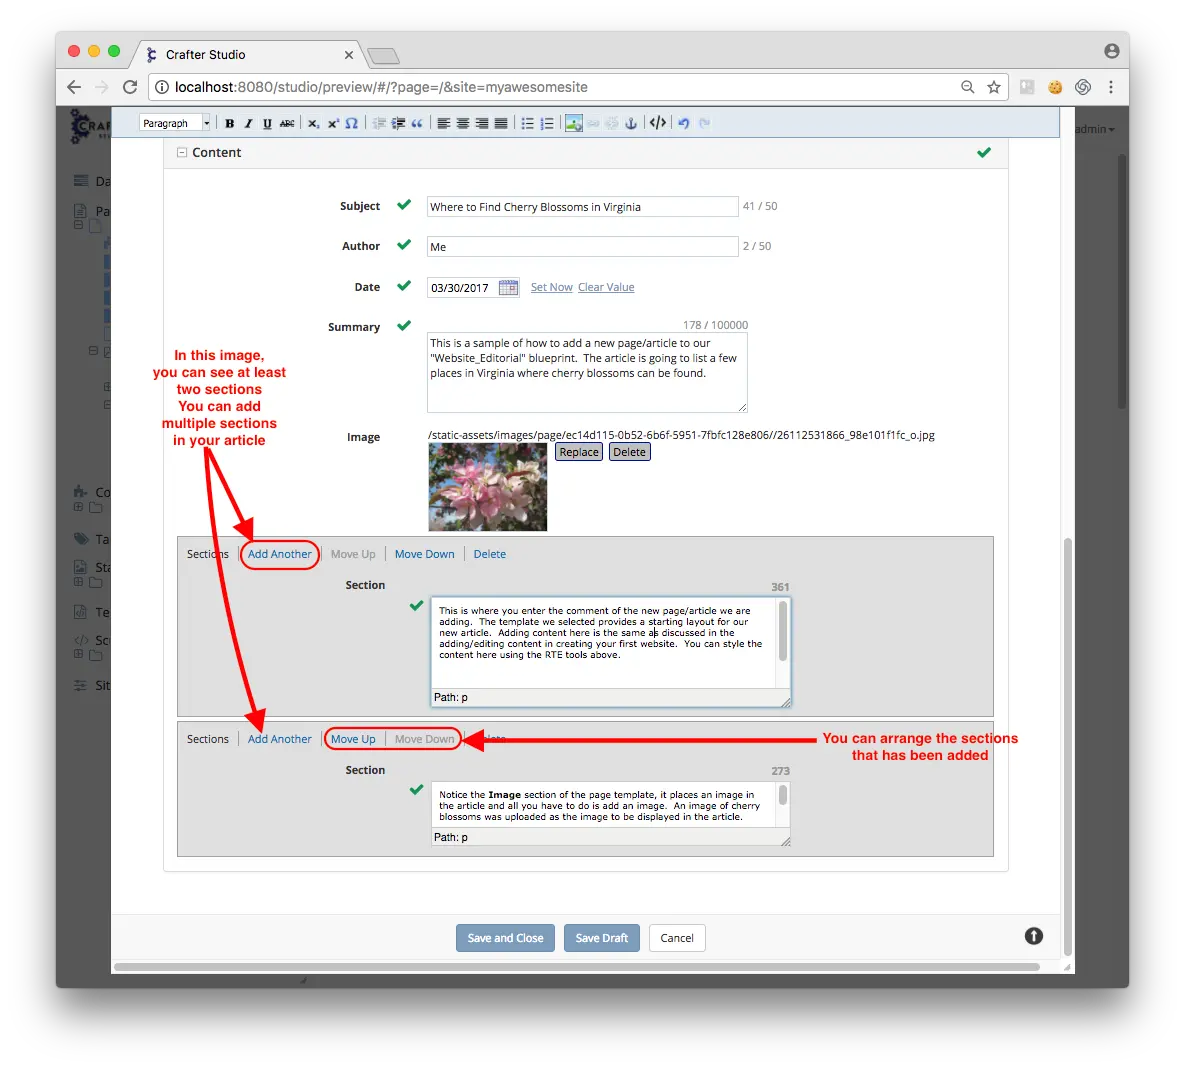
Finally, we add our blurb in the Content section of the form. Here, we fill out the Subject, Author, Date, Summary, Image and Section, which contains the content of our article.
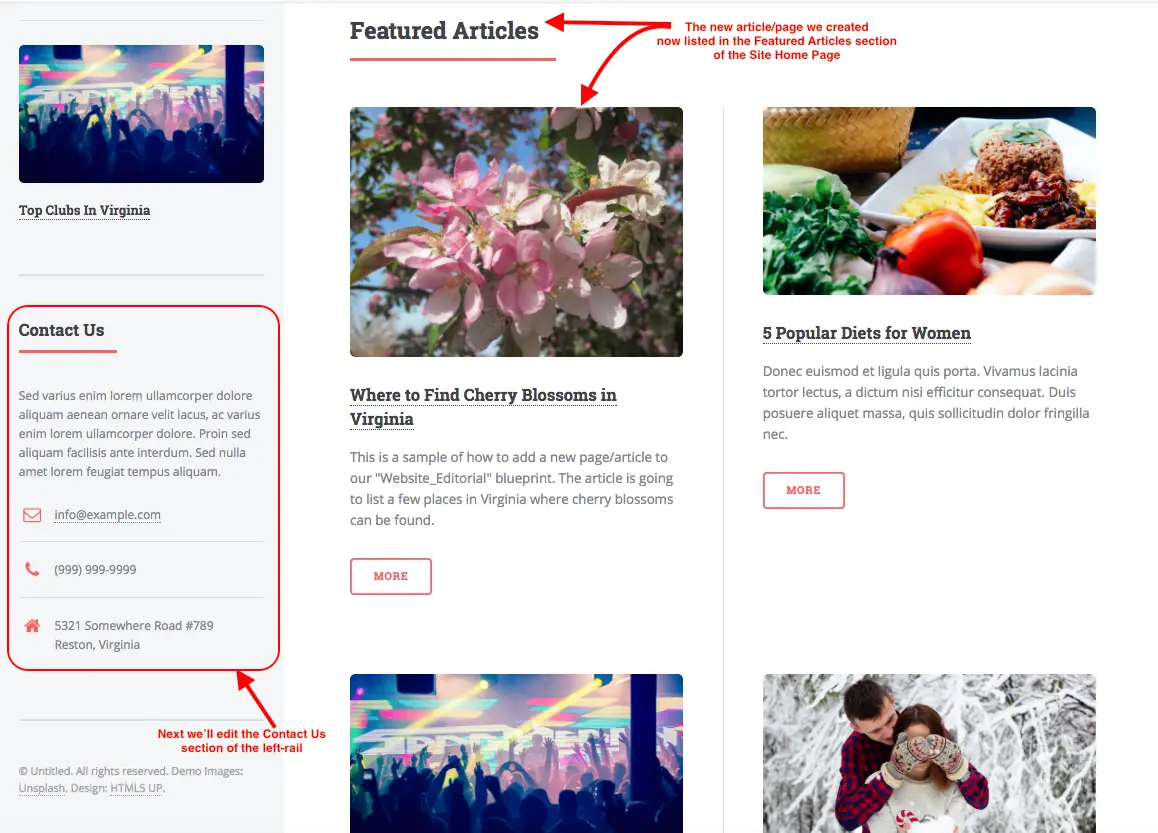
Here’s the site, with our newly created article in the featured section.
You can add more pages or modify/remove the existing pages from the blueprint, depending on your needs. To remove or edit an existing page, navigate to the location of the article you want to edit/remove. Right click on it, then select the action you would like to do on the page.
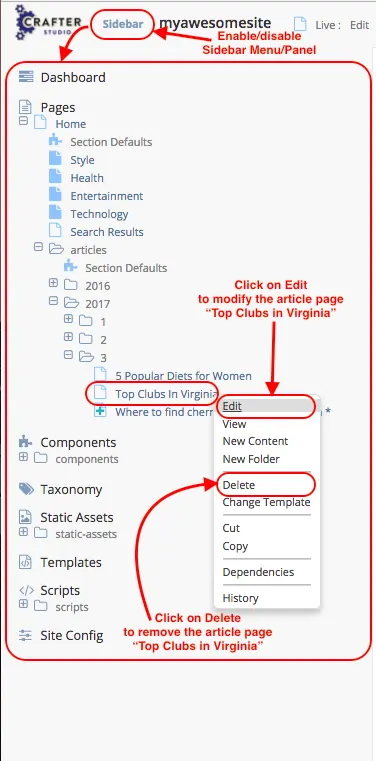
Updating the Contact Us section in the sidebar
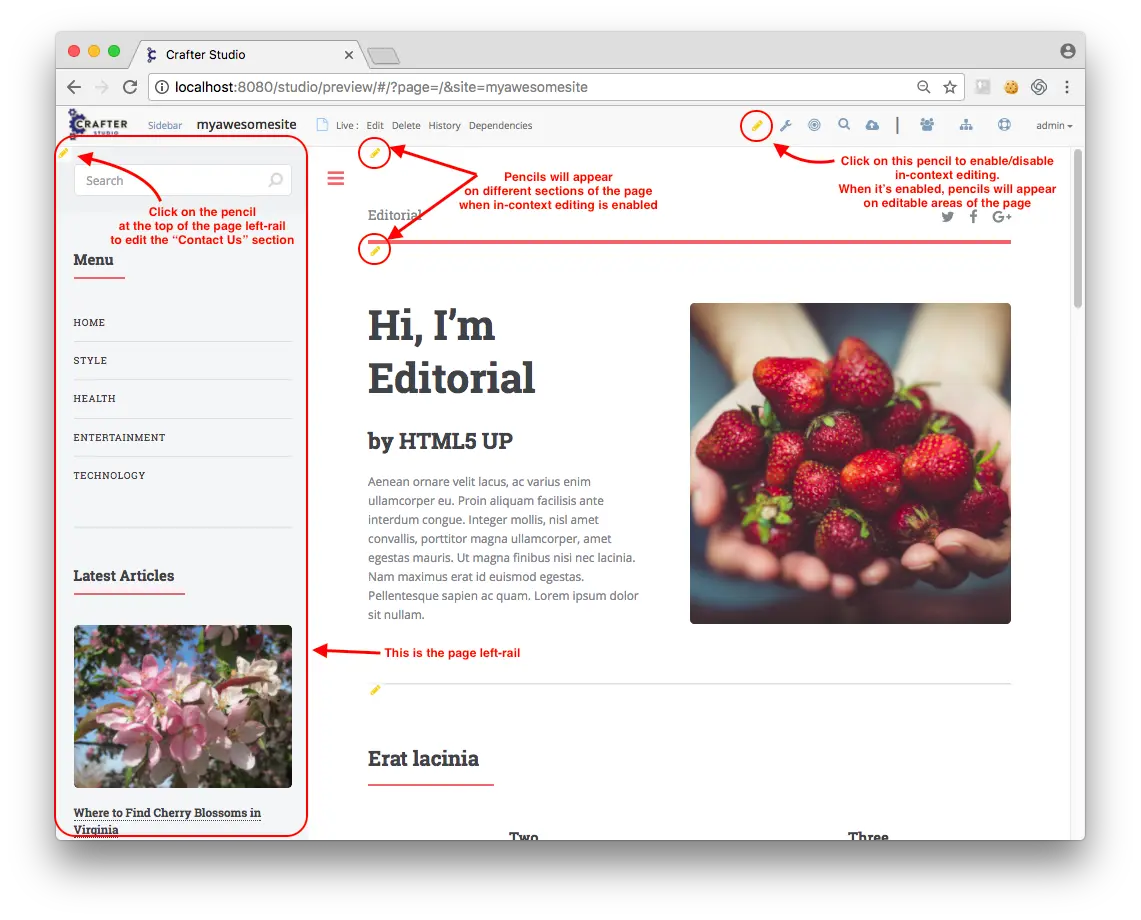
Another thing that we may want to modify from the blueprint, is the left rail. For this example, we are going to modify the Contact Us section in the left rail (contact widget). To edit items in the sidebar, click on the pencil on the top right of your screen to enable in-context editing. Pencils should appear on sections editable on the page. Go to the top left of the left rail and click on the pencil there.
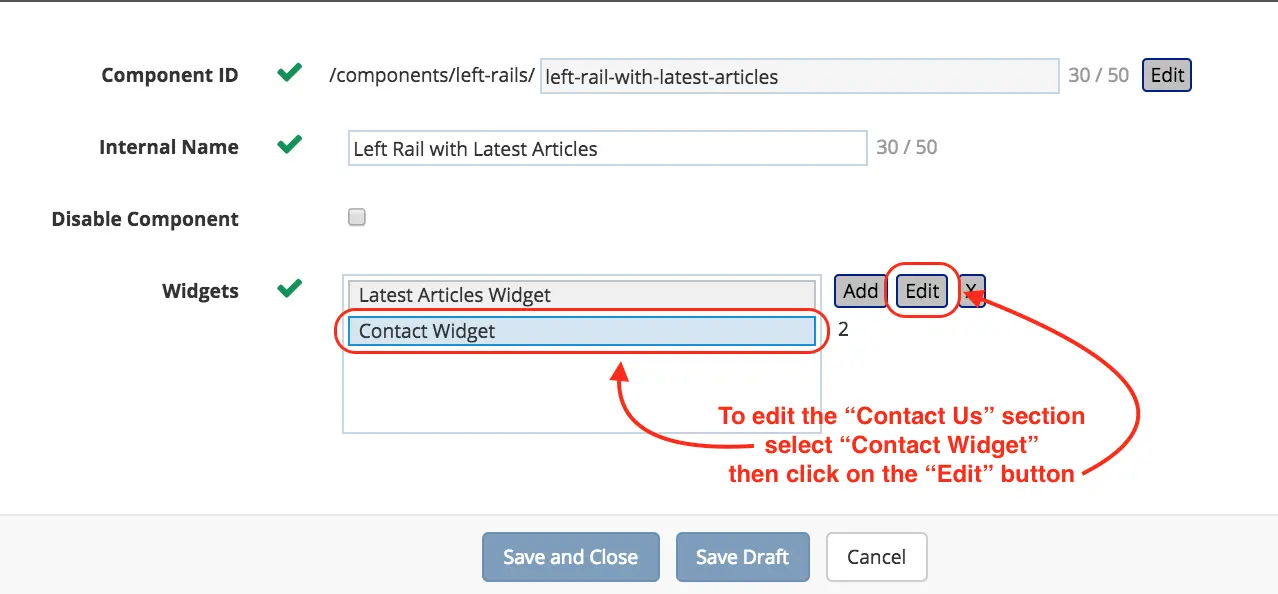
A form with all the editable content of the left rail will appear. Go to the Widgets section of the form, select Contact Widget and then click on the Edit button on the right of the list of widgets.
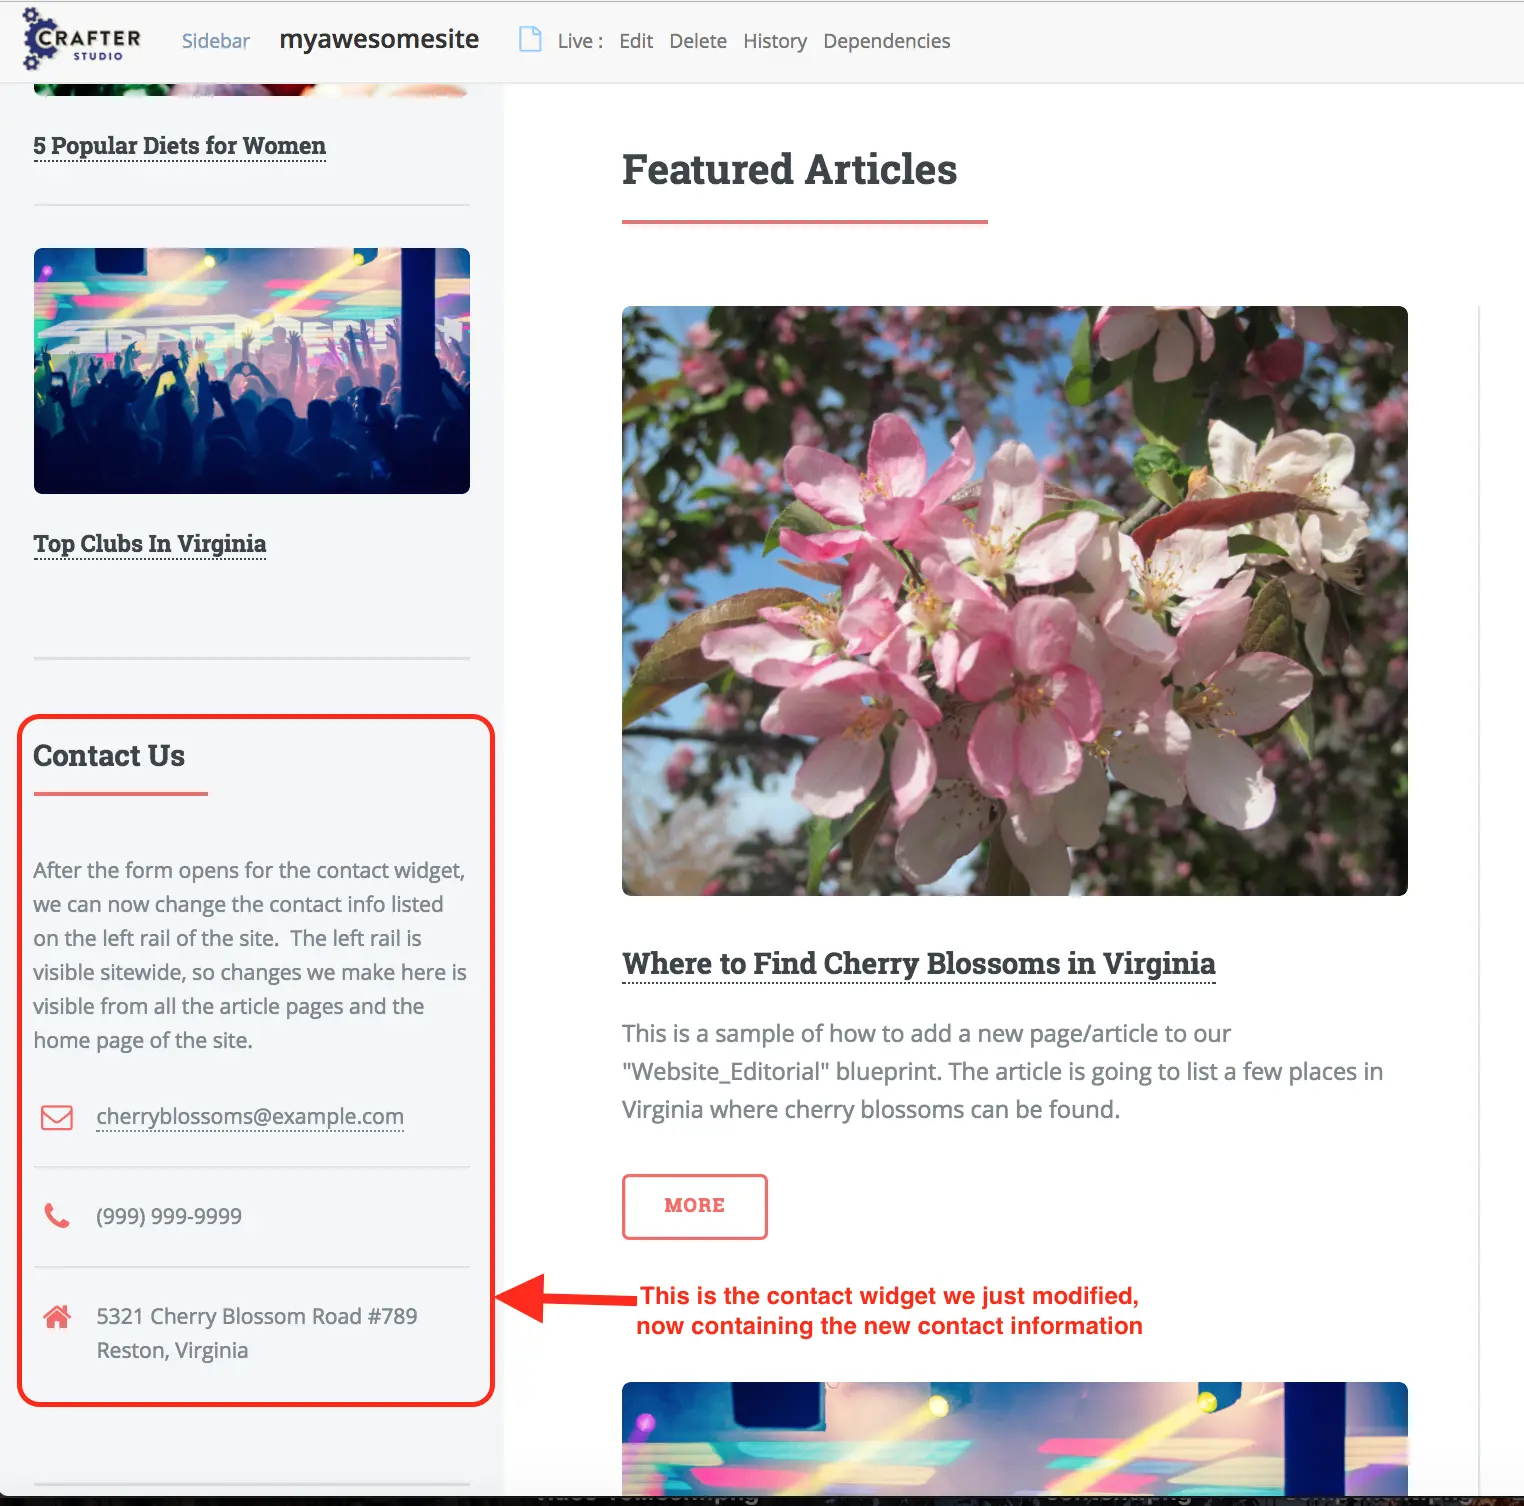
A form containing all the editable fields in the Contact Us section will appear. Modify the fields that you want to change.
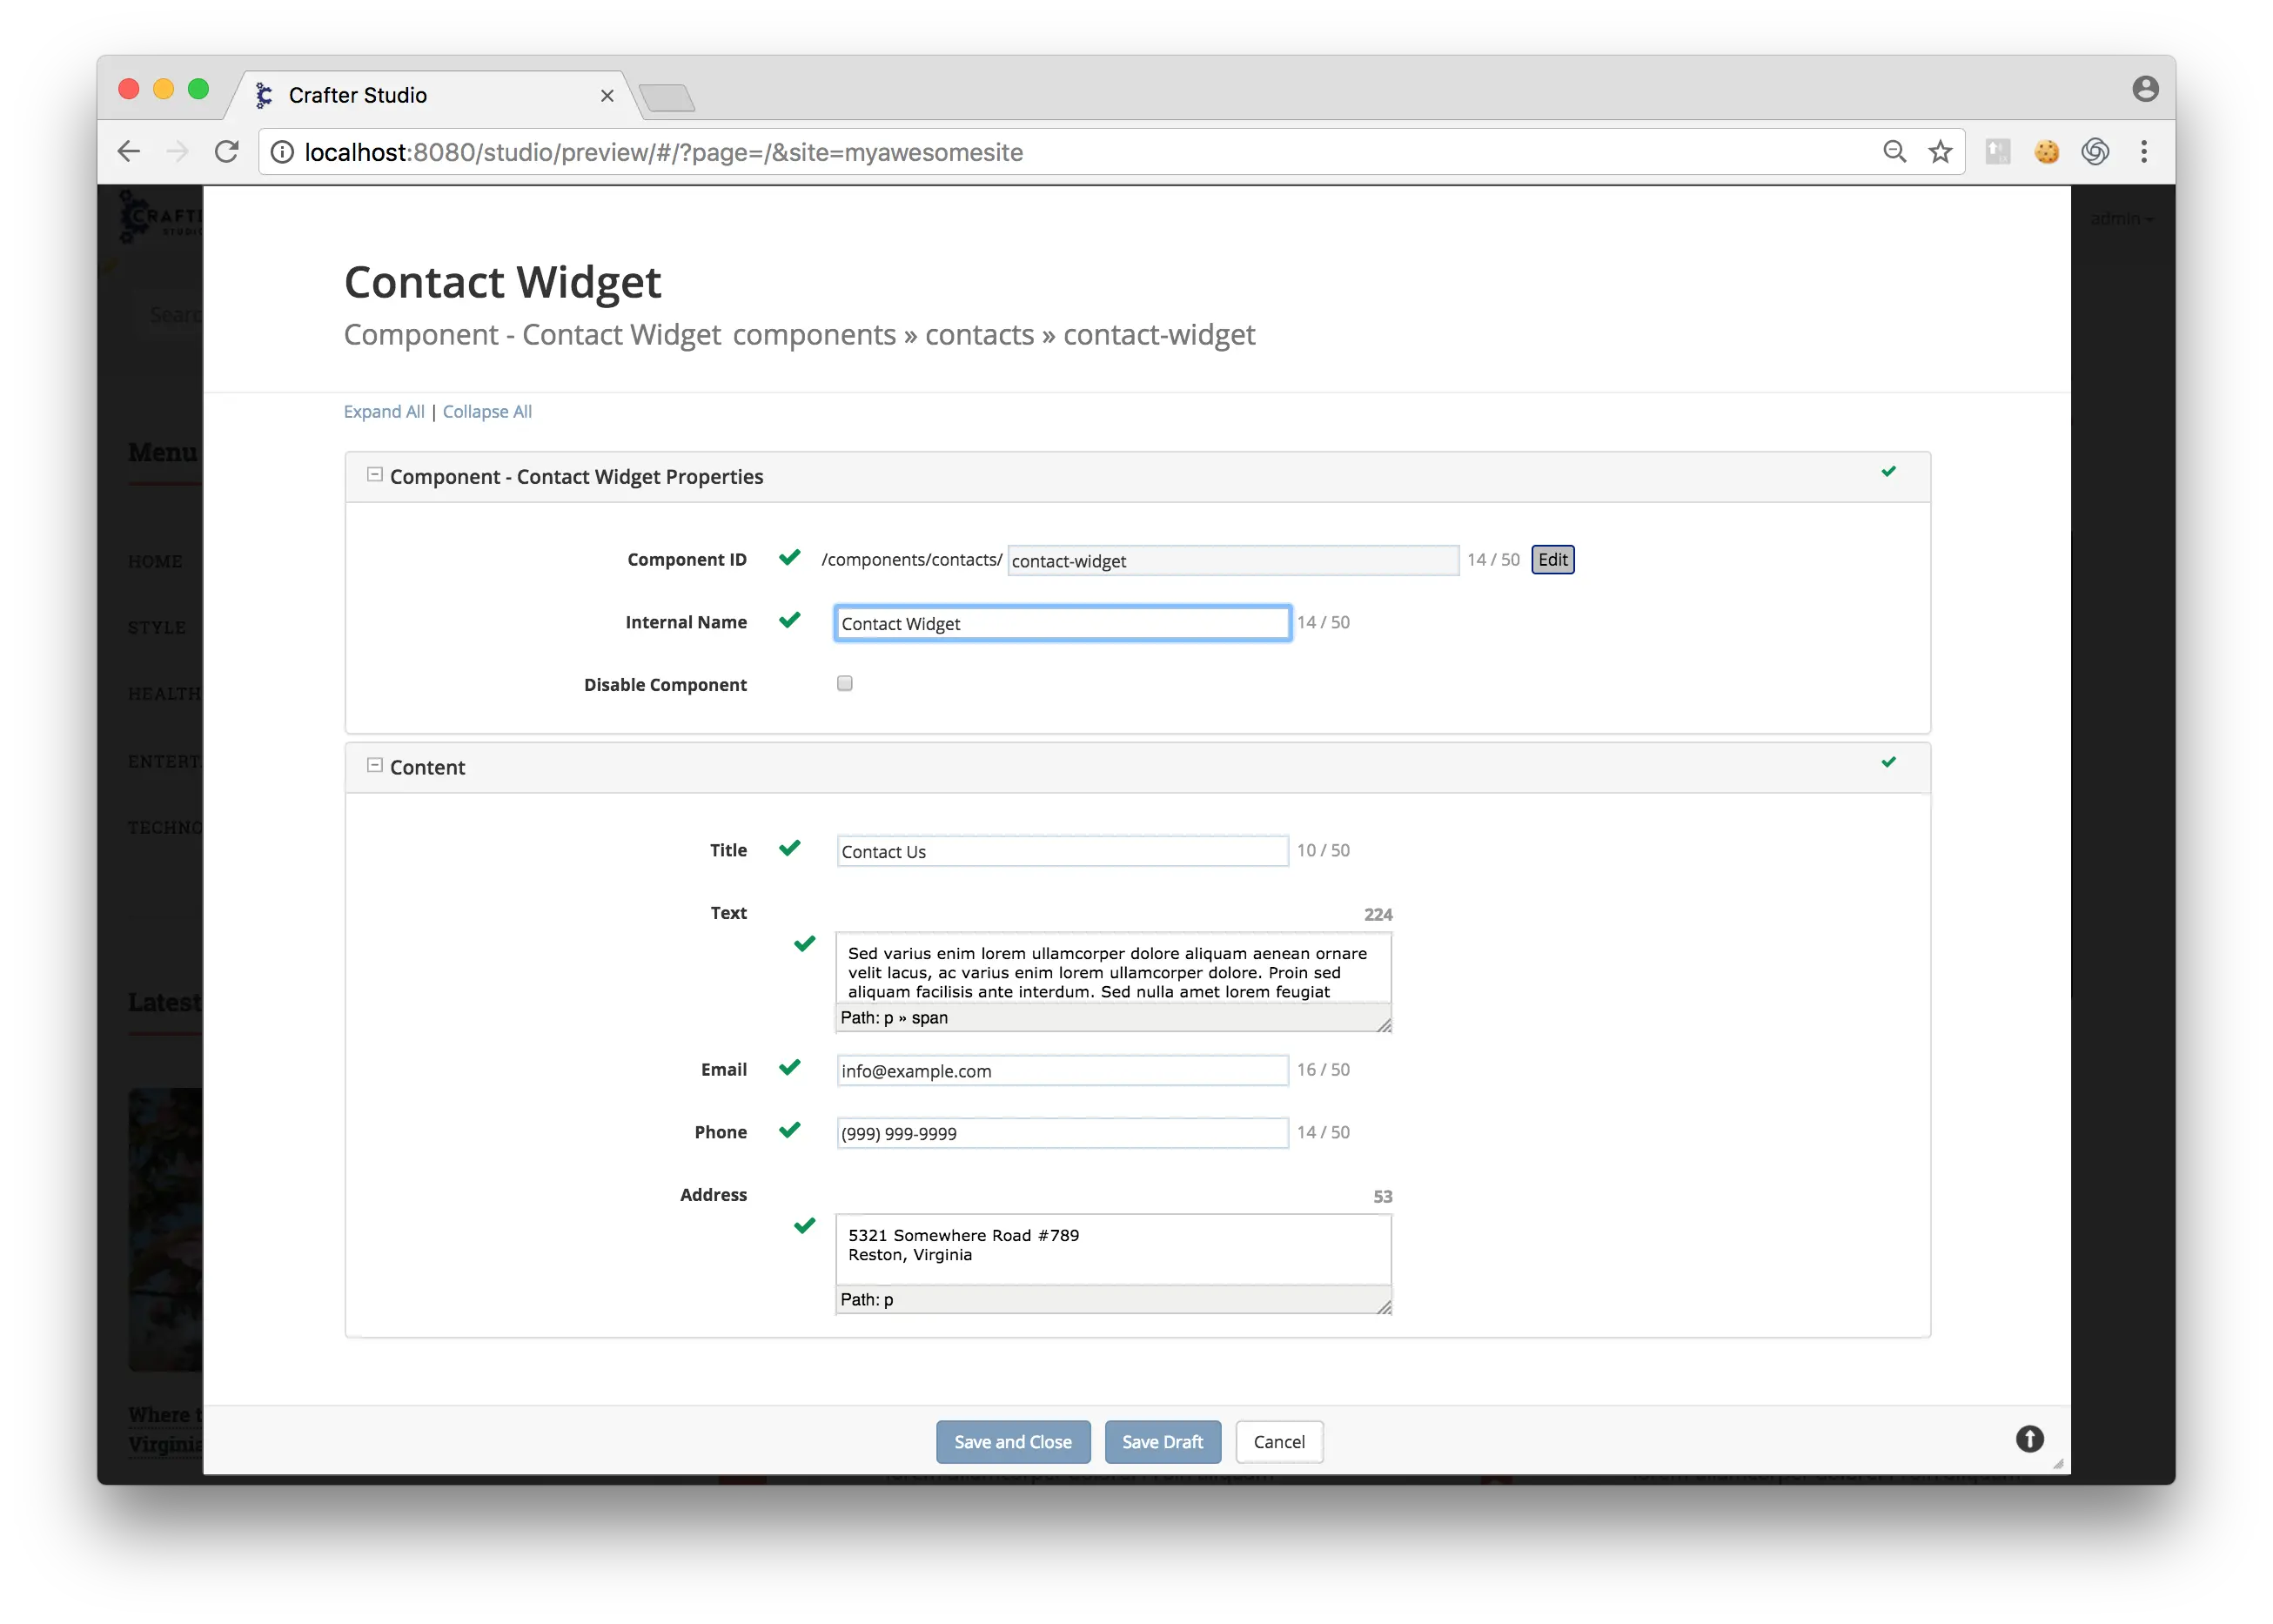
Here’s the sidebar with the Contact Us section updated.
Editing the features section, “Erat lacinia”
We will now edit the features section in our blueprint. The features in this section has been configured as components, as you will see in the images below. There are multiple ways of editing the features section in the blueprint.
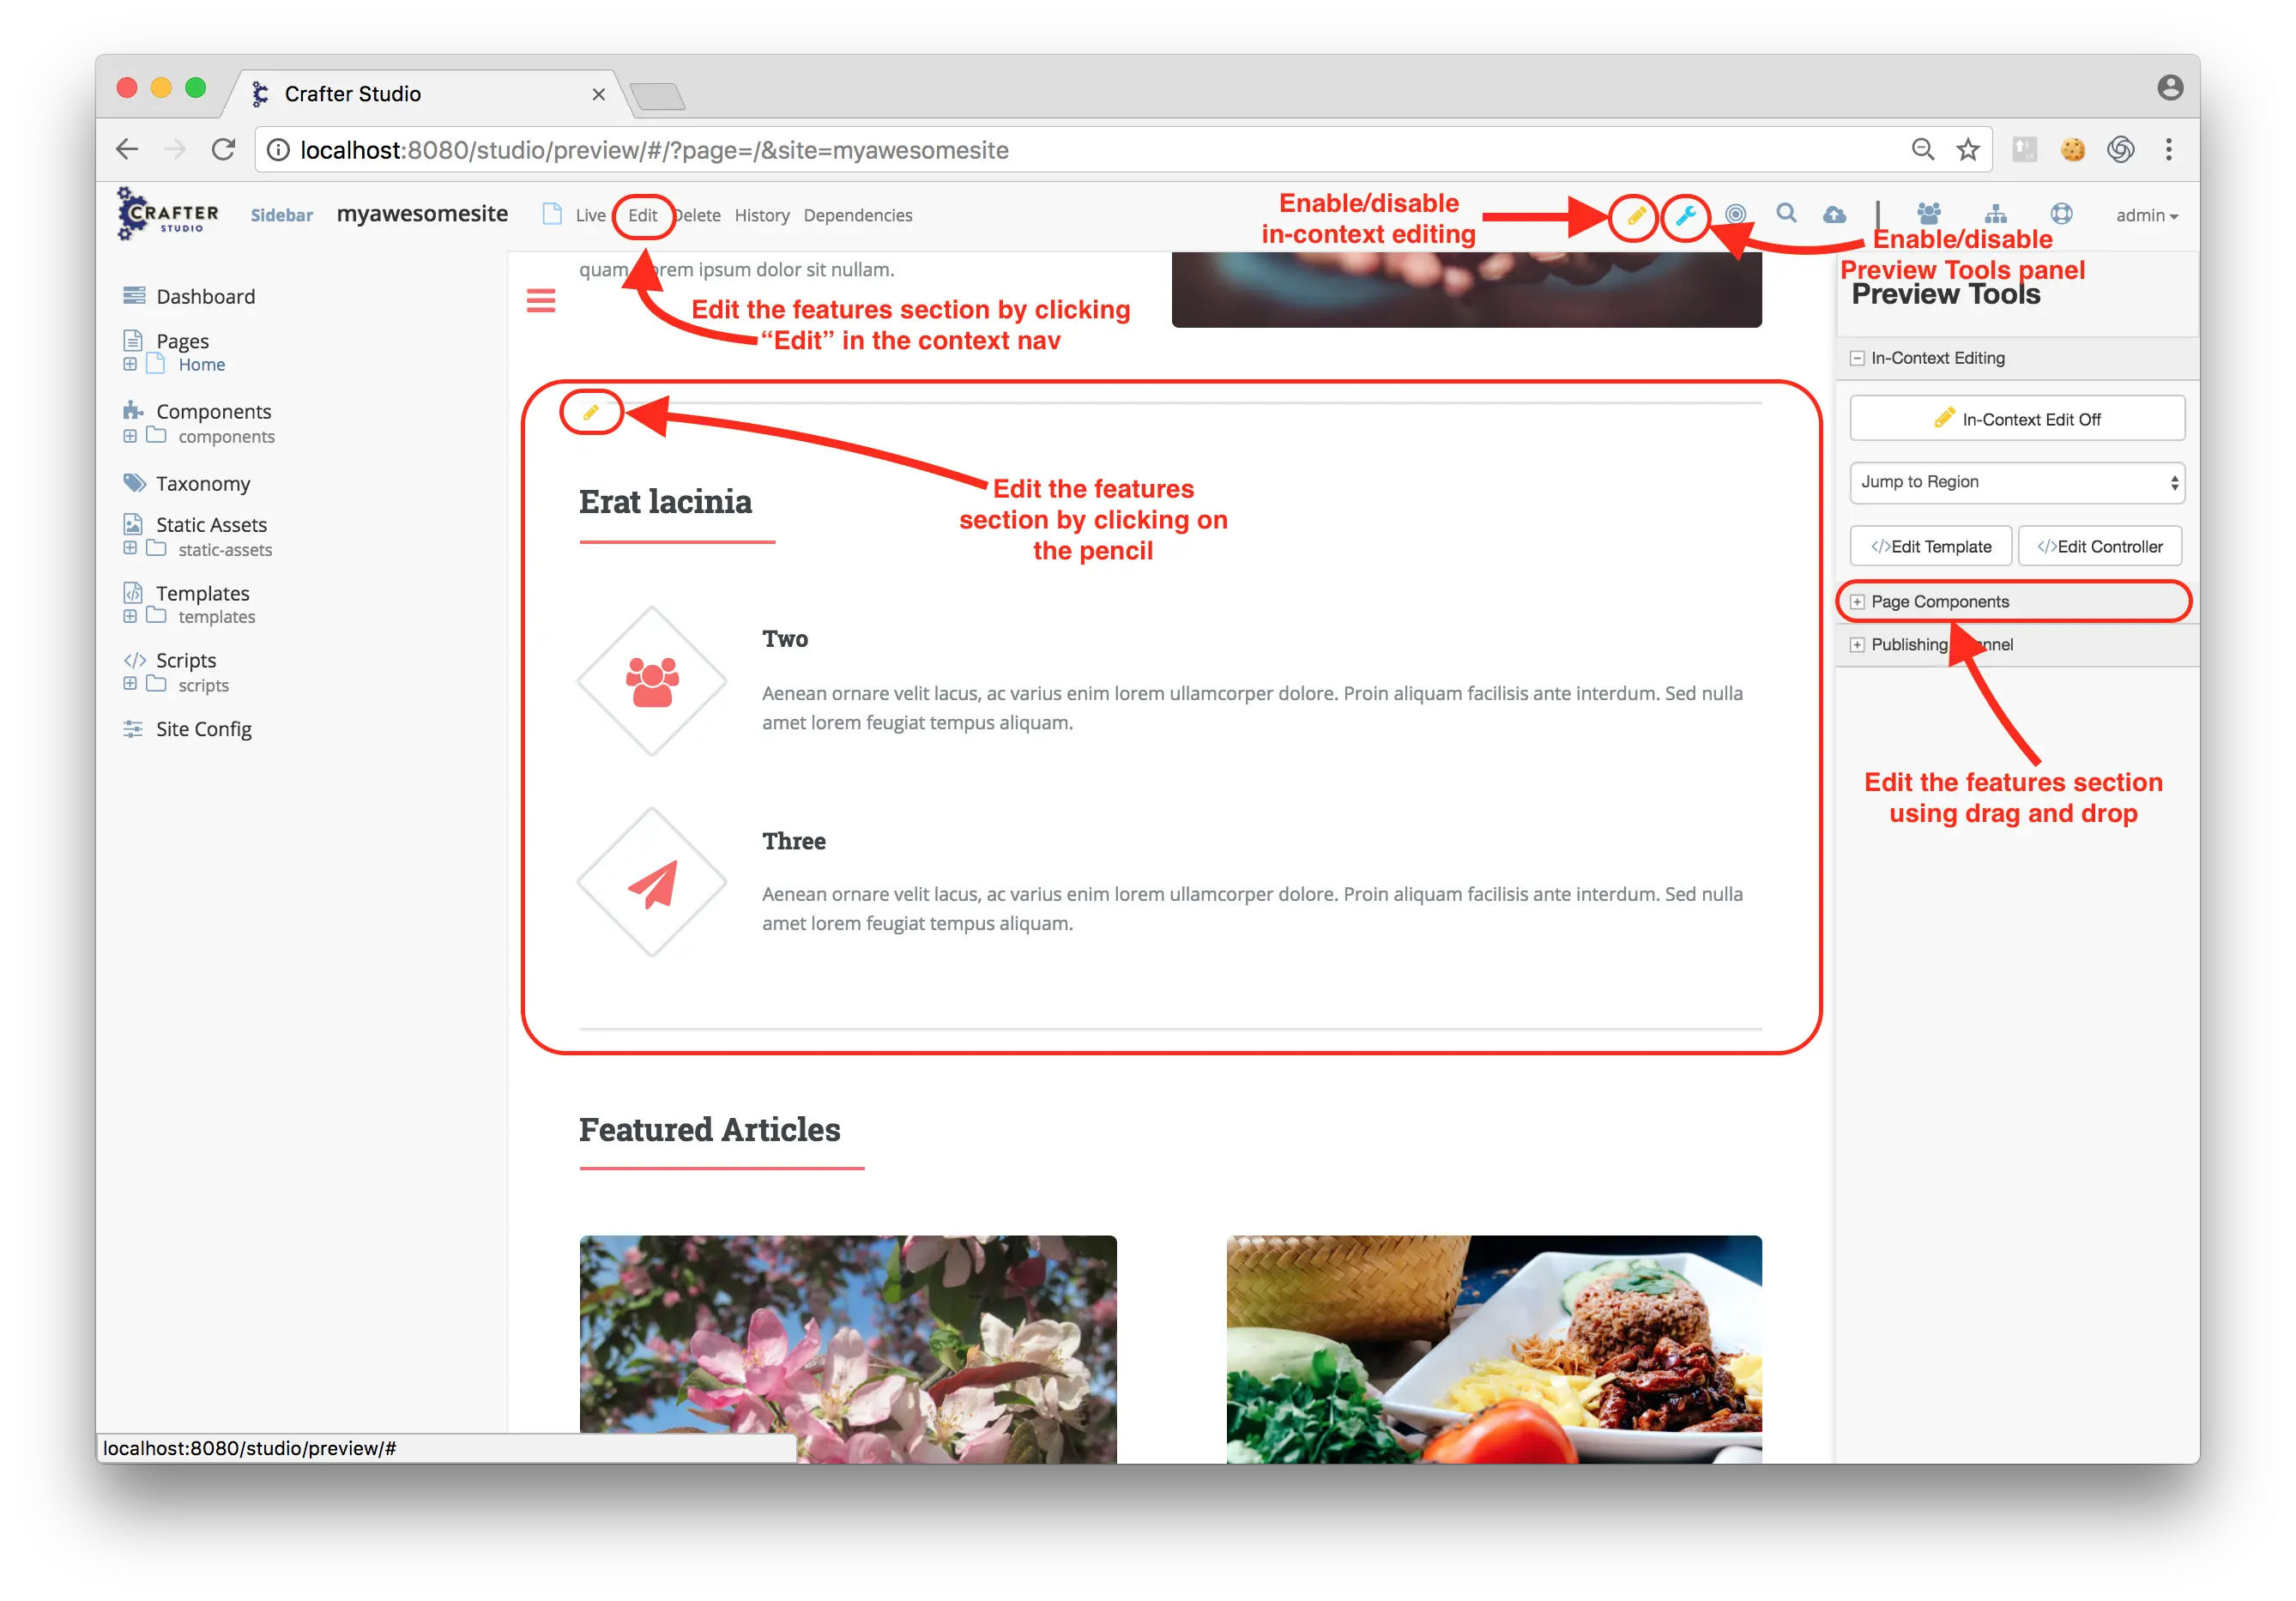
We’ll start out by adding a feature using the pencil at the top of the features section (In the image above, we will use the pencil captioned “Edit the whole features section”). Click on the pencil at the top of the features section. A form will open containing the content of the section. As you can see in the image below, there are currently two features in the section.
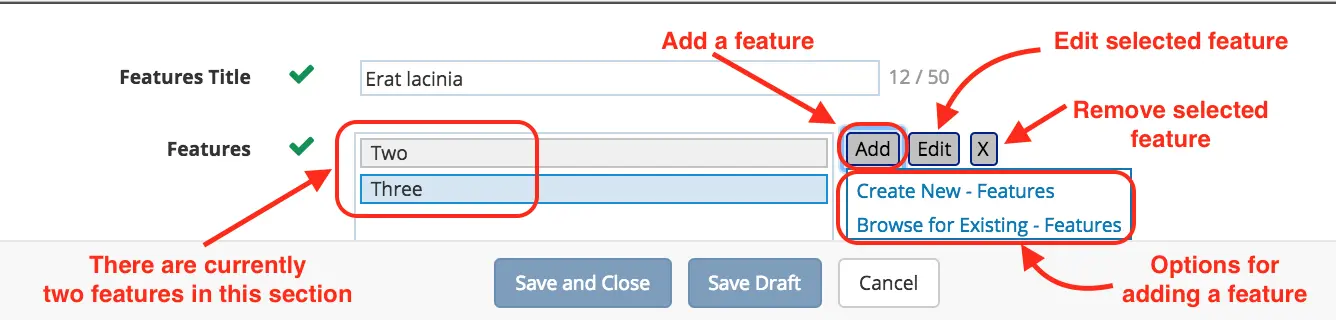
In this form, you can add another feature, by clicking on the Add button, which will give you a menu to Create New – Features or Browse for Existing – features
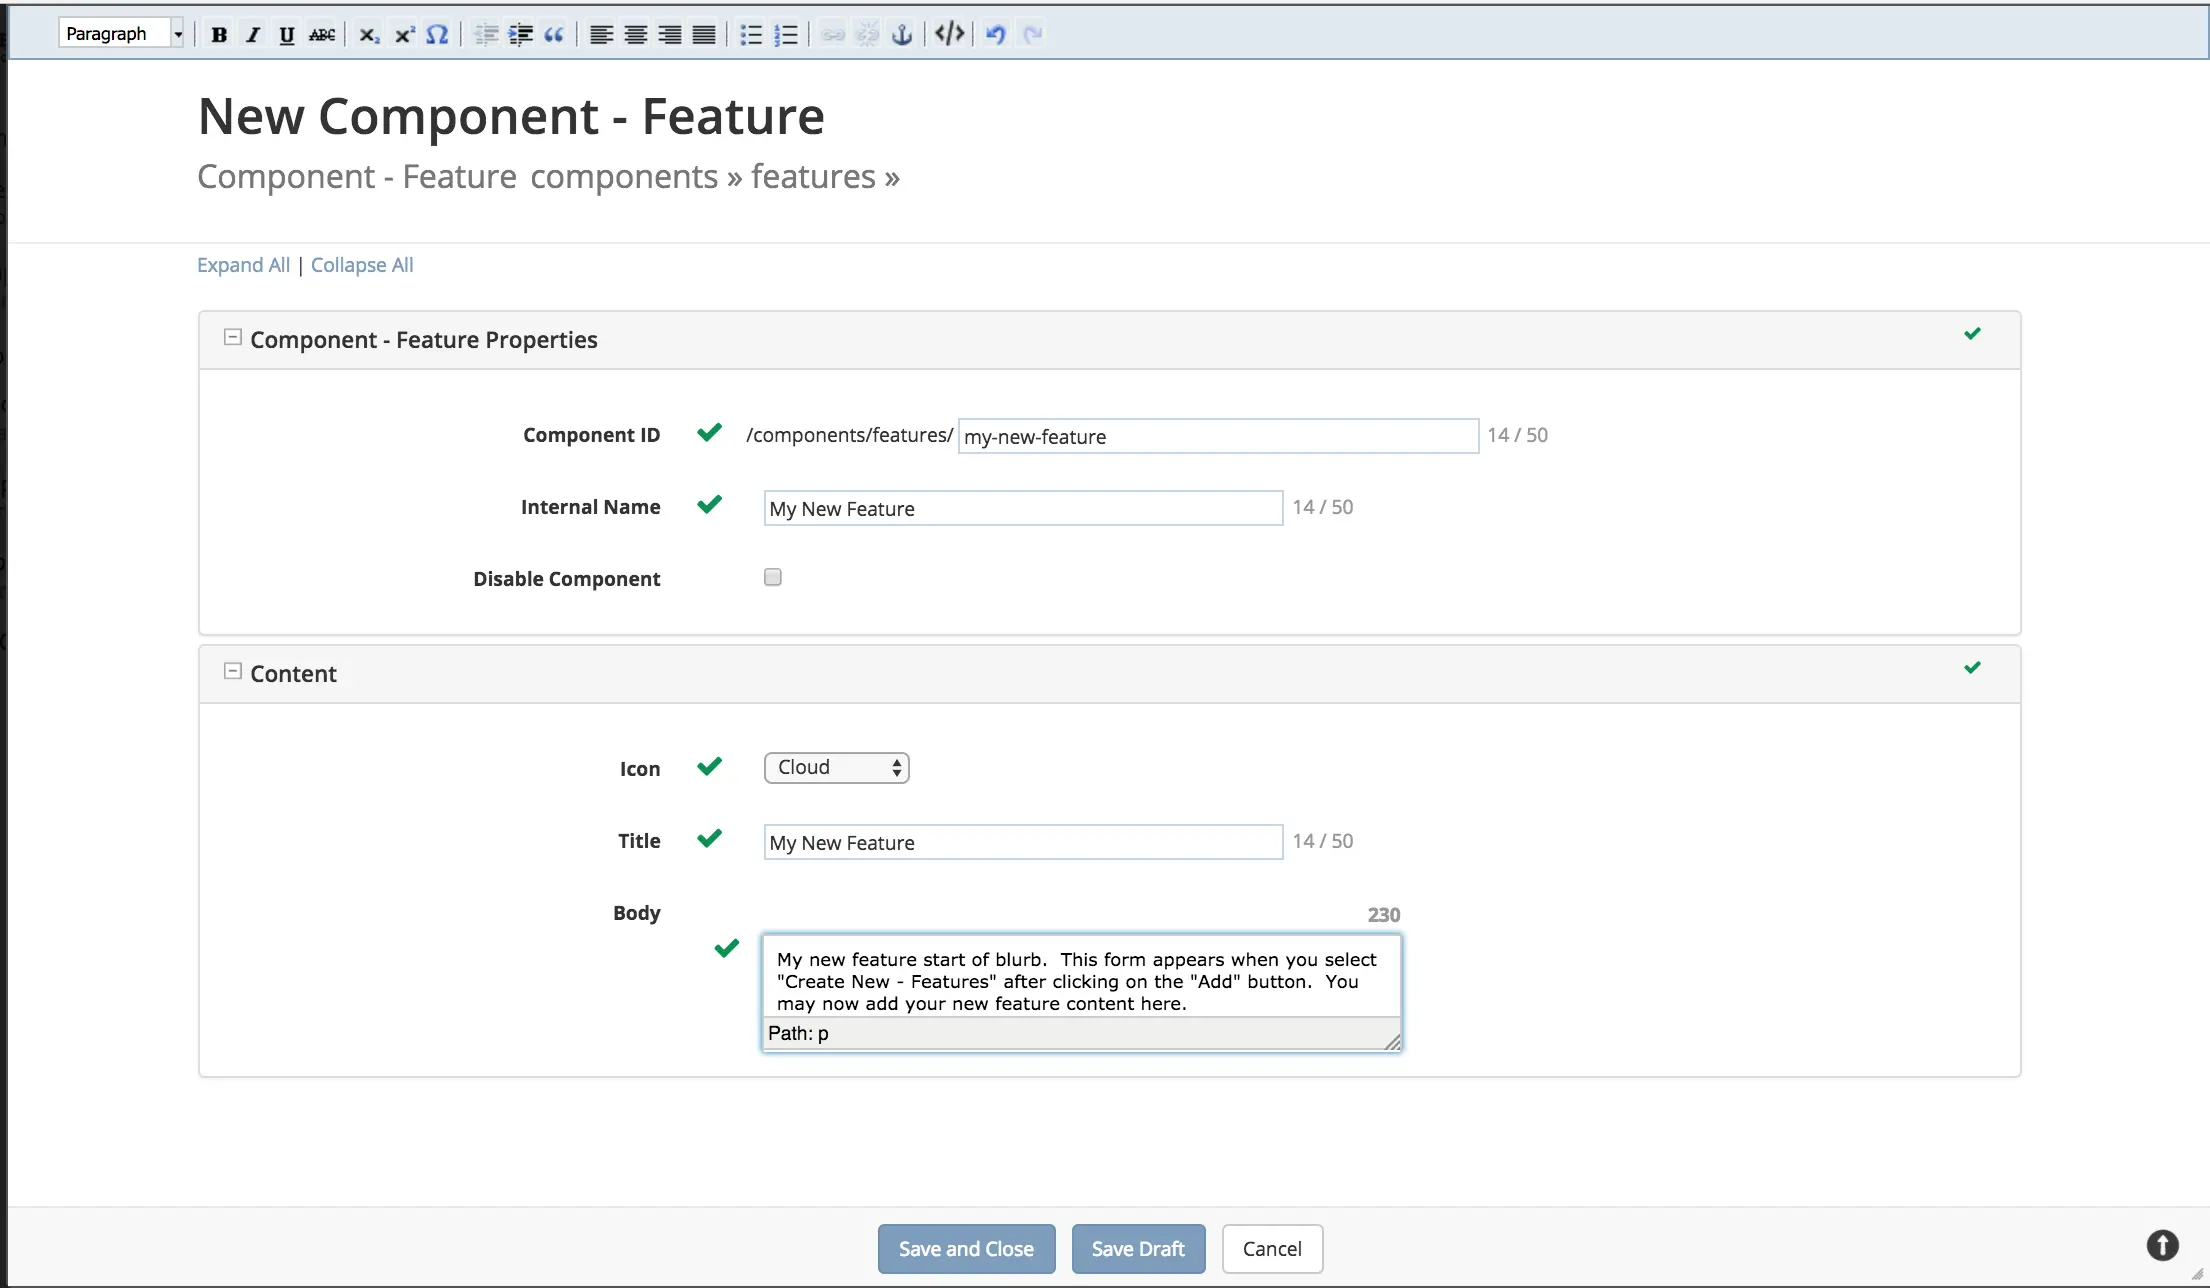
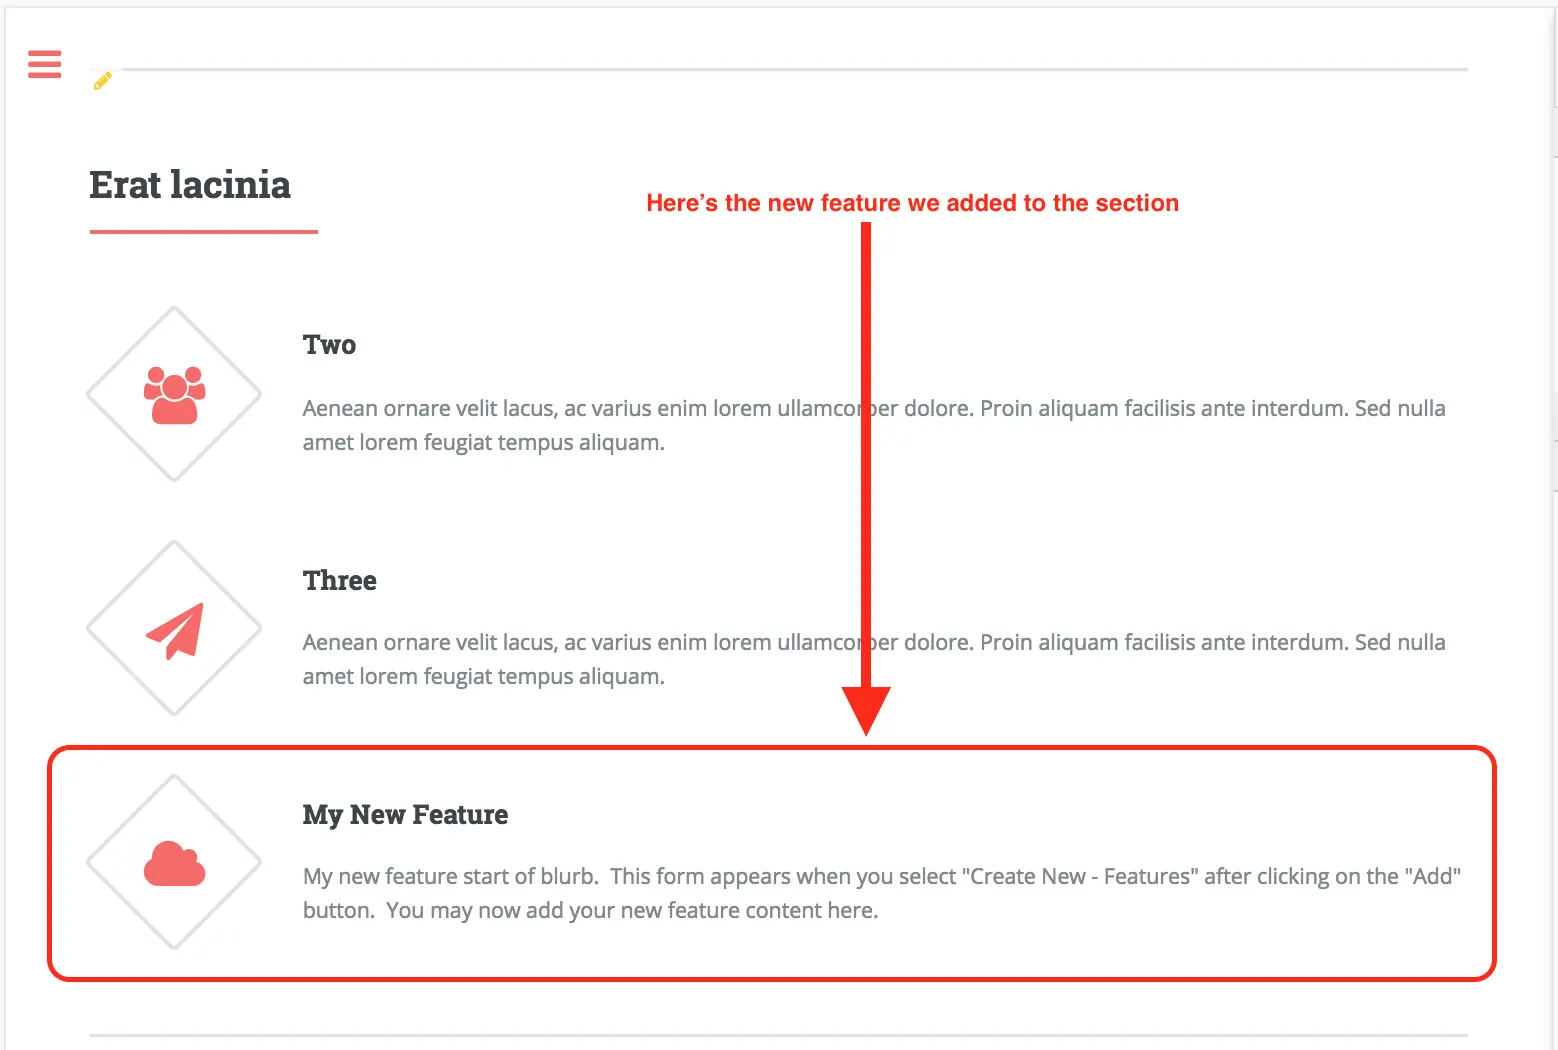
We will add a feature by selecting Create New – Features as seen on the image above. This will open a form, where we will now enter our content.
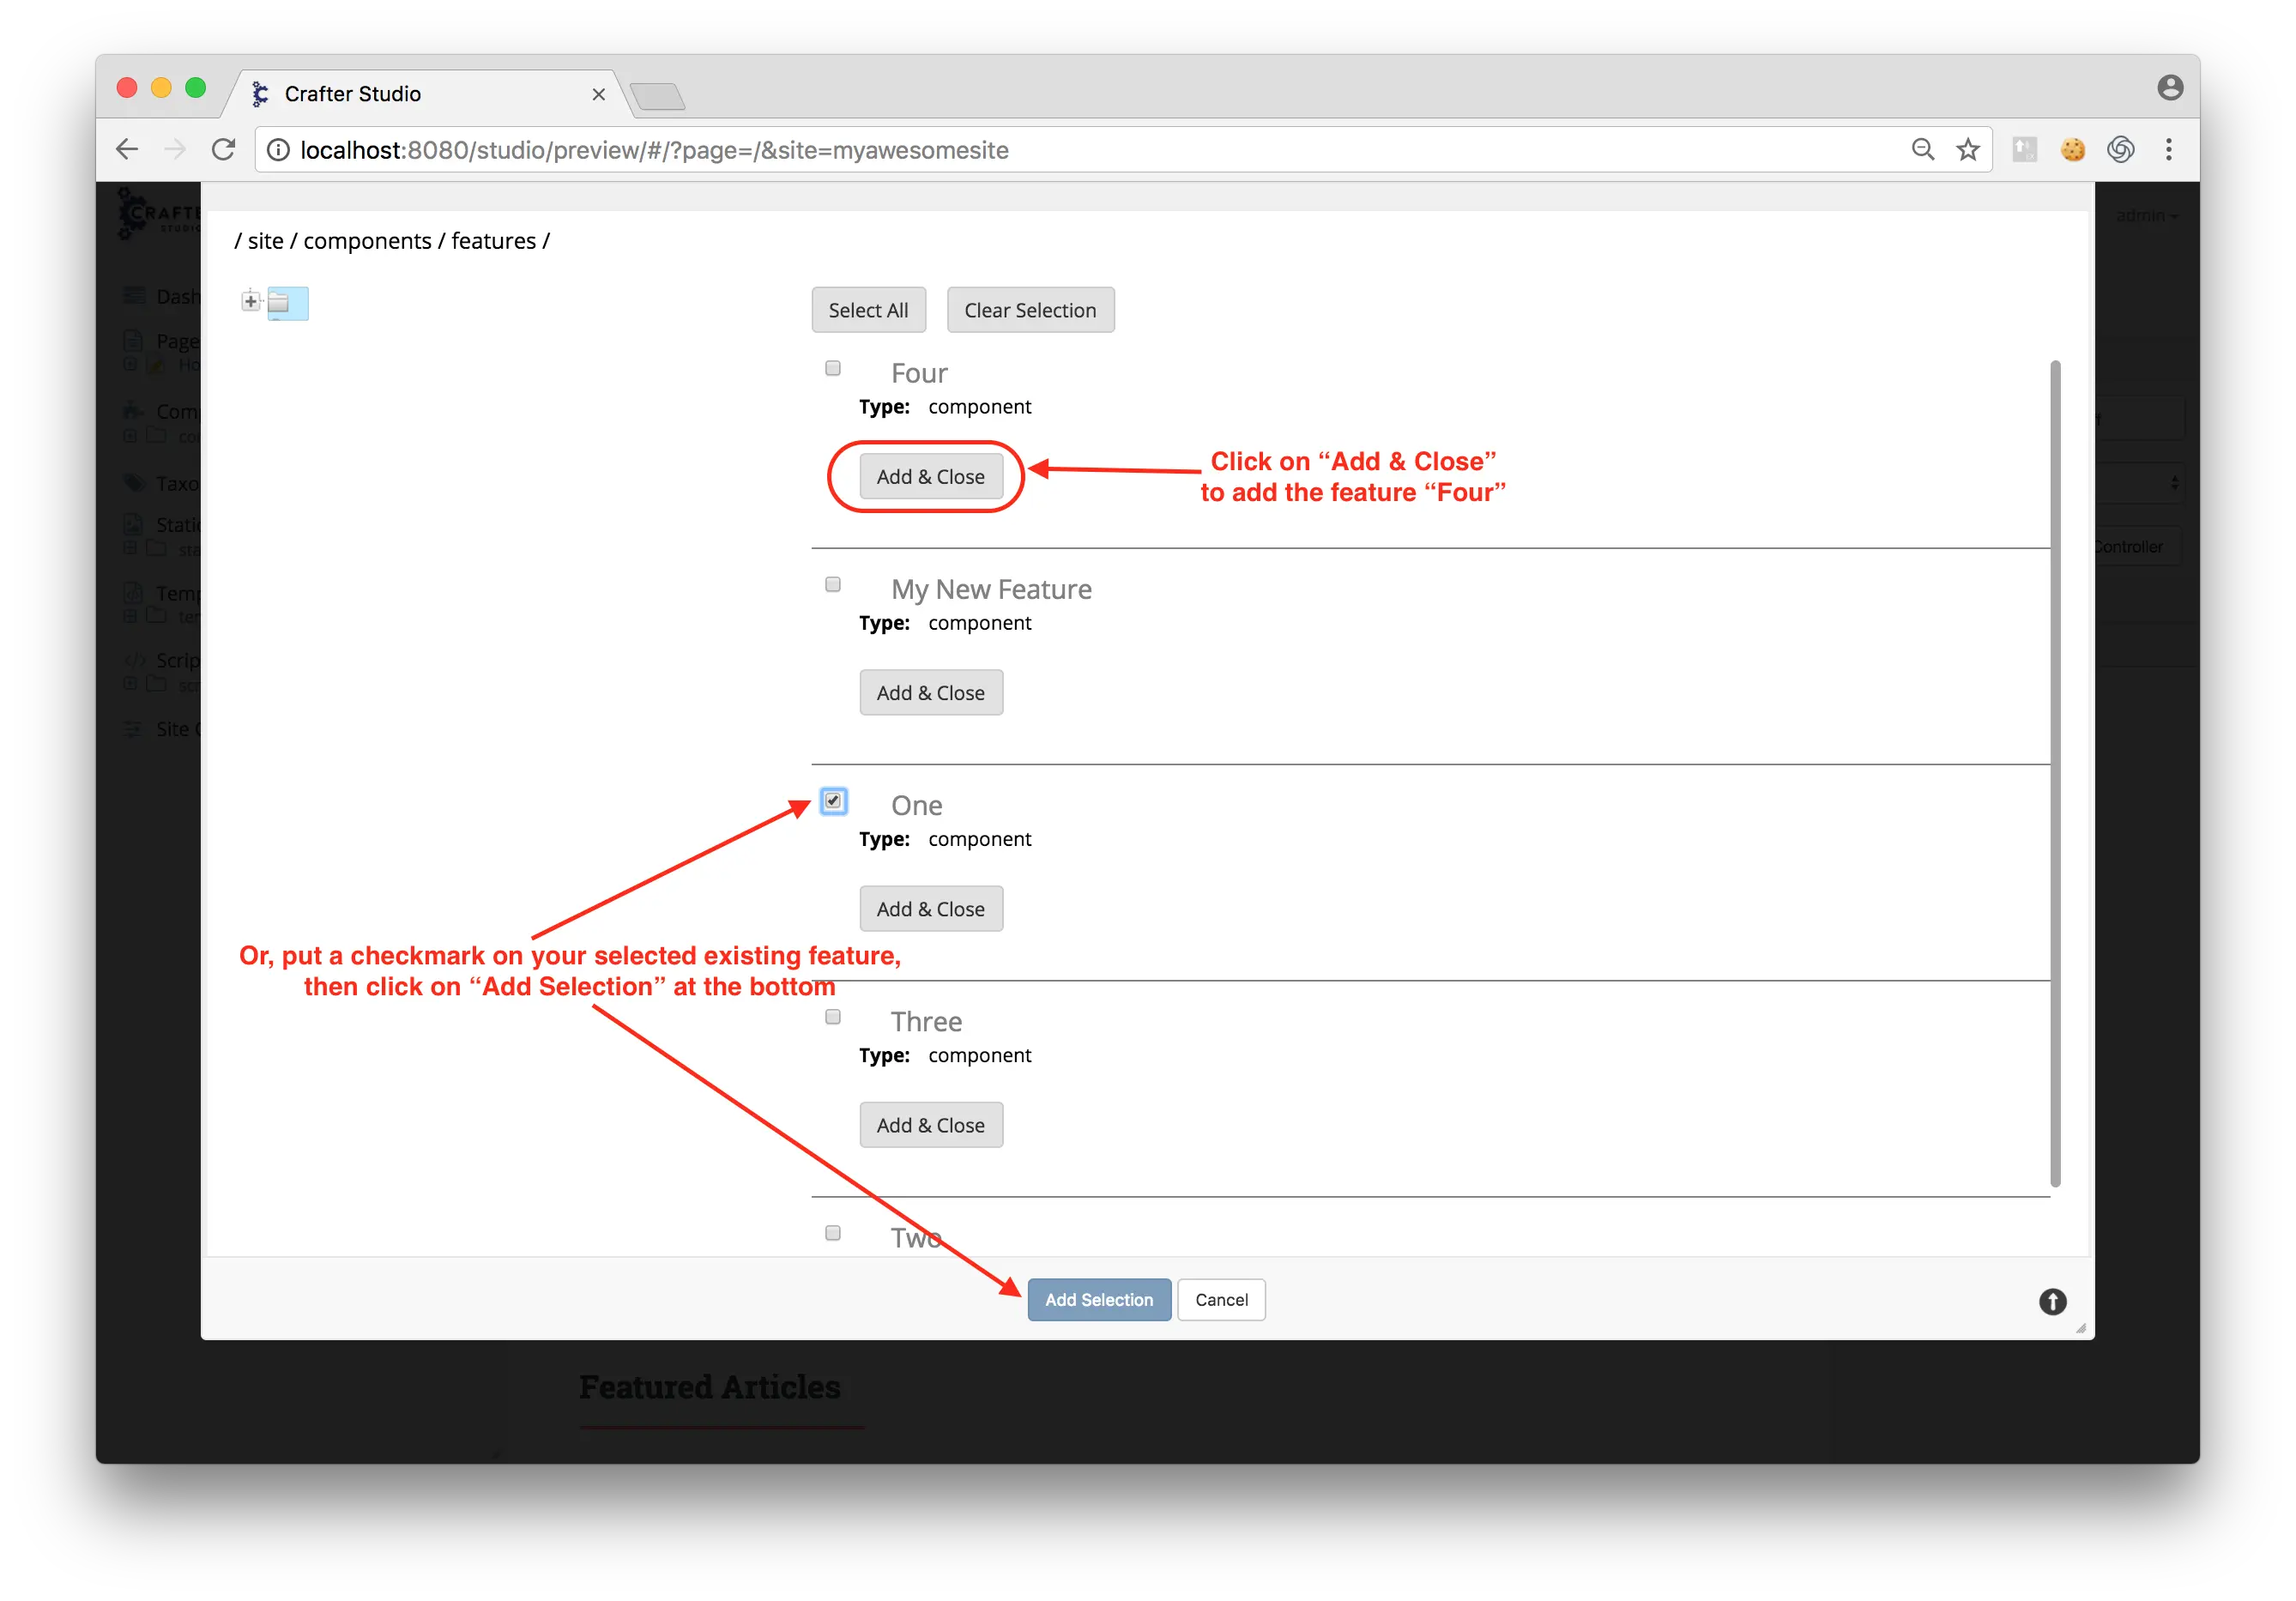
We will now add another feature, by selecting Browse for Existing – Features, after clicking on the Add button. This will bring up a form containing a list of existing features in the blueprint. Select one, then click on Add & Close or, click on the radio button of your selection, then click on Add Selection. This will add your selected existing feature to the features section of the page.
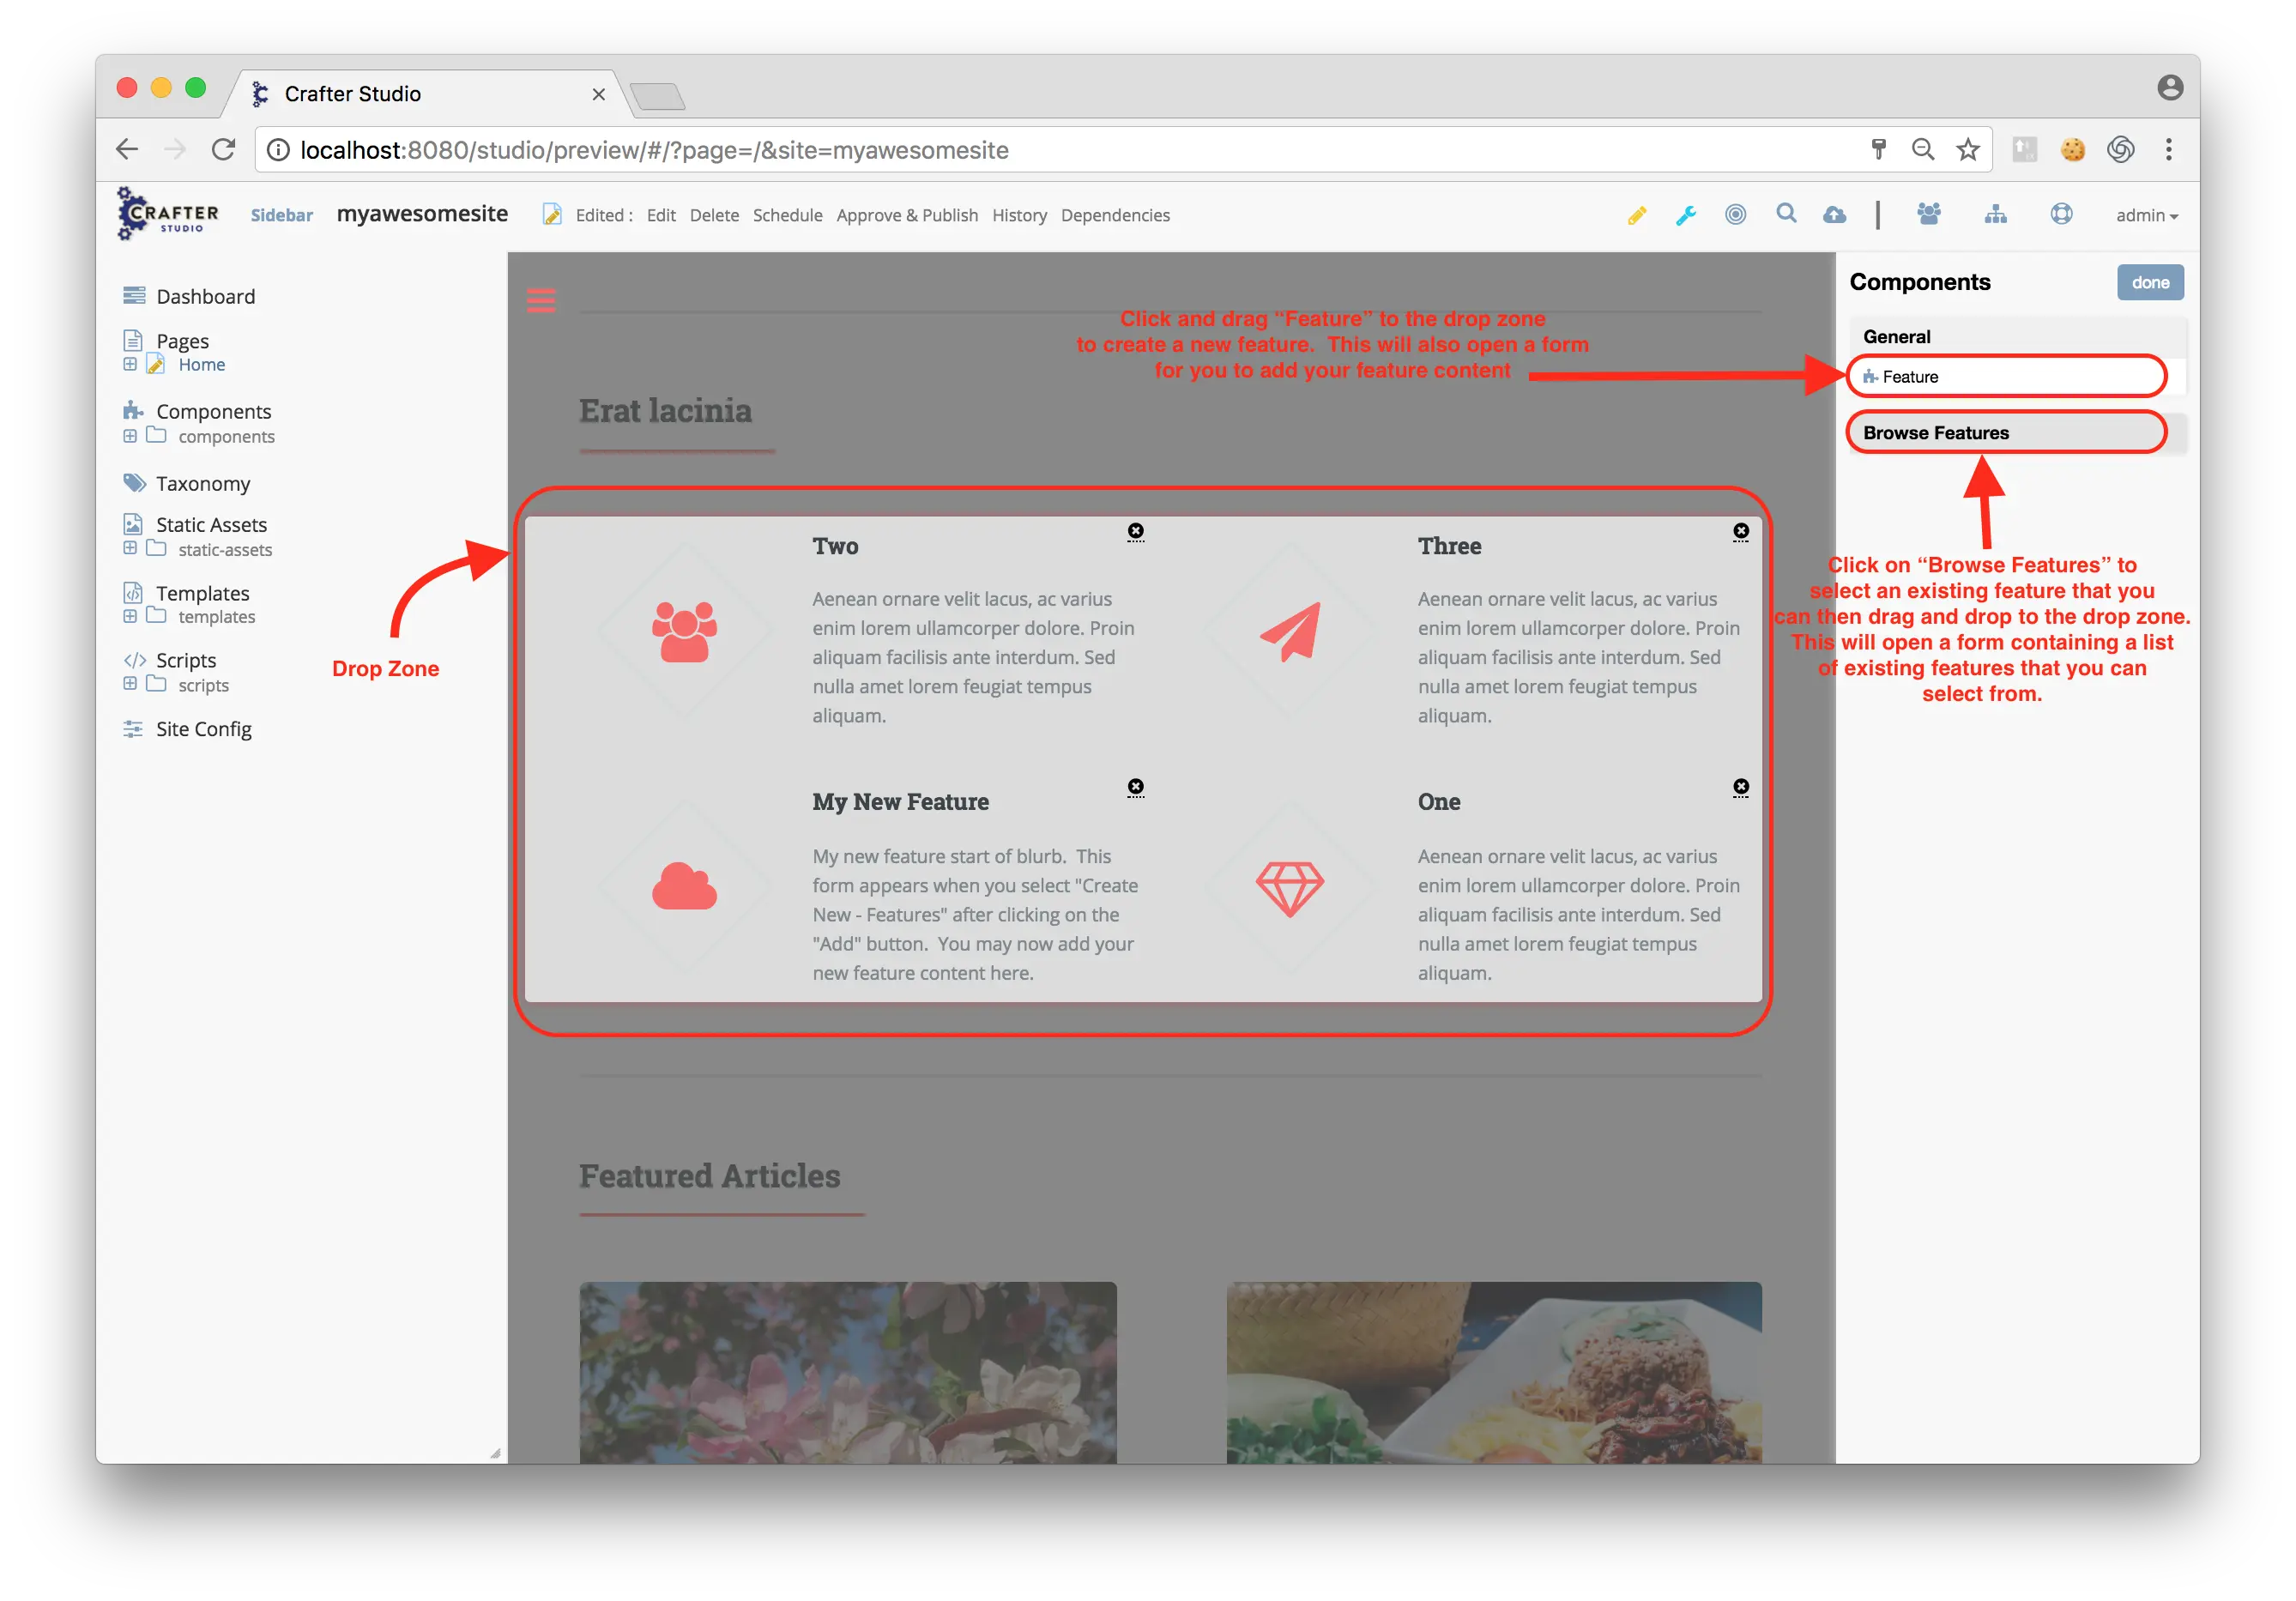
We will again add another feature, this time by opening the Preview Tools panel, and then clicking on Page Components. A Components panel will open where the Preview Tools panel used to be, containing components that you can drag and drop onto the drop zone highlighted on the page. To click and drag a new feature onto the drop zone, click and drag Feature, under the general heading. This will then open up a form for you to add your new feature content. To click and drag an existing feature onto the drop zone, click on Browse Features. This will then open up a form containing a list of existing features that you may choose from. Make your selection, the form with the list will then close and now you can drag and drop your selected existing feature onto the drop zone.
From inside the drop zone, you may also re-arrange the features by clicking and dragging on a feature and placing it in your desired position. Notice the positioning of the newly added feature and the existing features, which have been re-arranged compared to the previous image. To delete/remove a feature from the drop zone, just click on the X as show in the image below.

To edit a feature, select a feature from the list and click on the Edit button on the right of the list. Edit the fields you would like to modify, then click on Save and Close or Save Draft to save your changes or click on Cancel to discard all changes in the form. You can also edit a feature by clicking on the pencil next to the feature when In-Context Editing is enabled.
To remove a feature, select a feature from the list and click on the X button on the right of the list. Or, from the drag and drop zone when you click on “Page Components” in the Preview Tools panel, click on the X next to the feature.

Publishing Your New/Edited Page
Your site is published after creating the site from the Website_Editorial blueprint. If you make edits to any of the pages or created new pages, it will need to be published for your site visitors to see the changes. There are a couple of ways to publish your page edits. The first thing you need to do is to navigate to the page you want to publish in the Site Navigation Tree (Enabled by clicking on Sidebar on the right of the CrafterCMS logo on the upper left hand corner of Studio). After navigating to the page you want to publish, there are two ways to publish:
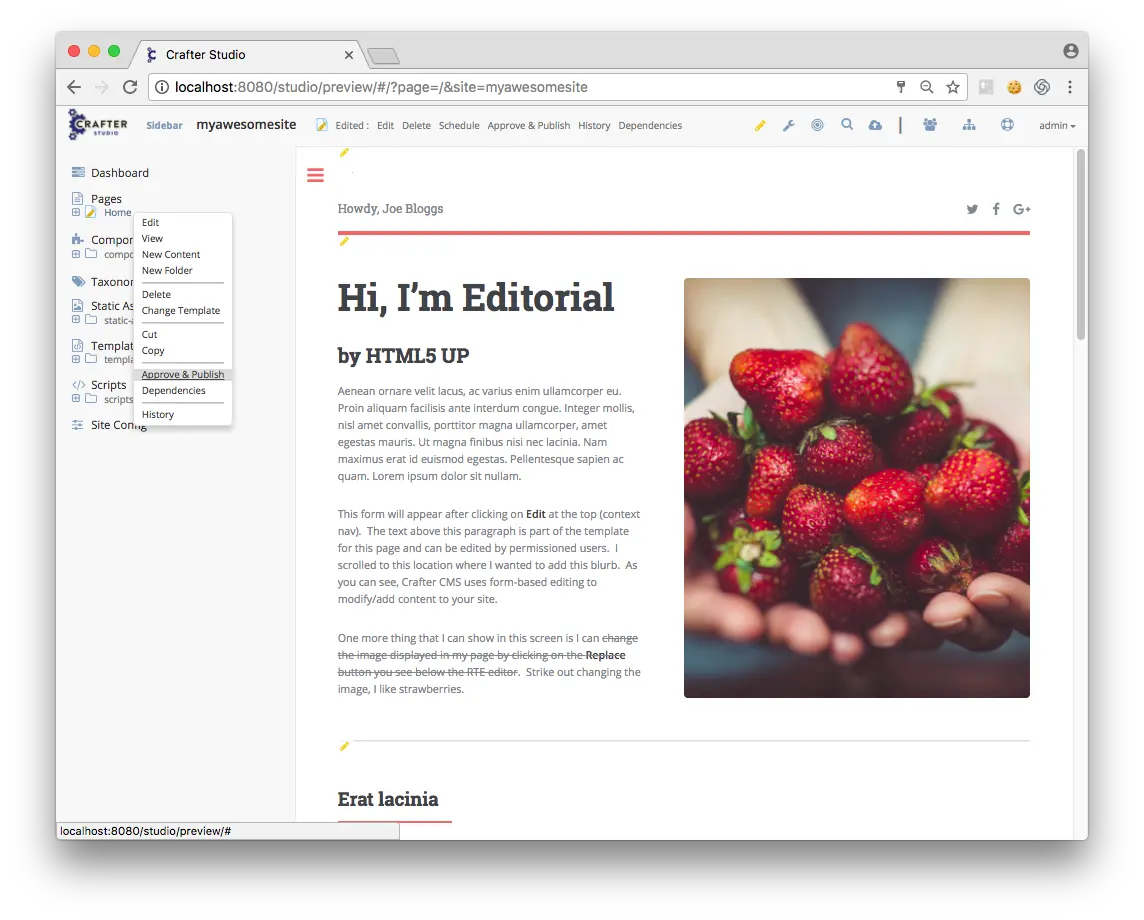
- Click on the page you want to publish. In the context menu, click on Approve & Publish
- Right click on the page you want to publish from the Site Navigation Tree, then click on Approve & Publish
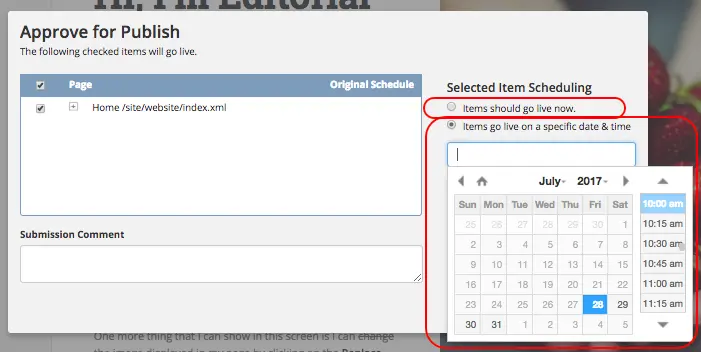
You will then prompted whether you want to publish the page now (Items should go live now), or publish the page at a later date and time (Items go live on a specific date & time).
For more information on content authoring, please see the documentation section: Content Authoring