CMS for SPAs: Building NextJS Apps with CrafterCMS 4.0.x

Introduction
Next.js is a React JavaScript framework that enables you to develop fast, user-friendly applications by combining server-side rendering with statically created pages. Some reasons for using Next.js include speed, performance, and scalability. These factors play a large part in delivering highly performant, scalable, successful applications.
CrafterCMS is both full-featured and fully supports headless CMS capabilities. That’s pretty unique. In this tutorial, you will learn how to create a content-rich, NextJS-based web application with in-context editing and other full-featured authoring capabilities.
In the previous article, we introduced how CrafterCMS version 3.1 works with NextJS. In this post, we will demonstrate the same but for CrafterCMS version 4.
Let’s get started.
Prerequisites
In this tutorial, you will need:
- A CrafterCMS Studio 4 stable version (v4.0.0 RC1 or later) run in port 8080 on your local machine
- NodeJS version 16 or later installed in your machine
CrafterCMS sites with NextJS integration
For convenience, we have created a CrafterCMS site with NextJS integration. You can easily create a new site with this blueprint and check out how CrafterCMS works with NextJS.
Here is a sample site with NextJS integration: https://github.com/rart/craftercms-example-nextjs
Let’s take a look at how to create a new site from this repository.
Demo sites with NextJS
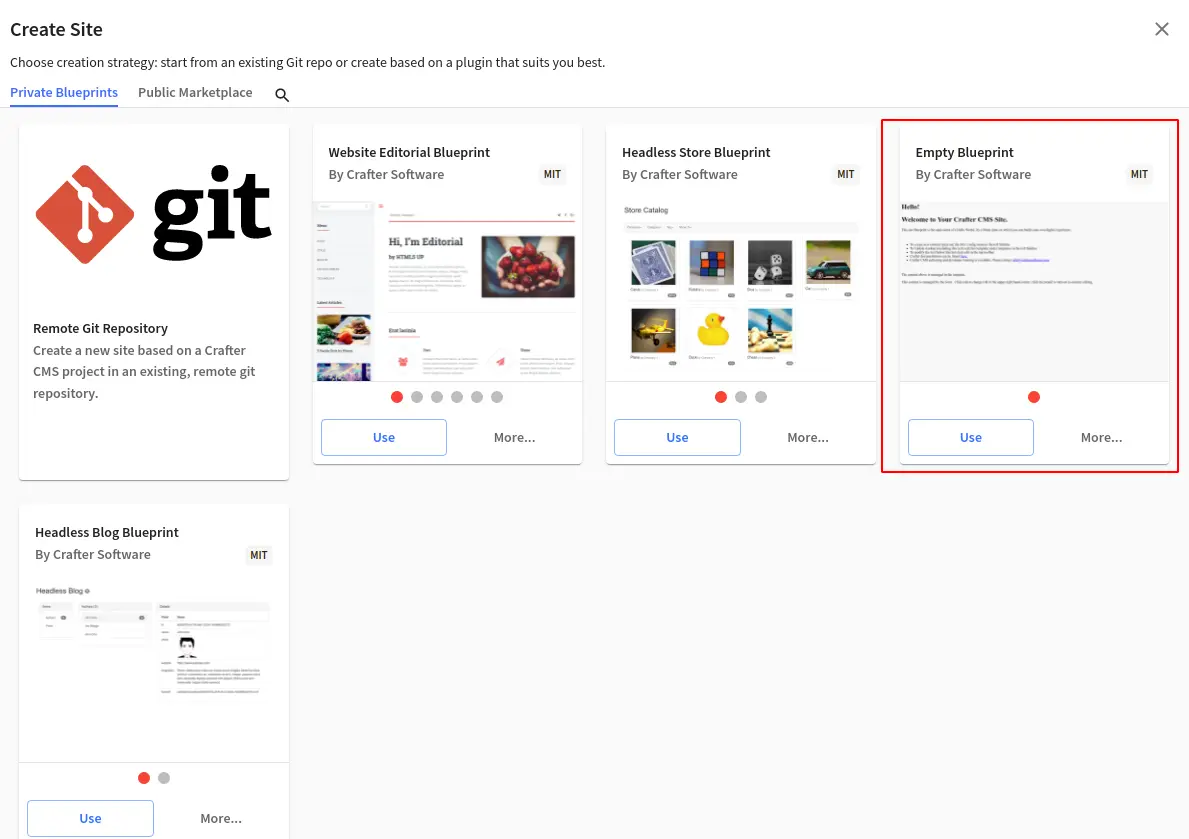
Log in to Studio, from Sites tab, click Create Site button and select Remote Git Repository.
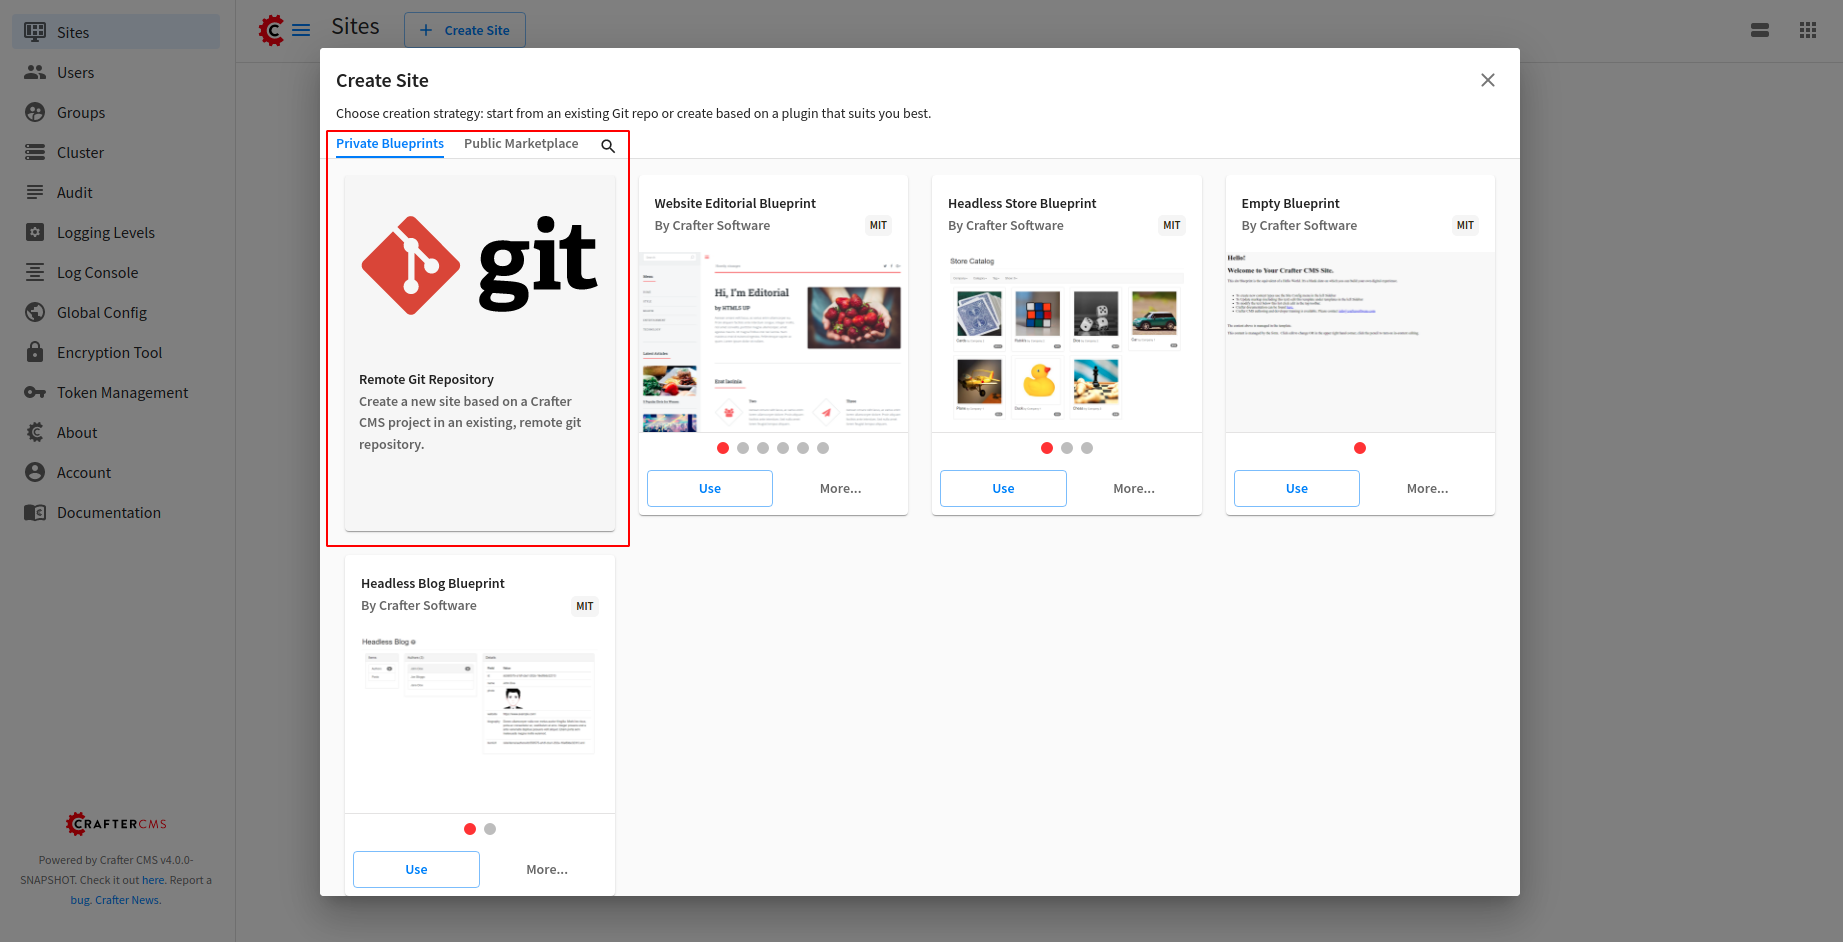
Input following in Create Site popup:
- Site Name: Next JS
- Site ID: next-js
- Git Repo URL: https://github.com/rart/craftercms-example-nextjs
Note: Site name can be any but inputting Next JS makes it easier for the setup.
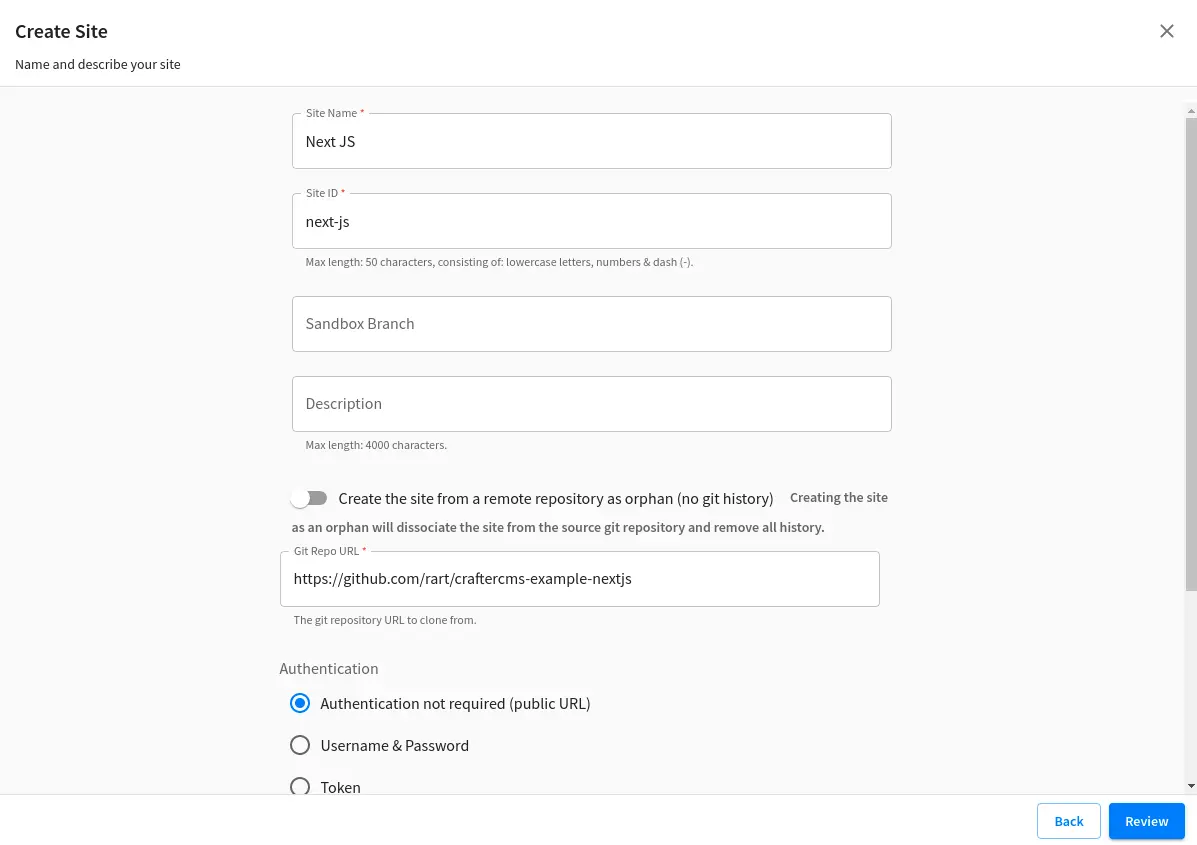
Click Preview > Create Site.
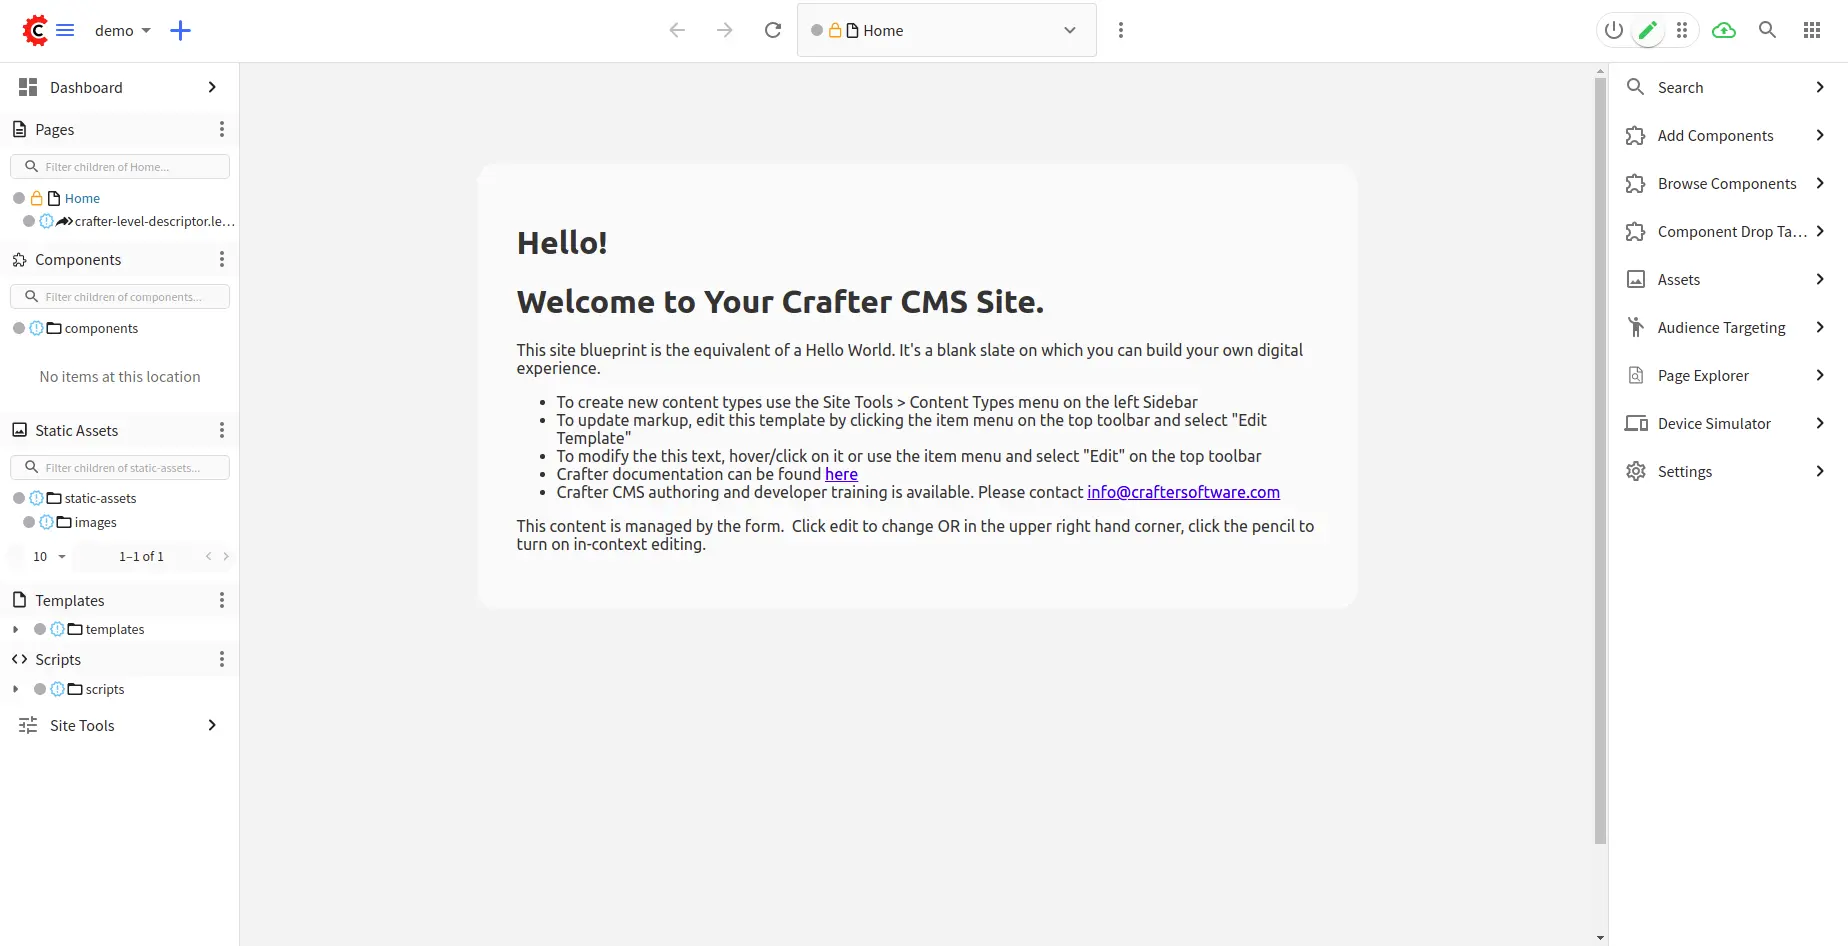
When the site “Next JS” is created. You should see the following screen:

There are instructions on Readme to follow:
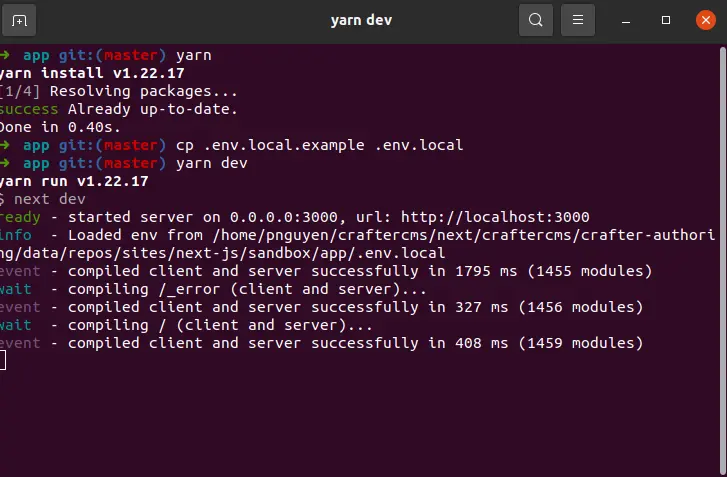
- In the CrafterCMS site sandbox directory, you'll find a directory called app, which is the Next.JS app. Visit that directory on your terminal and run `yarn`
- Create a copy of app/.env.local.example to produce app/.env.local. If you named your site next-js and CrafterCMS is running on localhost:8080, no further edits are necessary; otherwise, change the file accordingly.
- Run `yarn dev` to start the node server on localhost:3000
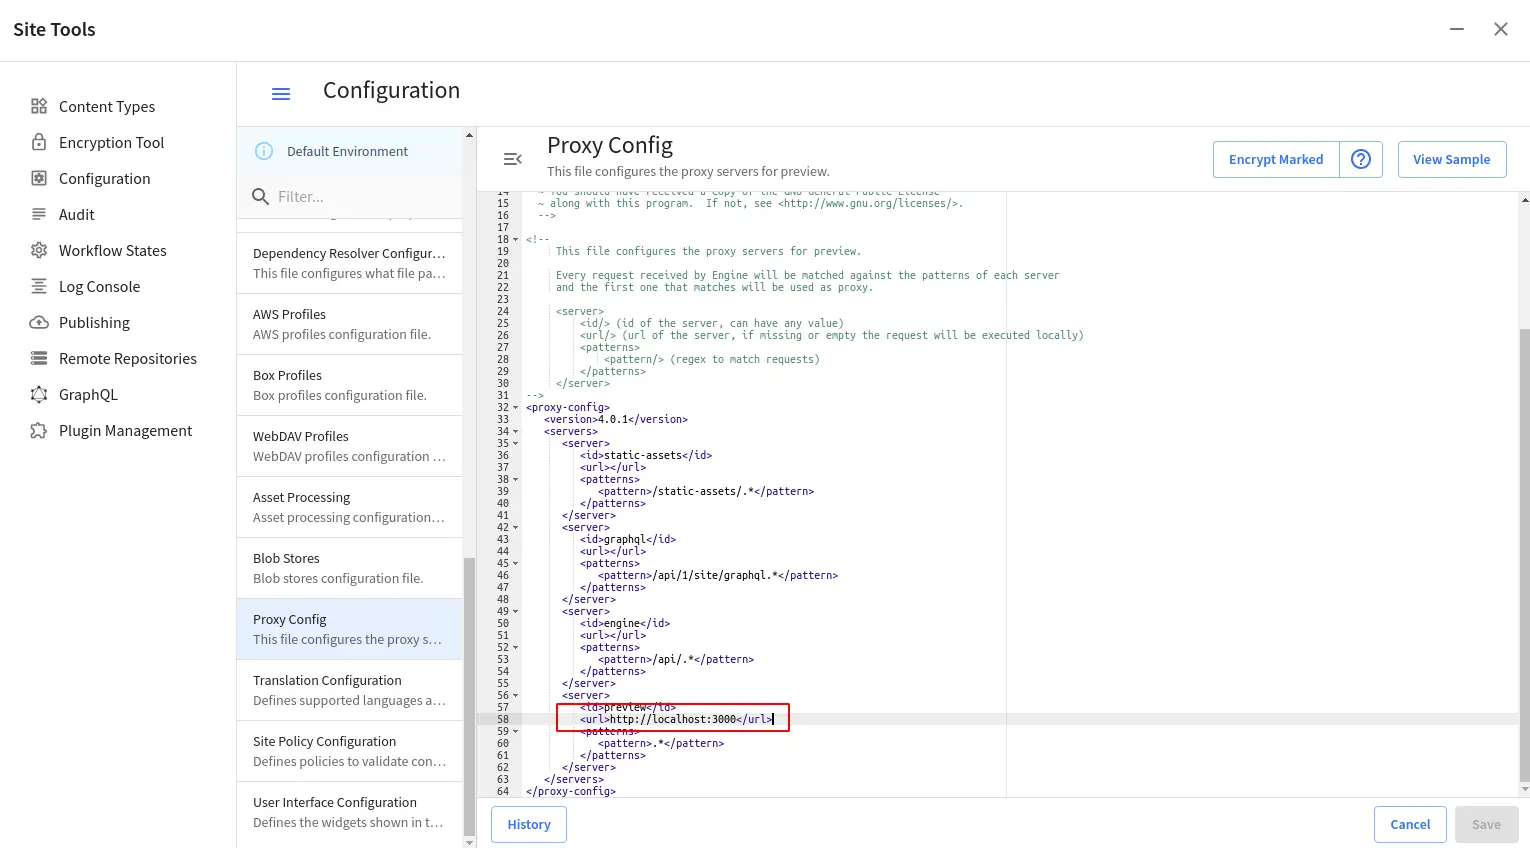
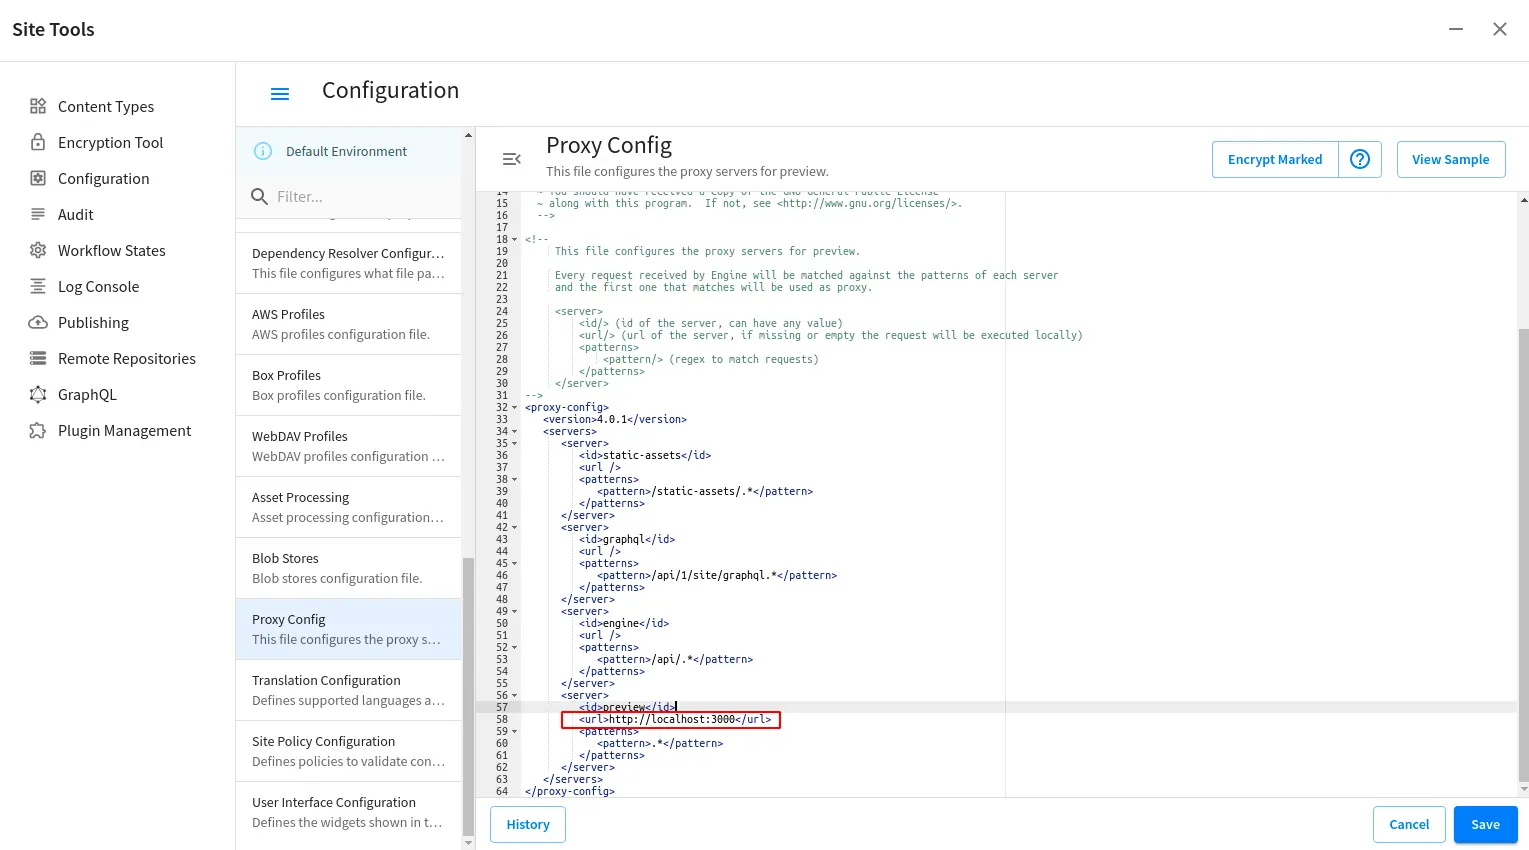
- Open Site Tools and select "Configuration"
- Search for "Proxy Config"
- Comment line 58 and uncomment line 59
- Close the pop-up and refresh the page. You'll now see the next.js application in this area.
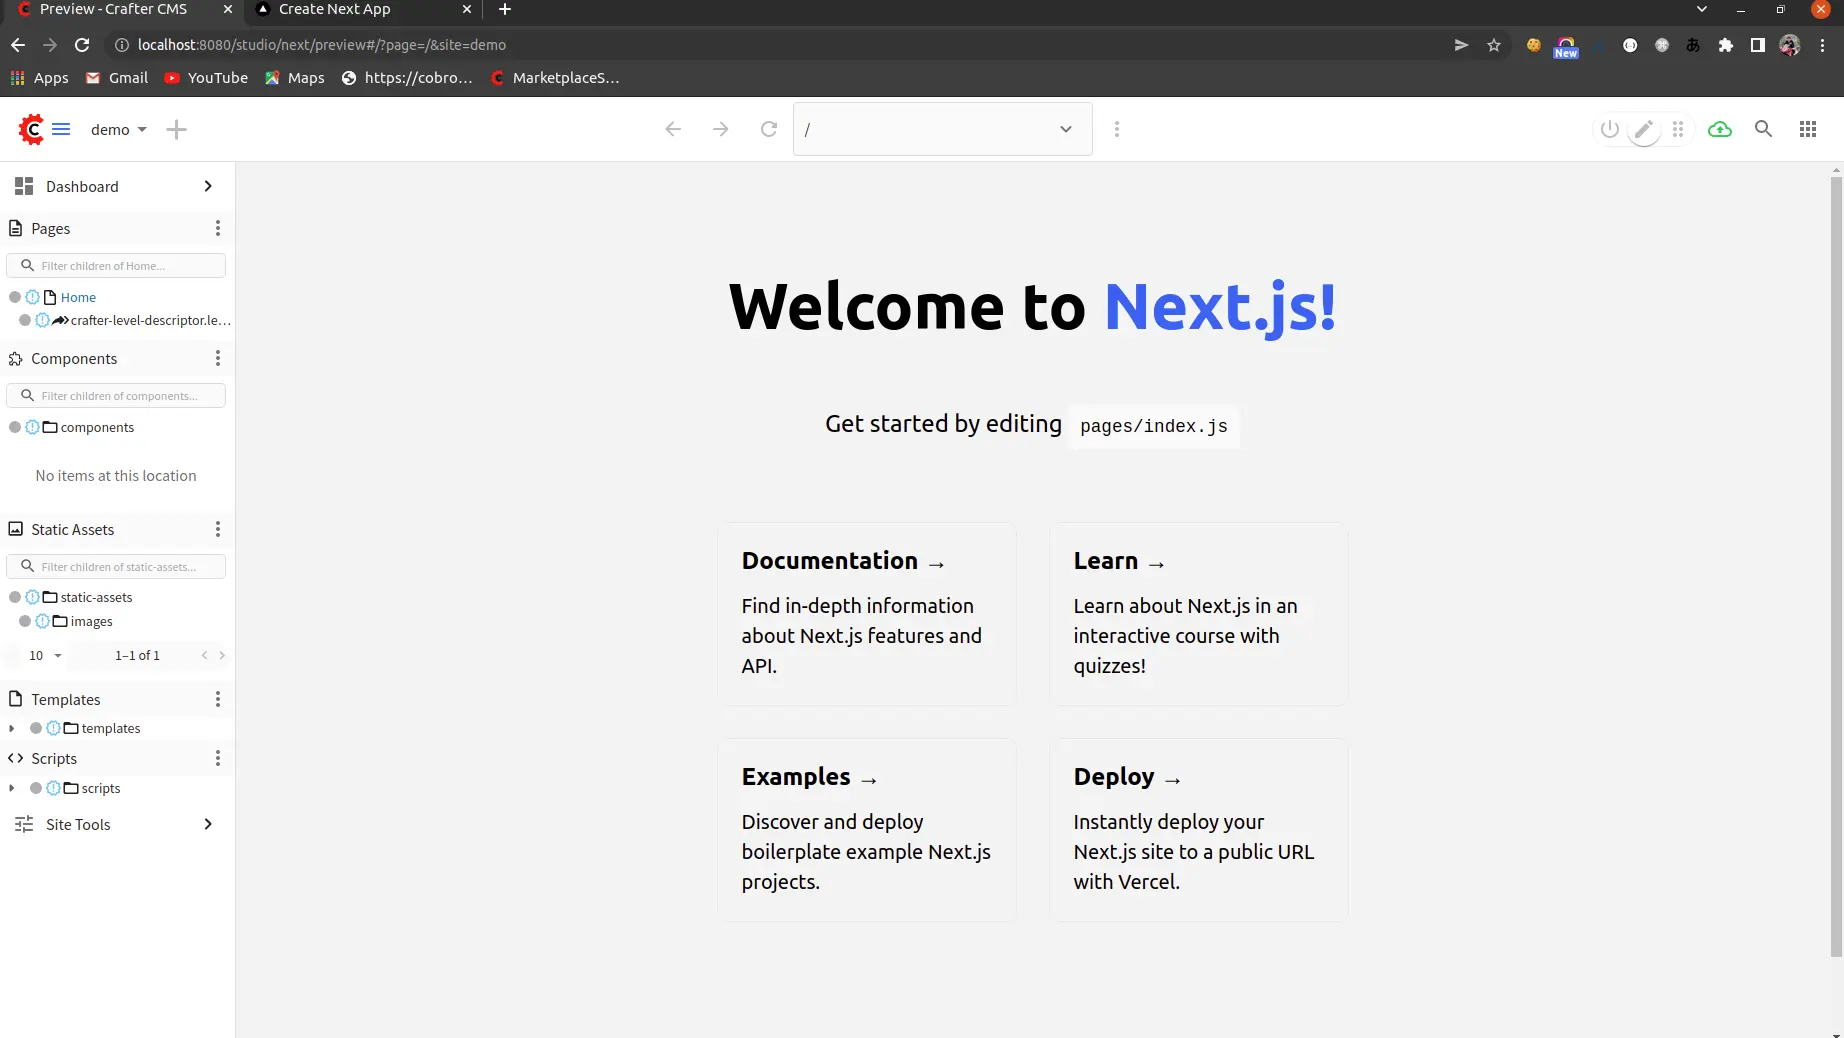
Once completed, you should be able to see the following screen while previewing your site in port 8080:
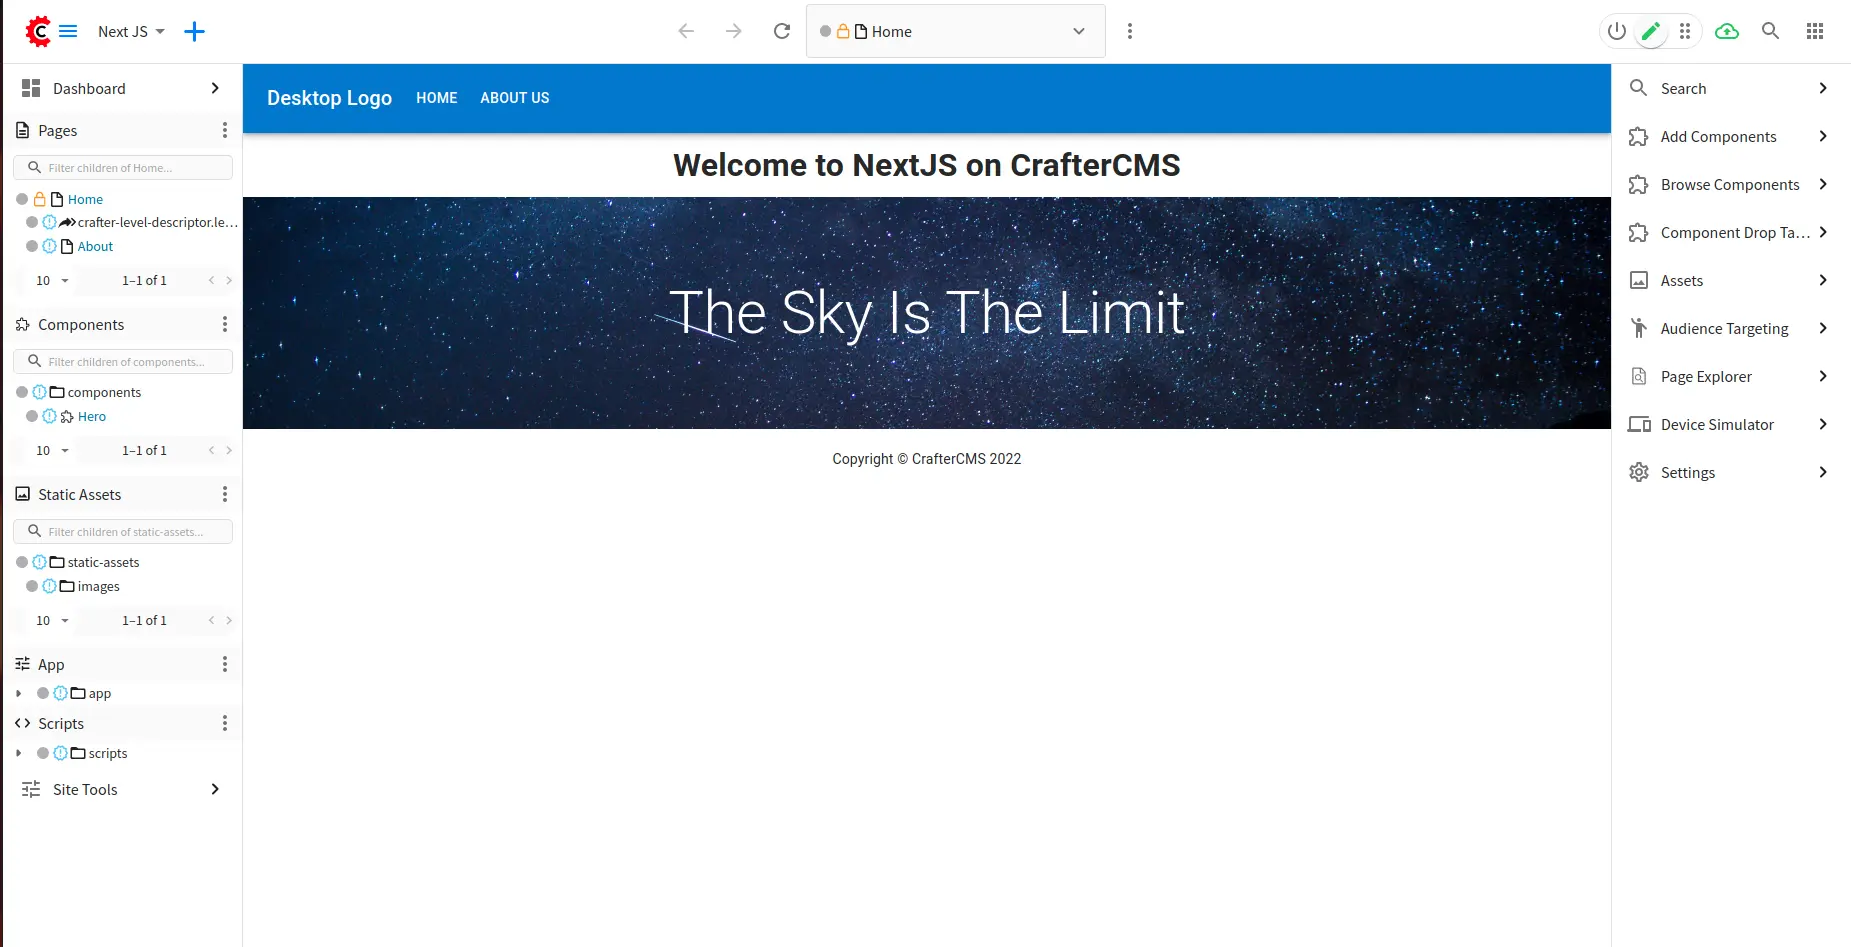
While the green pencil is active, click on components such as the text “Welcome to NextJS on CrafterCMS “, you should see a green box appears showing that the text is editable. Click on it and change the text to “Welcome to NextJS on CrafterCMS 4“.
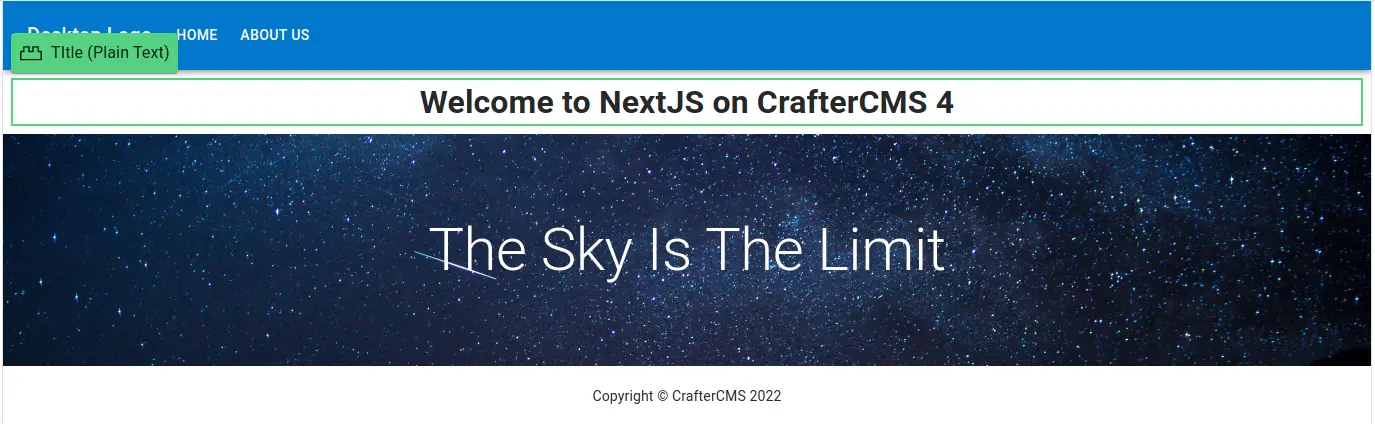
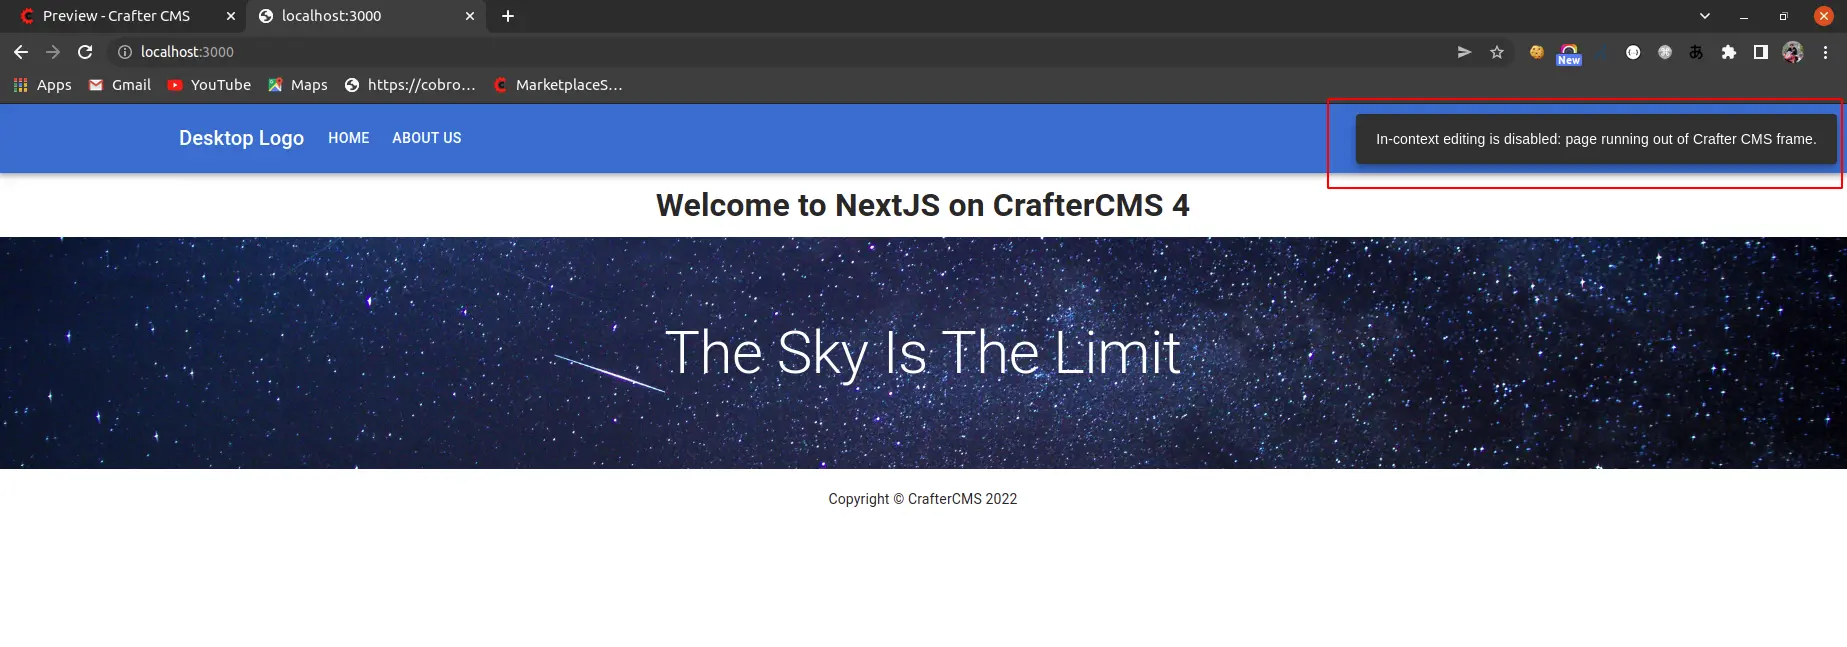
This feature is In-Context Editing which enables you to edit components while in previewing mode. If you open the site in port 3000, you will see a message saying that in-context editing is not available because we are opening the site out of Crafter Studio previewing frame.
How CrafterCMS works with NextJS
Similar to how CrafterCMS works with React, CrafterCMS works as the headless CMS for NextJS web applications.
CrafterCMS provides craftercms/craftercms-sdk-js and Experience Builder with built-in libraries to work with content, including In-Context Editing features. This library is tested works well with NextJS. Refer to the SDK in GitHub for more information about supported modules and their usages.
Next, let’s take a look at the source code of our site.
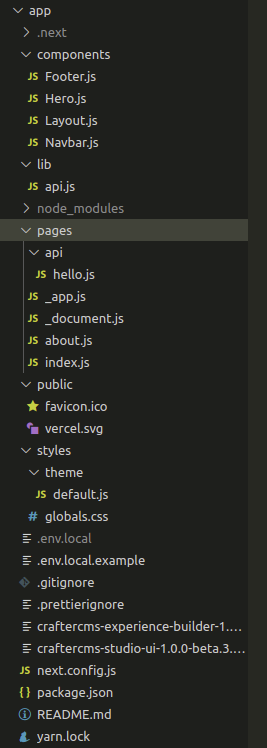
- pages: In NextJS, a page is a React Component that is associated with a route based on its file name. There are 2 routes for this project: The home and an about page.
- _document.js: A customized document to store HTML tags such as <html>, <body>.
- _app.js: A custom App. We use this to initialize pages and control how pages are rendered.
- Other folders such as components are just named React Component structures for readability.
- lib/api.js: Take a look at this file to learn how we can fetch an item from CrafterCMS (Studio or Engine) to NextJS:
import {
getDescriptor,
parseDescriptor,
getNavTree,
} from "@craftercms/content";
import { firstValueFrom, map } from "rxjs";

export async function getModel(path = "/site/website/index.xml") {
return await firstValueFrom(
  getDescriptor(path, { flatten: true }).pipe(
    map(parseDescriptor)
    // Can use this for debugging purposes.
    // tap(console.log)
  )
);
}

export async function getNav() {
return await firstValueFrom(
  getNavTree("/site/website", 1).pipe(
    // Flatten the nav so that home shows at the same level as the children.
    map((navigation) => [
      {
        label: navigation.label,
        url: navigation.url,
        active: navigation.active,
        attributes: navigation.attributes
      },
      ...navigation.subItems,
    ])
  )
);
index.js: This is the root route for home. Take a look on this on how to use In-Context Editing with Crafter Studio:
import {
Guest,
RenderField,
Field,
ContentType,
} from "@craftercms/experience-builder/react";

export default function Index({ model }) {
const { isAuthoring } = useCrafterAppContext();
return (
  <Guest path={model.craftercms.path} isAuthoring={isAuthoring}>
    <RenderField
      model={model}
      fieldId="title_s"
      component={Typography}
      variant="title"
      componentProps={{
        // Component props can simply be sent as props to RenderField and
        // they would be passed down to Typography, however, because there's
        // a prop name collision (i.e. `component`) we can use componentProps
        // to supply the component prop directly to Typography.
        component: "h1"
      }}
      align="center"
      sx={{ m: 1 }}
    />
    <RenderField
      model={model}
      component="div"
      fieldId="content_o"
      format={(content_o) =>
        content_o?.map((component, index) => (
          <Field
            key={`${component.craftercms.id}_${index}`}
            model={model}
            index={index}
            fieldId="content_o"
          >
            <ContentType model={component} contentTypeMap={contentTypeMap} />
          </Field>
        ))
      }
    />
  </Guest>
);
}
In the previous piece of code, we are using Experience Builder feature of CrafterCMS by importing:
import {
Guest,
RenderField,
Field,
ContentType,
} from "@craftercms/experience-builder/react";
CrafterCMS’ Experience Builder (XB) provides a UI layer on top of your applications that enables authors with in-context editing (ICE) for all the model fields defined in the content types of pages and components. CrafterCMS developers must integrate their applications with XB, essentially telling XB what field of the model each element on the view represents. See the documentation for more details.
In this example, we have used the component Guest, RenderField of the XB to enable In-Context Editing feature.
Create a new site with NextJS integration
In previous session, we create a site from a blueprint which has NextJS enabled. So how about working with NextJS from scratch?
Let continue this session on how we can create a CrafterCMS site with NextJS integration from scratch.
Go back to the Global Menu, Select Create Site with an Empty blueprint.
Input as follows and click Preview > Create Site:
- Site Name: demo
- Site ID: demo
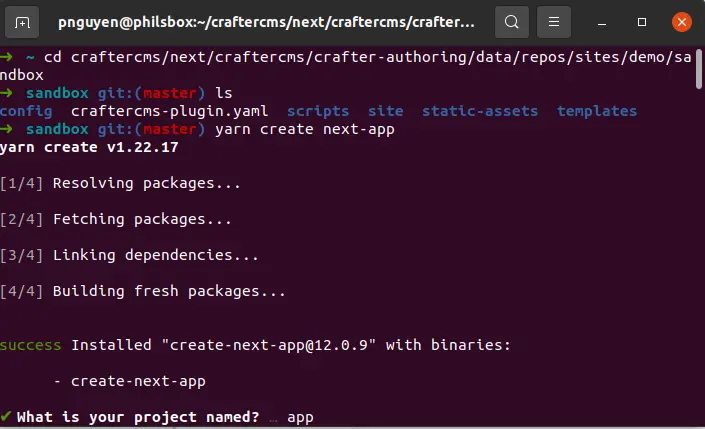
Now let’s create our `app` folder with a branch new NextJS application. Thanks to Create Next App command, creating a new NextJS is super easy:
cd {YOUR_STUDIO_DIR}/data/repos/sites/demo/sandbox
yarn create next-app
Run above commands to create a new NextJS application. The CLI tool will ask you for the project name, type `app` so that it will create `app` folder along with the NextJS application for us.
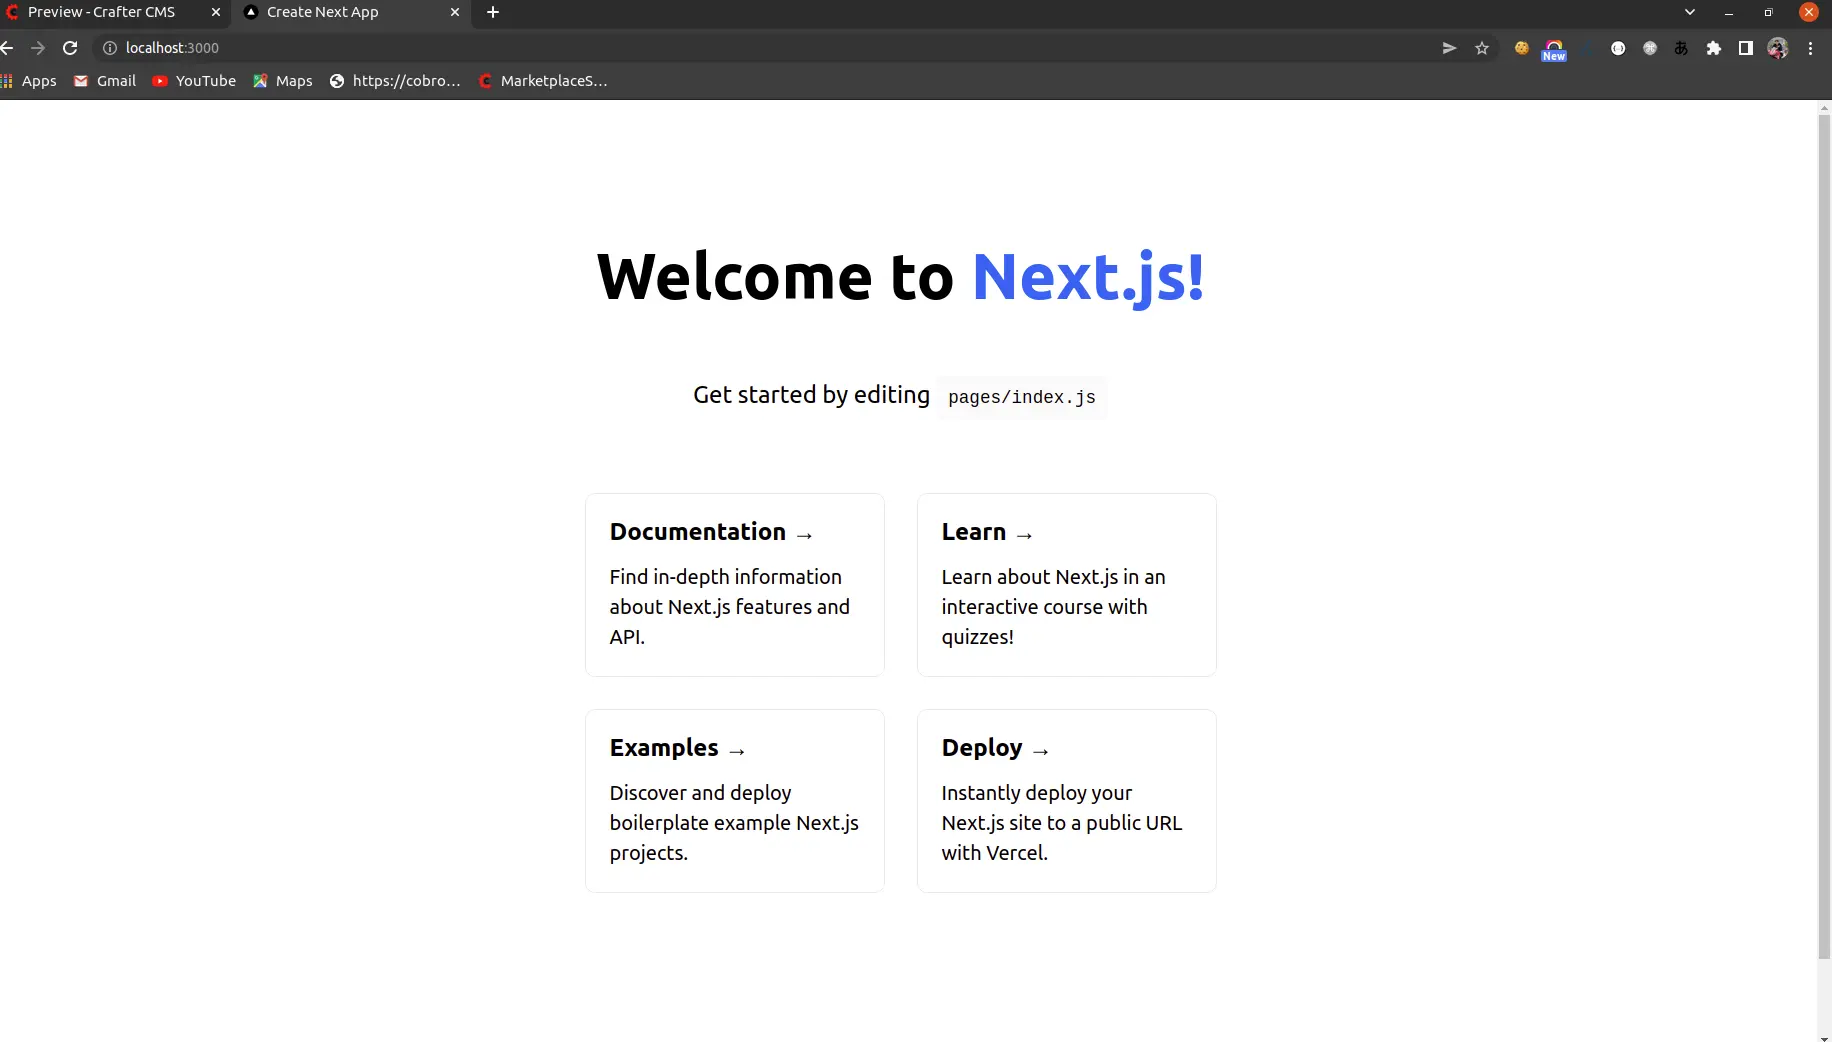
When completed, go to `app` then start NextJS in port 3000:
cd app
yarn dev
If the application is created successfully, you should see the following screen when browsing http://localhost:3000.
Update Proxy Configuration from demo site in Studio, you will see the same screen while previewing in port 8080:
As the NextJS web application is up and previewable within Crafter Studio, you can freely add up more logic, including the integration with CrafterCMS using CrafterCMS SDK and the Experience Builder. Take the reference from the above next-js site source code how to do it.
One last thing you must do when modifying a site outside of Studio is to commit the change:
cd {YOUR_SITE_SANDBOX}
git add app
git commit -m "Add NextJS application to CrafterCMS site"
Conclusion
NextJS is a fast-growing React framework. NextJS helps developers to create high-performance web applications with all features you will need for a highly optimized web application in production, including Server-Side Rendering, a hybrid of static and dynamic rendering, smart bundle, pre-fetching, and more. In this tutorial, we have introduced how NextJS works with CrafterCMS.
Are you interested in building Next.js applications on a headless CMS platform? Get started by reading about the Crafter Engine APIs. And check out the Crafter Studio APIs to customize your content authoring experience.