Integrate the DocuSign eSignature platform with CrafterCMS
Introduction
DocuSign is an electronic signature platform that allows users to sign and send documents securely. Integrating DocuSign with CrafterCMS lets you easily manage and sign your documents directly from any site or app built on the headless CMS.
In this tutorial, we will demonstrate how to integrate the DocuSign eSignature API with CrafterCMS and build a plugin for your next CMS project. This plugin provides a REST API and a form to input the signer's email address and full name. When users submit the form, an email will be sent to the signer’s address with a document to sign.
Let’s get started with the integration for your next CrafterCMS project!
Prerequisites
Before beginning, make sure you have the following:
- DocuSign developer account
- CrafterCMS instance (version 4.0.2 or later)
- Basic knowledge of CrafterCMS
- Basic knowledge of DocuSign and its eSignature API
Getting Started with a Pre-Built Plugin
For convenience, we have developed a plugin that you can use to integrate eSignature API with your CrafterCMS project. You can find the full version of this plugin here.
- Download and install CrafterCMS 4.0.2 or later version.
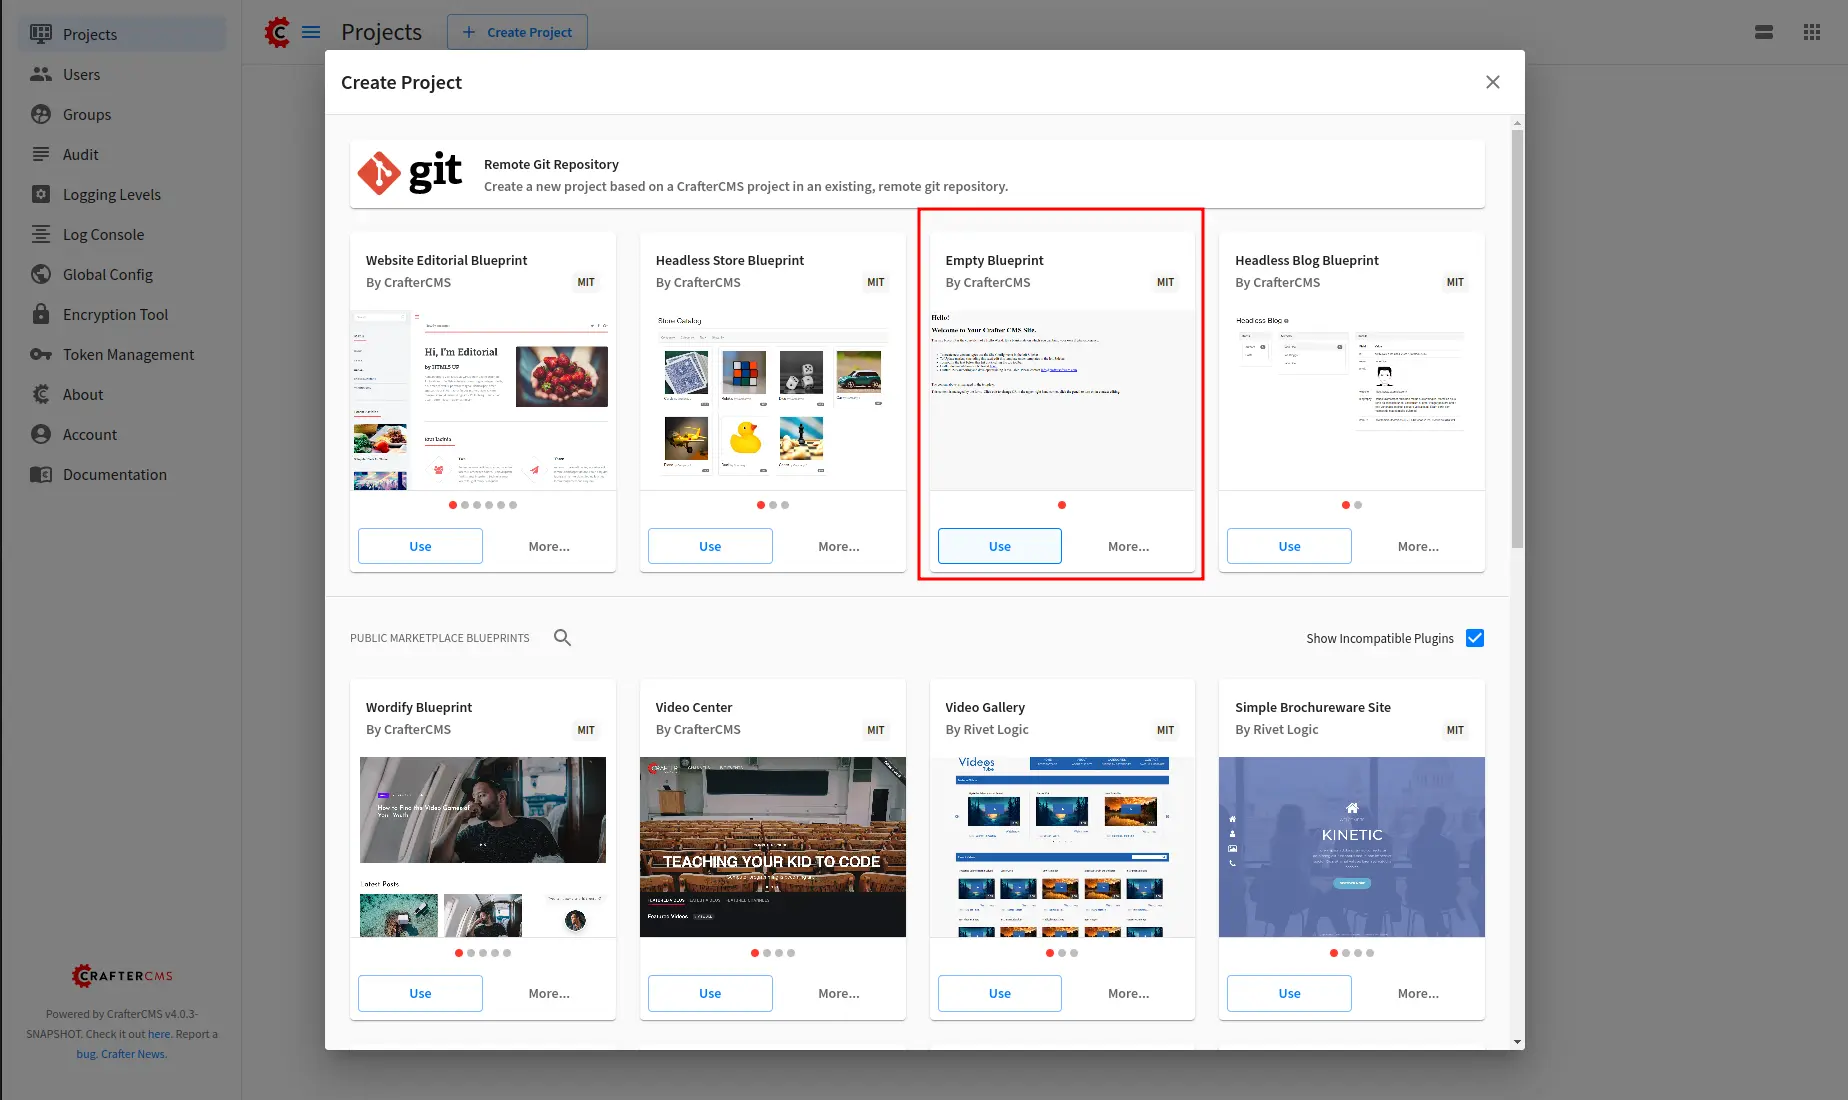
- Create a new project from Empty Blueprint.
- Install the DocuSign pre-built plugin
In this tutorial, we will use the CrafterCMS CLI Commands to install the plugin.
- Clone the plugin using Git
https://github.com/phuongnq/craftercms-plugin-docusign.git
- Use the CLI to copy the plugin
$ cd YOUR_CRAFTERCMS_STUDIO/bin
$ ./crafter-cli add-environment -e local -u http://localhost:8080 --token
# Enter value for --token (The access token for authentication):
# Environment added
$ ./crafter-cli copy-plugin -e local -s YOUR_PROJECT --path PATH_FOR_PLUGIN_GIT/craftercms-plugin-docusign
OK
Where the token is a JWT token created with Token Management Tool.
- After the plugin is installed. Make sure you have the items located in the following paths:
/static-assets/plugins/org/craftercms/plugin/docusign/...
/templates/plugins/org/craftercms/plugin/docusign/...
/scripts/classes/plugins/org/craftercms/plugin/docusign/...
/scripts/controllers/plugins/org/craftercms/plugin/docusign/...
/scripts/rest/plugins/org/craftercms/plugin/docusign/..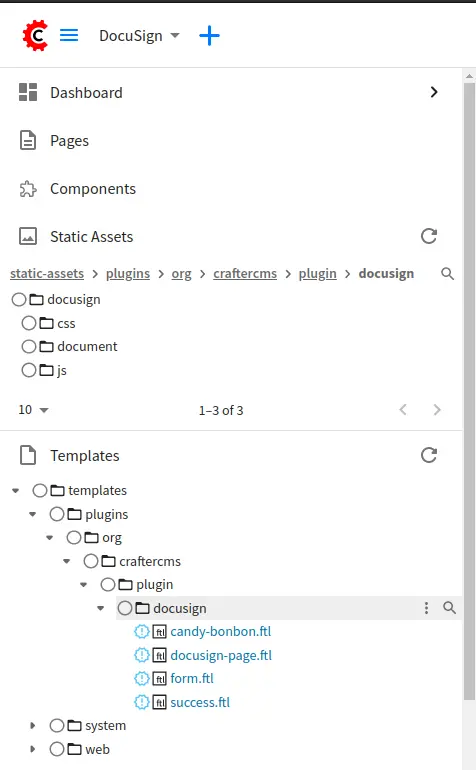

You can also find the following content types which are created by this plugin:
/component/plugins/org/craftercms/plugin/docusign/docusign-form
 /page/plugins/org/craftercms/plugin/docusign/docusign-page
- Update the Engine Project Configuration with your DocuSign credentials
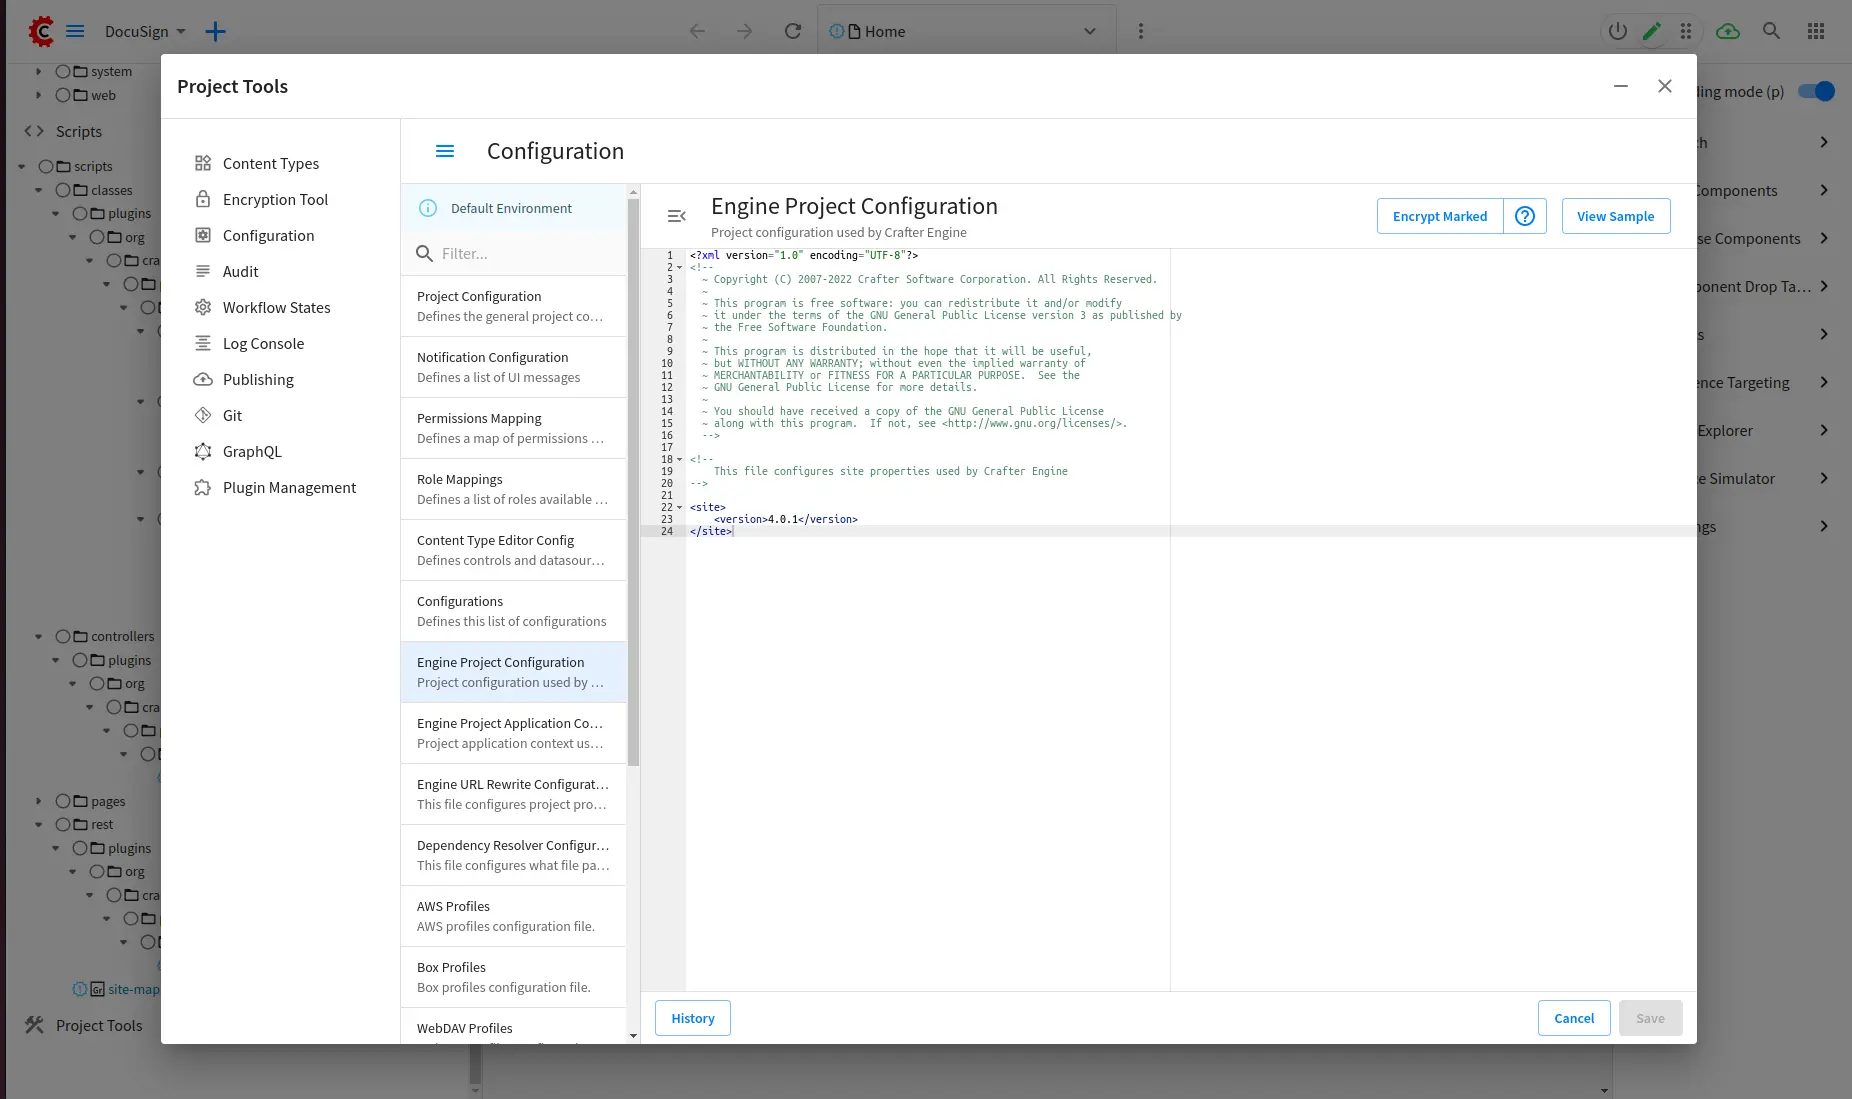
Input the following:
  4.0.1

      https://demo.docusign.net/restapi
      account-d.docusign.com
      ${enc:CCE-V1#heFjVbXwK...}
      ${enc:CCE-V1#2FO+0dhgP...}
      ${enc:CCE-V1#sYOpw...}
      signature, impersonation
      CC_EMAIL_ADDRESS
      CC_NAME
      sent
      ${enc:CCE-V1#tMoh1Qs...}
      ${enc:CCE-V1#mkt3jYPh...}
Where:
- basePath: DocuSign API base path
- authDomain: DocuSign authentication domain
- accountId: DocuSign Account ID
- userId: DocuSign User ID
- integrationKey: To integrate DocuSign with CrafterCMS, you need to create a DocuSign integration key. This key is used to authenticate your application with the DocuSign API.
- scopes: list of scrope to consent
- ccEmail: Email address of CC
- ccName: Name of CC
- status: Request that the envelope is sent by setting |status| to "sent". To request that the envelope be created as a draft, set to "created"
- publicKey: The public key of your DocuSign application
- privateKey: The private key of your DocuSign application
Values starting with ${enc:...} are encrypted text using CrafterCMS Encryption Tool
You can find the document from DocuSign on how to build a DocuSign integration here.
- Consent your DocuSign application
Our plugin uses the JSON Web Token (JWT) Grant flow. Before you can make any API calls using JWT Grant, you must get your user’s consent for your app to impersonate them.
Refer to How to get an access token with JWT Grant / Step 1. Request application consent for the detail. Here is a sample request to consent to your application:
https://account-d.docusign.com/oauth/auth?response_type=code&scope=impersonation%20signature%20&client_id=YOUR_INTEGRATION_KEY&redirect_uri=https://developers.docusign.com/platform/auth/consent
- Using the REST API
When everything is set, you can start using the plugin to request a signature by sending an email to the signer.
To use the REST API:
curl --location --request POST 'http://localhost:8080/api/plugins/org/craftercms/plugin/docusign/sign.json?crafterSite=YOUR_PROJECT_ID' \
--header 'Content-Type: application/json' \
--data-raw '{
   "signerEmail": "SIGNER_EMAIL_ADDRESS",
   "signerName": "SIGNER_NAME"
}'
An email is sent to the signer email with the document to sign:
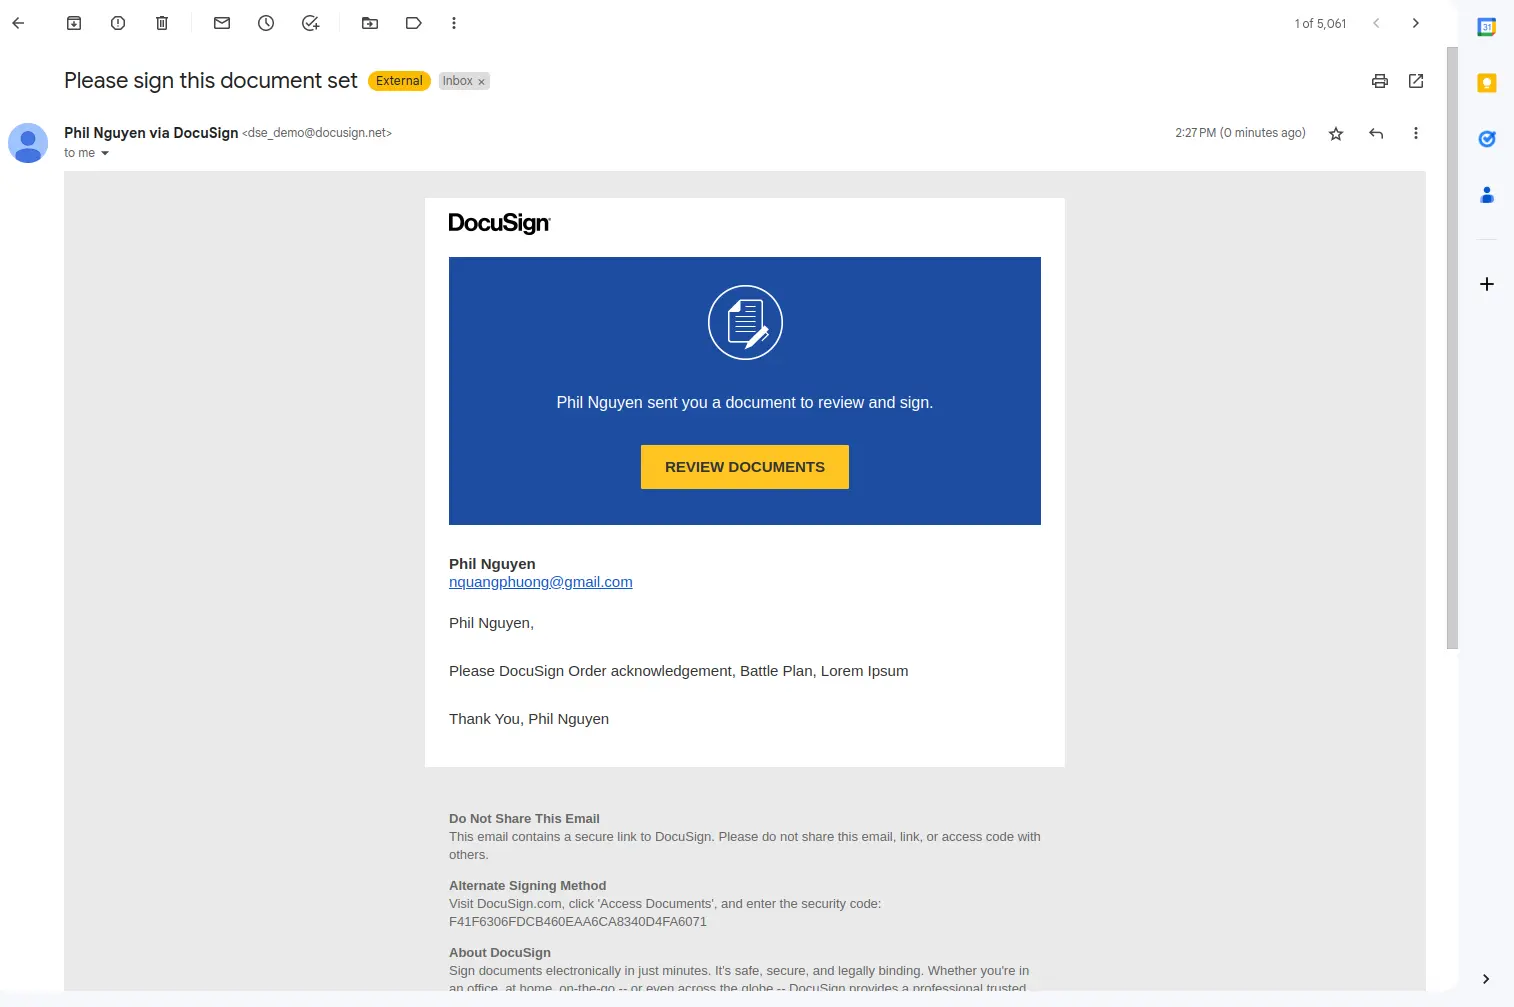
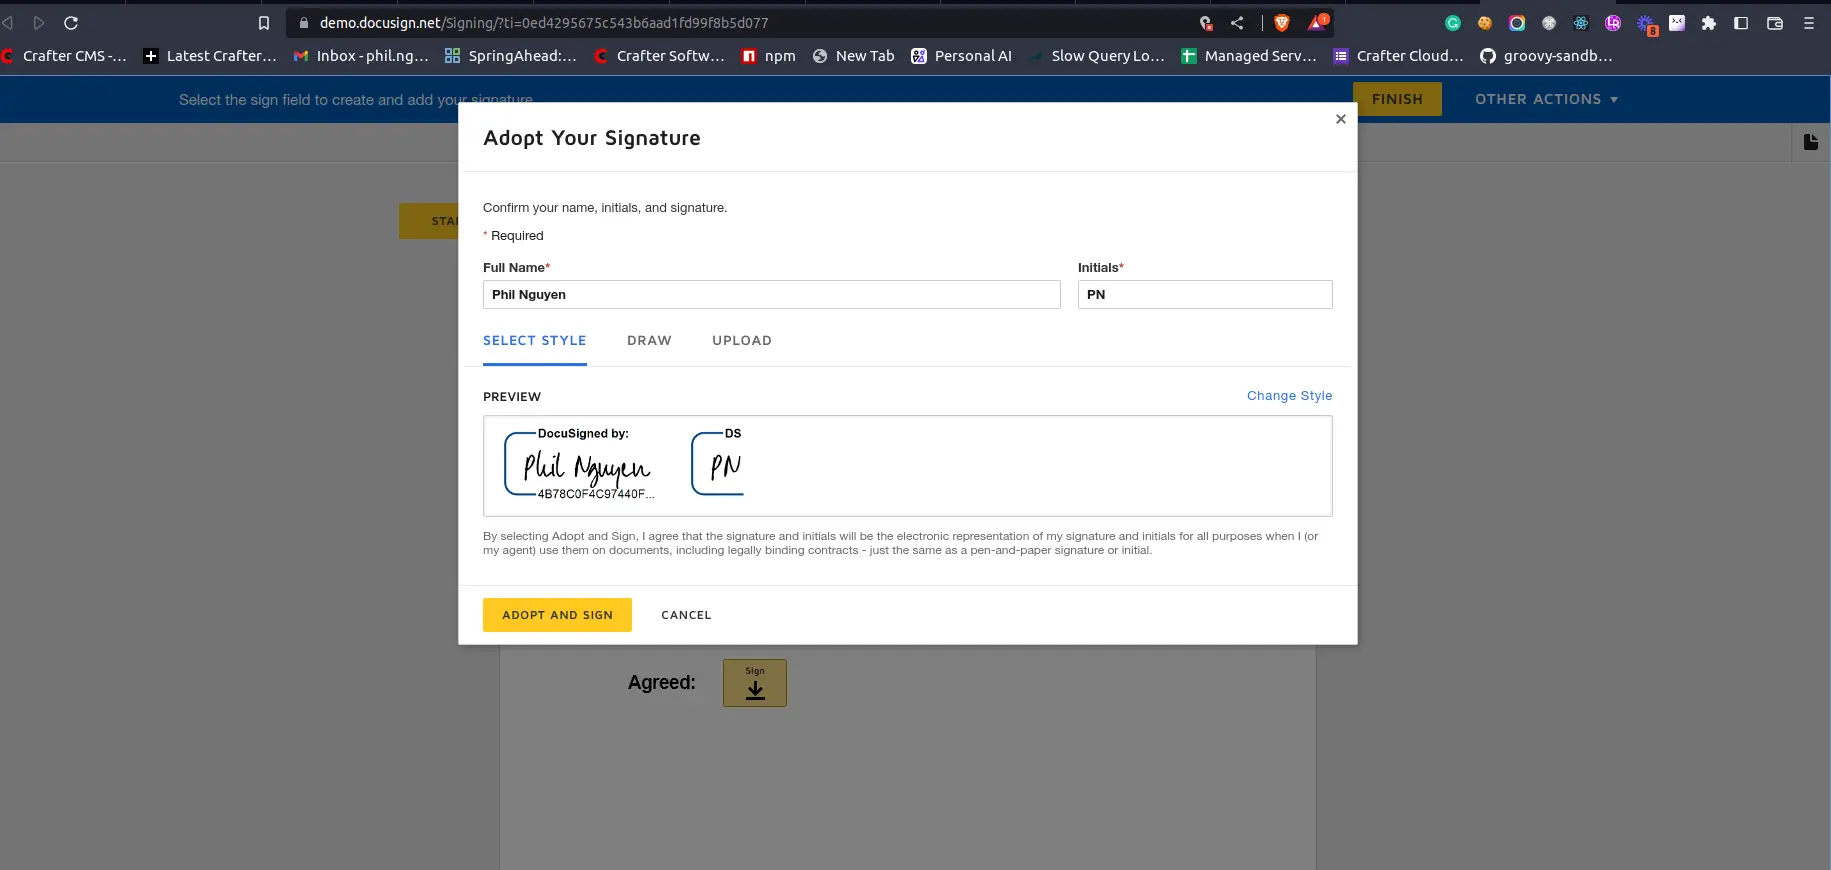
Open the document to sign:
By default, we have the document in the following paths:
/static-assets/plugins/org/craftercms/plugin/docusign/document/world_wide_corp_lorem.pdf
/static-assets/plugins/org/craftercms/plugin/docusign/document/world_wide_corp_battle_plan_trafalgar.docx
/templates/plugins/org/craftercms/plugin/docusign/candy-bonbon.ftl
It is configured in /scripts/classes/plugins/org/craftercms/plugin/docusign/services/SigningViaEmailService.groovy
private static final String HTML_DOCUMENT_FILE_NAME = "/templates/plugins/org/craftercms/plugin/docusign/candy-bonbon.ftl";
private static final String HTML_DOCUMENT_NAME = "Order acknowledgement";
private static final String PDF_DOCUMENT_FILE_NAME = "/static-assets/plugins/org/craftercms/plugin/docusign/document/world_wide_corp_lorem.pdf";
private static final String PDF_DOCUMENT_NAME = "Lorem Ipsum";
private static final String DOCX_DOCUMENT_FILE_NAME = "/static-assets/plugins/org/craftercms/plugin/docusign/document/world_wide_corp_battle_plan_trafalgar.docx";
private static final String DOCX_DOCUMENT_NAME = "Battle Plan";
private static final int ANCHOR_OFFSET_Y = 10;
private static final int ANCHOR_OFFSET_X = 20;
For this plugin, we will demonstrate sending a document for signature from a FreeMarker template, a PDF and a Microsoft Word document.
- Use an HTML form to send the same
Our plugin also has a built-in FreeMarker form with the same functionality as the REST API:
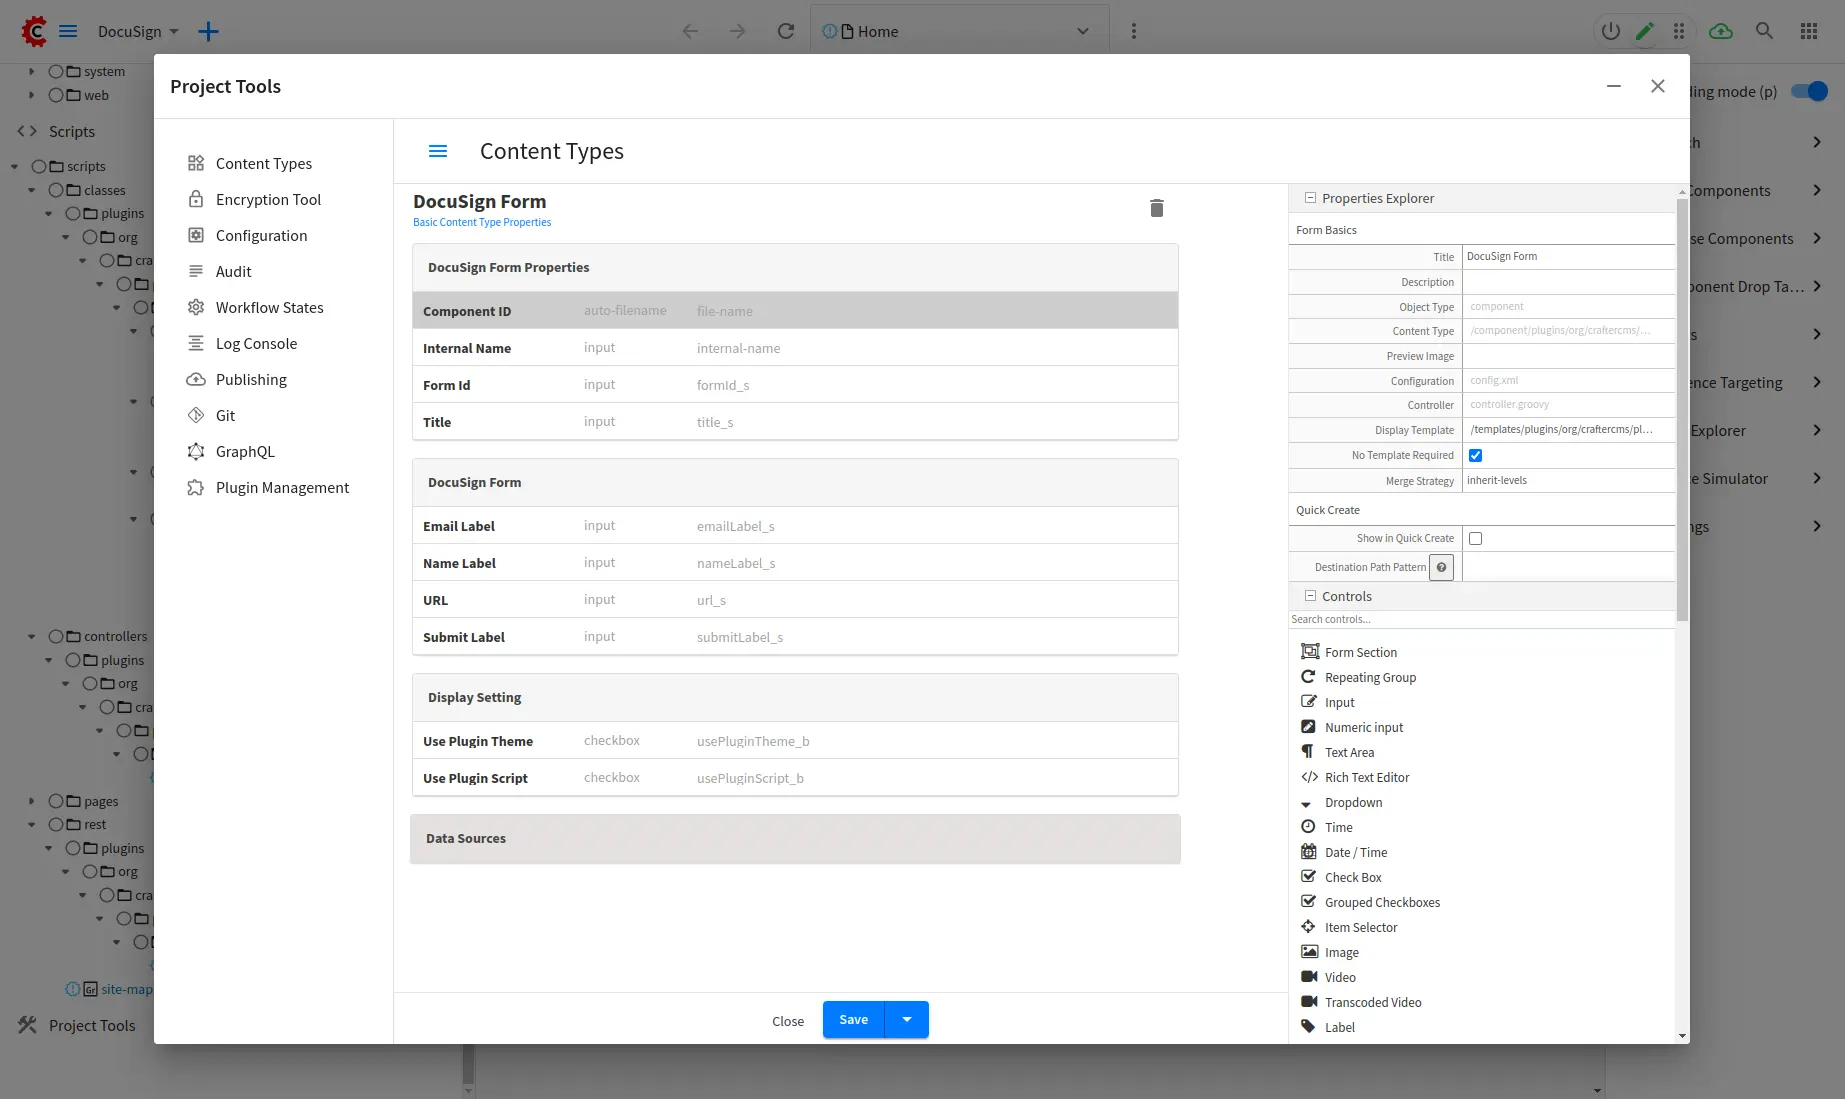
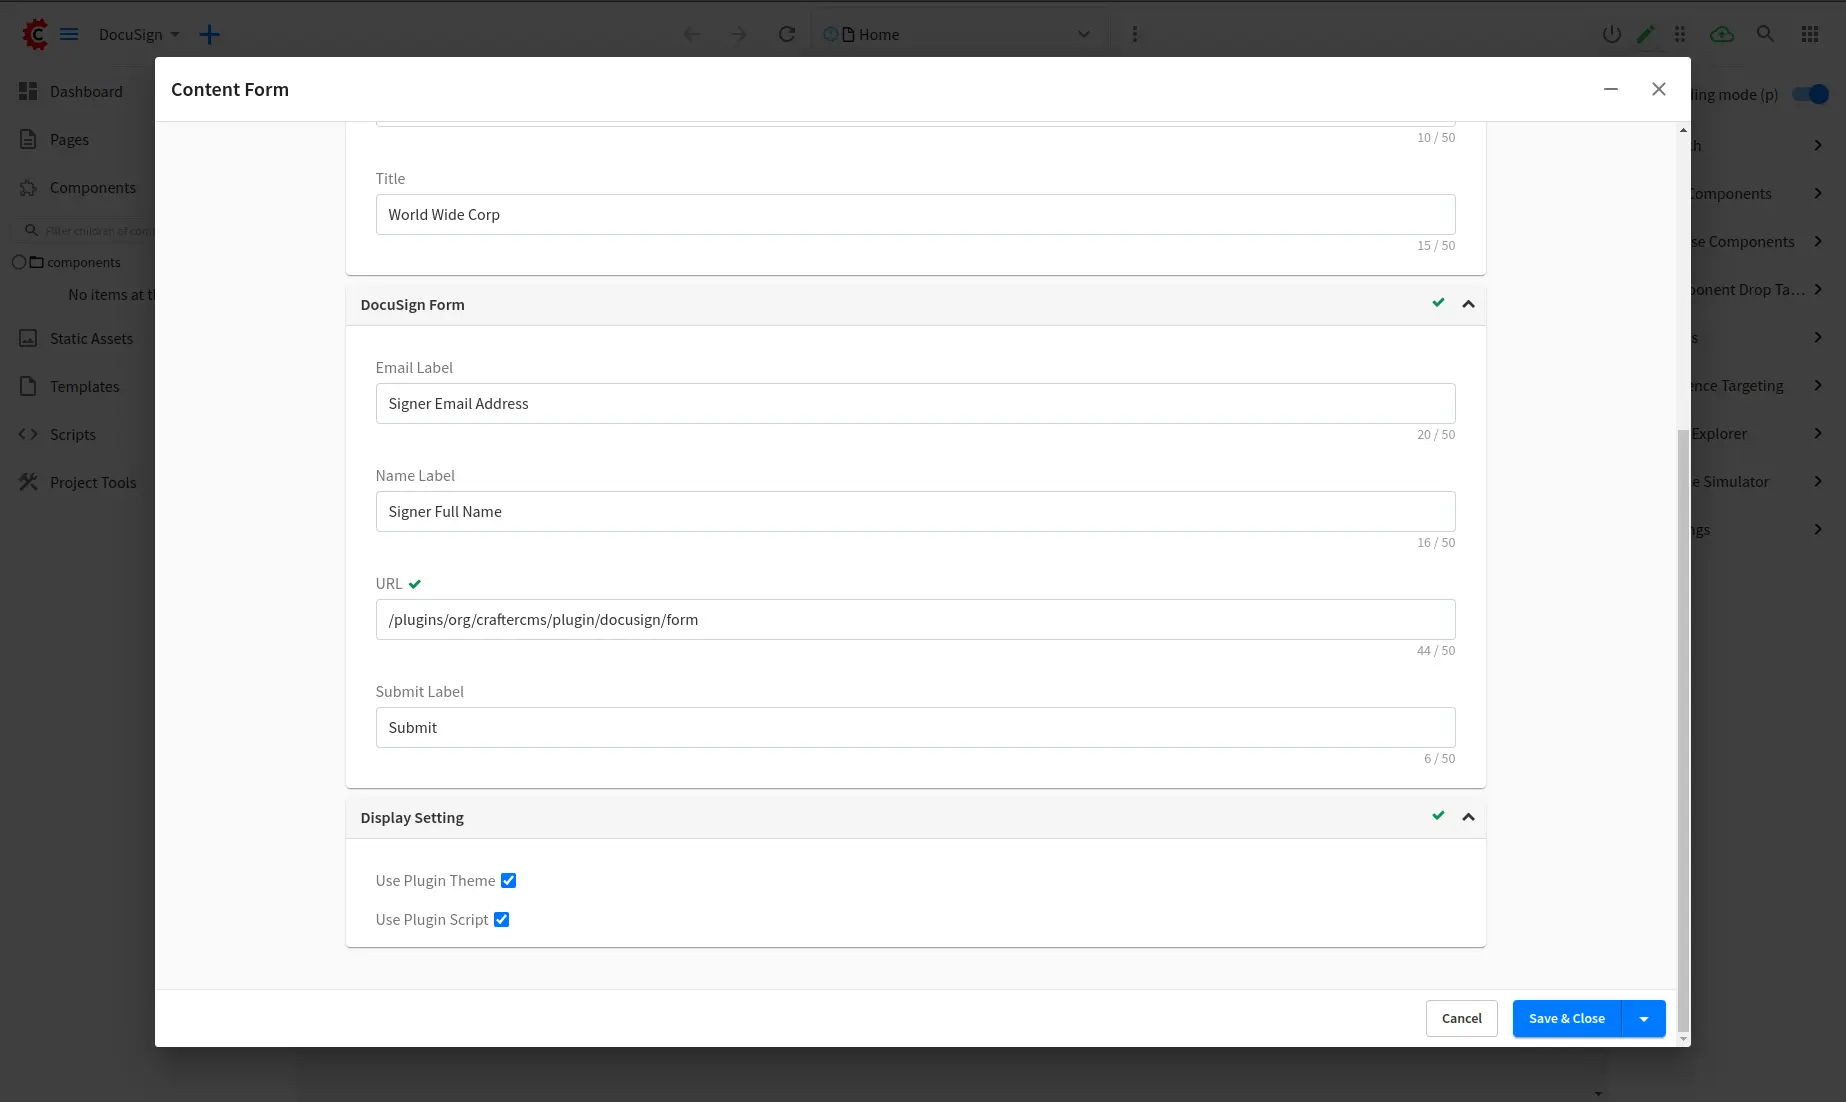
- Create a form with
/component/plugins/org/craftercms/plugin/docusign/docusign-formcontent type
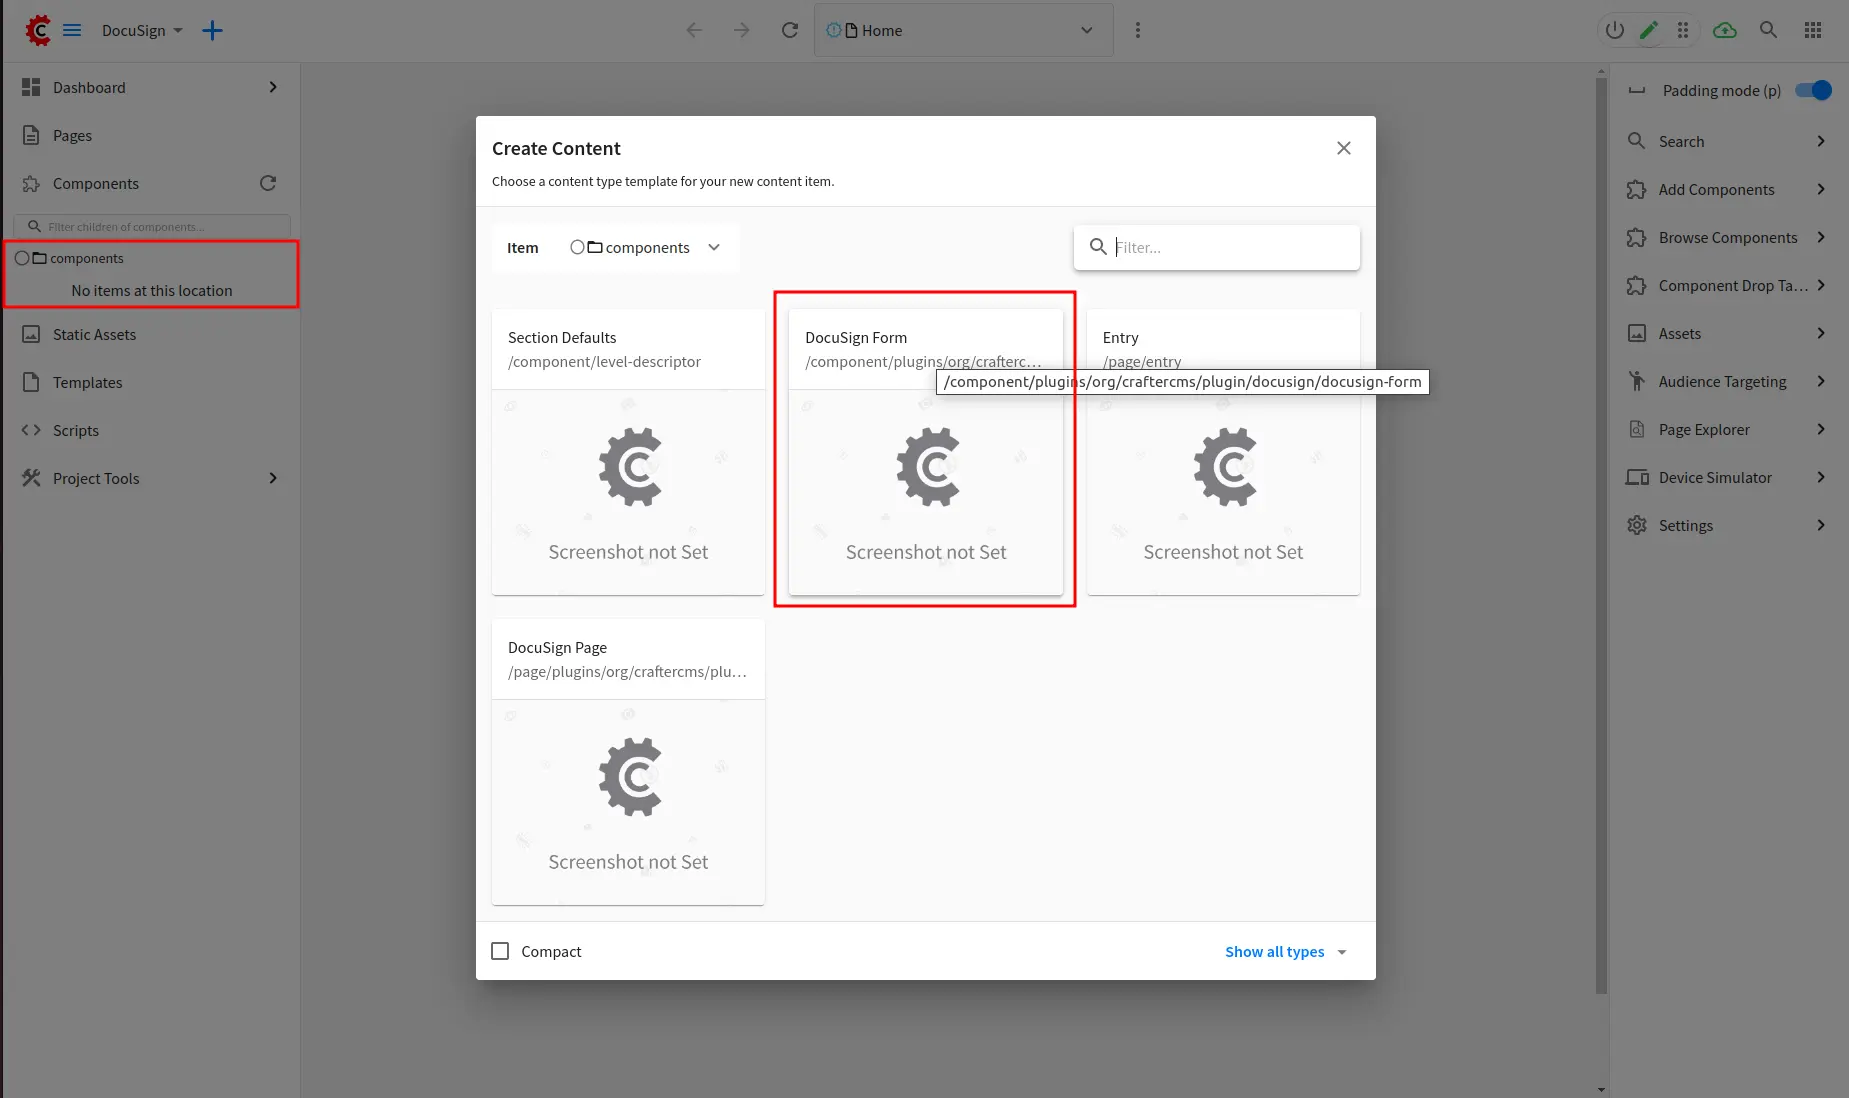
Input form component detail:
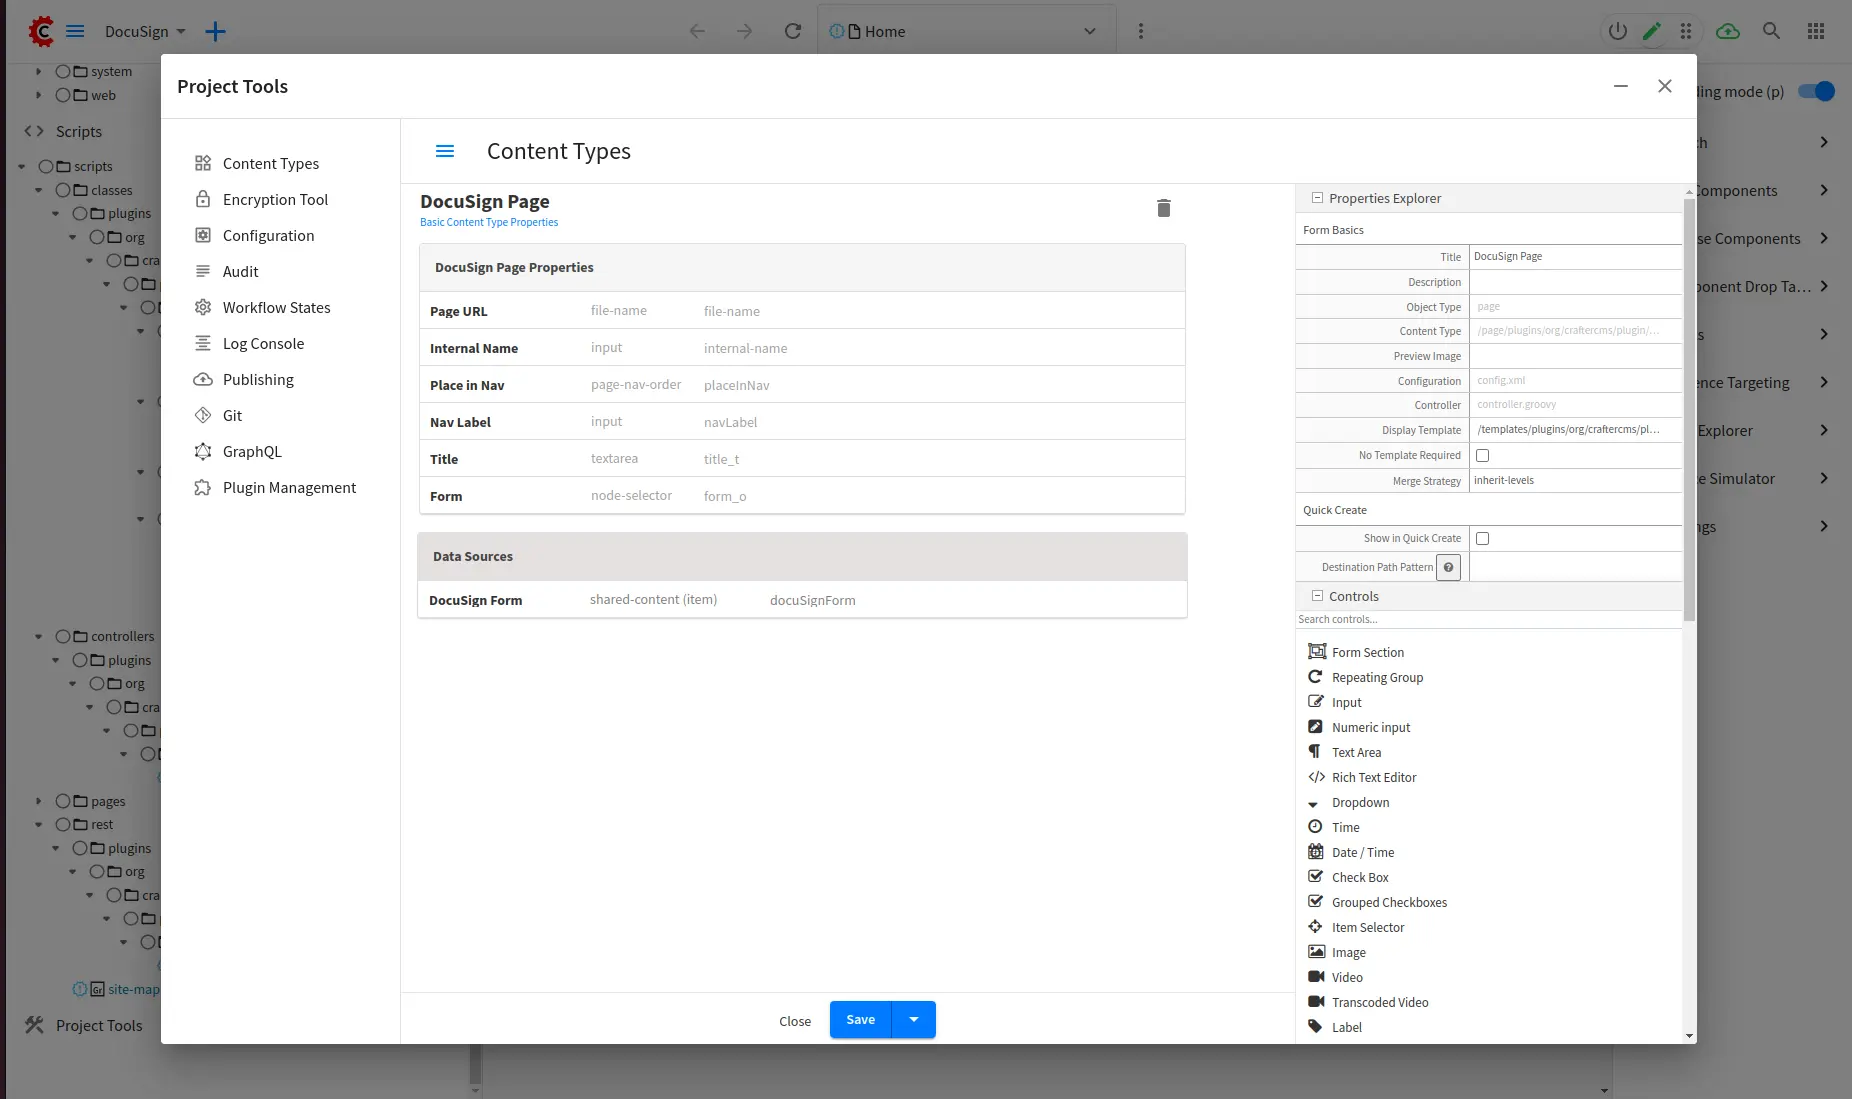
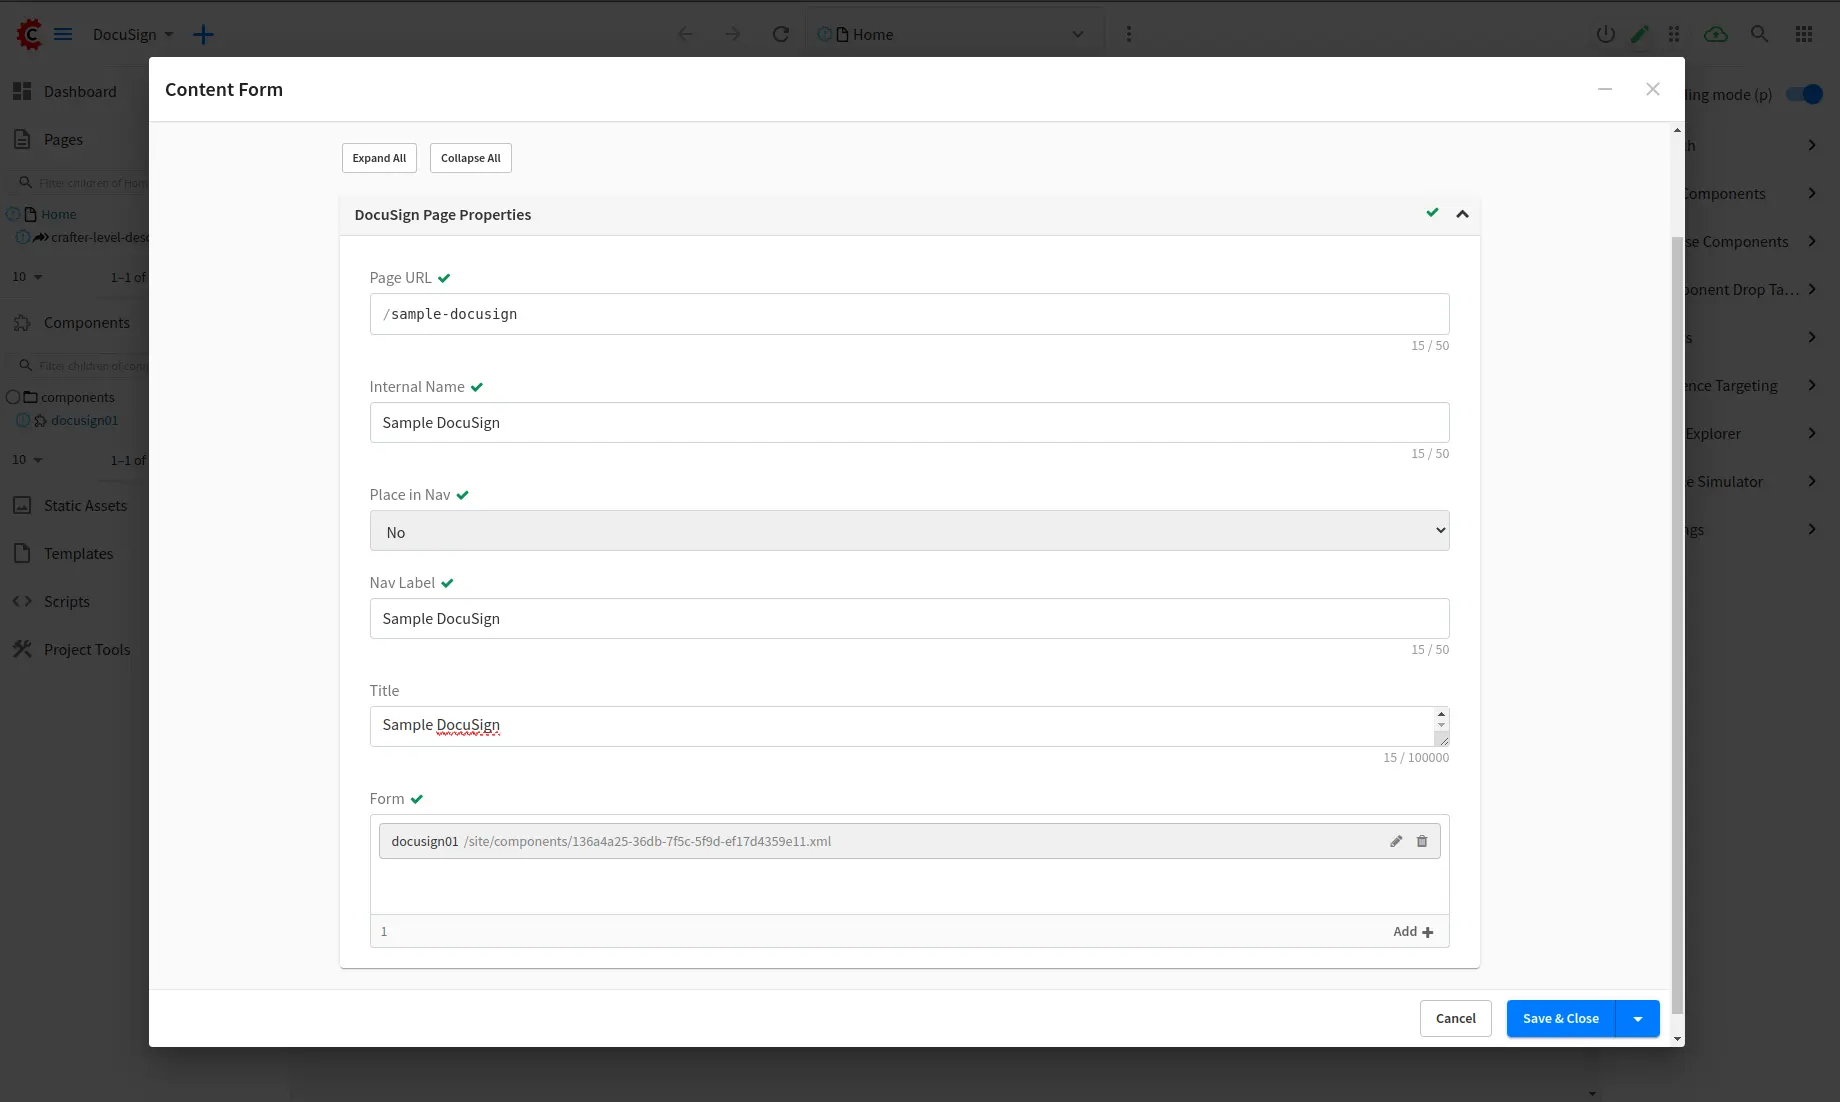
- Create a page with /page/plugins/org/craftercms/plugin/docusign/docusign-page content type to display the DocuSign form in the previous step:

Input page detail:
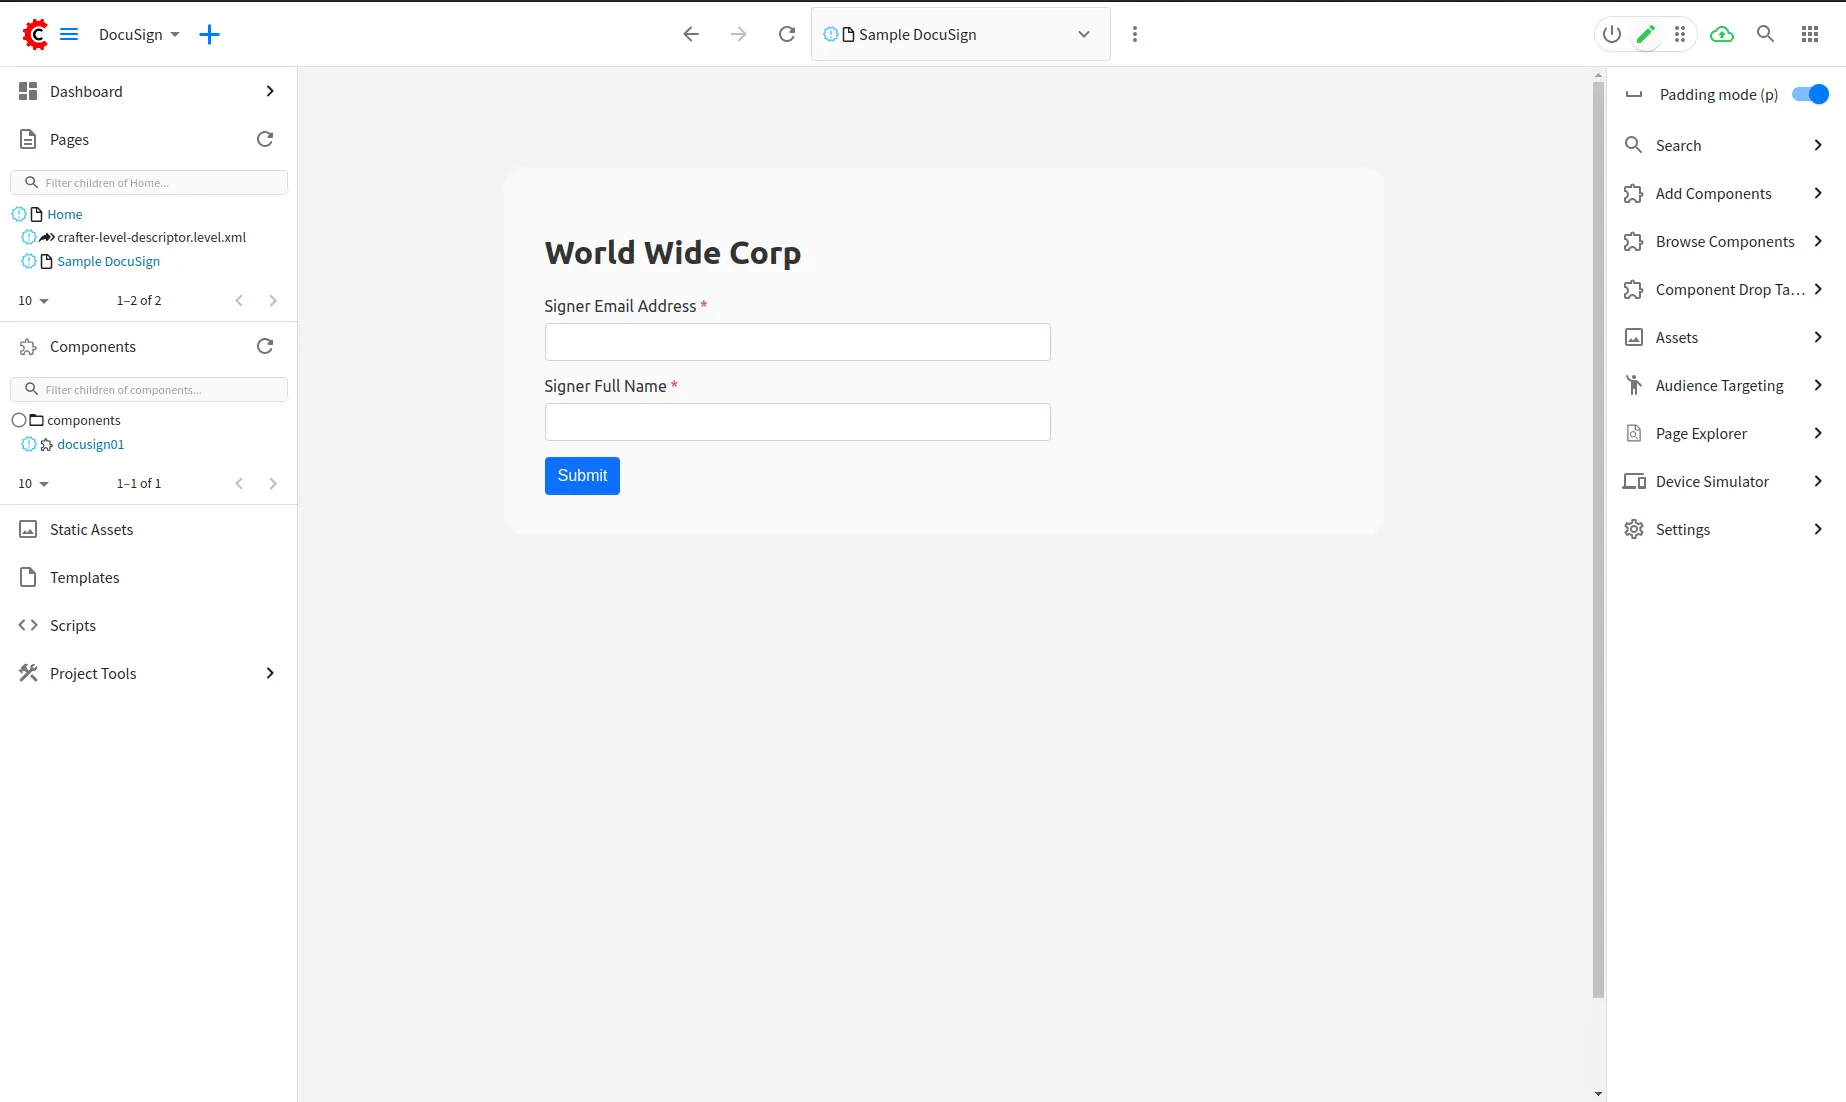
- Open the created page in preview mode and submit the signer's email address and signer name. You will get the same email sent to the signer similar to when using the REST API.
Inside the Plugin - How it works
In the previous section, we introduced our pre-built DocuSign plugin and how to integrate it with CrafterCMS.
Let’s dive into the detail of the plugin source code to understand more about its structure and how it is integrated with the DocuSign APIs.
DocuSign Core functionality
All DocuSign core functionality are built with Groovy script using the
Official DocuSign eSignature Java Client SDK.
You can find all the core functionality in the following location:
/scripts/classes/plugins/org/craftercms/plugin/docusign/... We use @Grab annotation to include docusign-esign-java-client library and its dependencies in our Groovy scripts:
Refer to DocuSign documentation on how to request a signature by email.
Rest API
@Grapes([
    @Grab(group = 'io.swagger', module = 'swagger-annotations', version = '1.5.18', initClass = false),
    @Grab(group = 'jakarta.ws.rs', module = 'jakarta.ws.rs-api', version = '2.1.6', initClass = false),
    @Grab(group = 'org.glassfish.jersey.media', module = 'jersey-media-multipart', version = '2.29.1', initClass = false),
    @Grab(group = 'org.glassfish.jersey.media', module = 'jersey-media-json-jackson', version = '2.29.1', initClass = false),
    @Grab(group = 'org.glassfish.jersey.core', module = 'jersey-client', version = '2.29.1', initClass = false),
    @Grab(group = 'org.glassfish.jersey.inject', module = 'jersey-hk2', version = '2.26', initClass = false),
    @Grab(group = 'com.fasterxml.jackson.core', module = 'jackson-core', version = '2.12.1', initClass = false),
    @Grab(group = 'com.fasterxml.jackson.core', module = 'jackson-databind', version = '2.12.1', initClass = false),
    @Grab(group = 'com.fasterxml.jackson.dataformat', module = 'jackson-dataformat-csv', version = '2.12.1', initClass = false),
    @Grab(group = 'com.fasterxml.jackson.datatype', module = 'jackson-datatype-jsr310', version = '2.12.1', initClass = false),
    @Grab(group = 'org.apache.oltu.oauth2', module = 'org.apache.oltu.oauth2.client', version = '1.0.2', initClass = false),
    @Grab(group = 'com.auth0', module = 'java-jwt', version = '3.4.1', initClass = false),
    @Grab(group = 'org.bouncycastle', module = 'bcprov-jdk15on', version = '1.69', initClass = false),
    @Grab(group = 'com.docusign', module = 'docusign-esign-java', version = '3.23.0', initClass = false)
])
// Class SigningViaEmailService is the main service to sign via email:
public final class SigningViaEmailService {

    // ...

    public static EnvelopeDefinition makeEnvelope(
        SiteItemService siteItemService,
        String signerEmail,
        String signerName,
        String ccEmail,
        String ccName,
        String status,
        WorkArguments args
    ) throws IOException {
        // ...
    }

}
/scripts/rest/plugins/org/craftercms/plugin/docusign/sign.post.groovy
The Rest API is a Groovy script to build a POST method in which the request has a signerEmail and signerName parameter.
def signerEmail = params.signerEmail
def signerName = params.signerName

// We use the `siteConfig` Groovy API variable to read DocuSign credentials from site-config.xml:

String basePath = siteConfig.getString('docusign.basePath')
String privateKey = siteConfig.getString('docusign.privateKey')
String integrationKey = siteConfig.getString('docusign.integrationKey')
String userId = siteConfig.getString('docusign.userId')

List scopes = siteConfig.getList(String.class, 'docusign.scopes')

// ...
To call eSignature API, we first need to get an access token:
String accessToken = ApiClientHelpers.getOneTimeAccessToken(basePath, privateKey, integrationKey, userId, scopes)
Refer to the documentation on how to get an access token with JWT Grant.
Create an EnvelopApi instance:
EnvelopesApi envelopesApi = ApiClientHelpers.createEnvelopesApi(basePath, accessToken)Make envelop and sign via email:
EnvelopeDefinition envelope = SigningViaEmailService.makeEnvelope(
    siteItemService, // CrafterCMS SiteItemService instance
    args.getSignerEmail(),
    args.getSignerName(),
    args.getCcEmail(),
    args.getCcName(),
    args.getStatus(),
    args
)

// ...

EnvelopeSummary envelopeSummary = SigningViaEmailService.signingViaEmail(
    envelopesApi,
    accountId,
    envelope
);
FreeMarker Template
FreeMarker form works similarly to the REST API. When submitting the form, a Groovy controller is used to process the form:
// /scripts/controllers/plugins/org/craftercms/plugin/docusign/form.post.groovy

import plugins.org.craftercms.plugin.docusign.form.DefaultFormHandler

logger.info("New contact form submission")

def formId = params.formId
def handler = applicationContext."${formId}FormHandler"

if (!handler) {
  logger.info("No form handler found for form $formId")
  handler = new DefaultFormHandler()
}

return handler.handle(params, request, siteConfig, siteItemService)
The default handler processes the same as the REST API, sending a signing email, and then returning a successful page:
// /scripts/classes/plugins/org/craftercms/plugin/docusign/form/DefaultFormHandler.groovy

def handle(params, request, siteConfig, siteItemService) {
  // Similar to REST API...
  return "/templates/plugins/org/craftercms/plugin/docusign/success.ftl"
}
When we create a new DocuSign form component, the following FreeMarker template is used to render the form with the default controller (contentModel.url_s):
/templates/plugins/org/craftercms/plugin/docusign/form.ftl
<#if contentModel.usePluginTheme_b?? && contentModel.usePluginTheme_b>
  <link rel="stylesheet" href="/static-assets/plugins/org/craftercms/plugin/docusign/css/docusign-form.css" />
</#if>

<#assign validateForm = contentModel.usePluginScript_b?? && contentModel.usePluginScript_b />

<form
  id="${contentModel.formId_s}"
  action="${contentModel.url_s}"
  method="post"
  class="contact-form <#if validateForm>needs-validation</#if>"
  <#if validateForm>novalidate</#if>
>

  <#if contentModel.title_s??>
    <div class="form-section">
      <h2 class="form-title">${contentModel.title_s}</h2>
    </div>
  </#if>

  <div class="form-section">
    <label for="${contentModel.formId_s}-email" class="form-label">
        ${contentModel.emailLabel_s}
        <#if validateForm>
          <span class="form-field-required-indicator" />
        </#if>
    </label>
    <input id="${contentModel.formId_s}-email" name="email" class="form-control" required />
  </div>

  <div class="form-section">
    <label for="${contentModel.formId_s}-name" class="form-label">
      ${contentModel.nameLabel_s}
      <#if validateForm>
        <span class="form-field-required-indicator" />
      </#if>
    </label>
    <input id="${contentModel.formId_s}-name" name="name" class="form-control" required />
  </div>

  <input type="hidden" name="formId" value="${contentModel.formId_s}" />
  <input type="submit" class="submit-btn" value="${contentModel.submitLabel_s}" />

</form>

<#if validateForm>
  <script src="/static-assets/plugins/org/craftercms/plugin/docusign/js/validate-form.js"></script>
</#if>
That’s it for the plugin!
Conclusion
In this tutorial, we demonstrated how you can easily integrate DocuSign with CrafterCMS, and how you can build sites and apps with end-user functionality for signing documents directly. This integration saves time and streamlines the document signing process, and is especially useful for applications such as customer portals, partner portals, employee onboarding experiences, and more. Moreover, this pattern can be extended easily to meet applications that require more sophisticated workflows.
We also introduced CrafterCMS plugins. A CrafterCMS plugin is an add-on that extends the functionality of the content management system. In this case, the plugin is for integrating DocuSign with CrafterCMS, allowing users to manage and sign their documents directly from sites and apps powered by the headless CMS. The plugin includes the necessary API calls and methods for authentication and authorization, as well as a custom UI that integrates with the CrafterCMS interface.
Have questions about CrafterCMS? Join our Slack channel today.